Part1
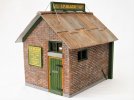
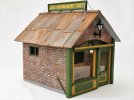
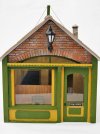
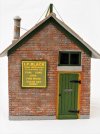
Coal Office for I.P.Black, Coal Merchant, Gernise End
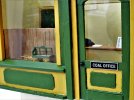
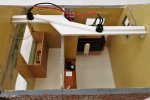
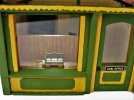
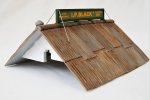
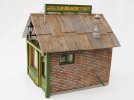
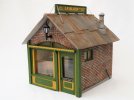
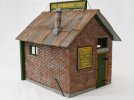
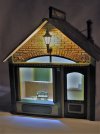
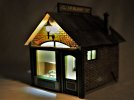
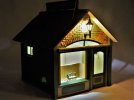
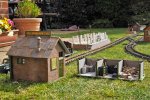
This is one of the four buildings that Father Christmas delivered Christmas 2020. This building, together with the scratch built coal staithes and storage bins and the modified 1941 Plymouth delivery truck, complete the coal yard installations of I.P.Black, Coal Merchant of Gernise End Station.
The building kit is from the British Outline Buildings range as supplied by Garden Railway Specialists (GRS) of Princess Risborough. I must admit that on opening the box my initial impressions were disappointing. The casting material was quite brittle and there was a lot of flash. I did find, however, that the flash was easily cleaned off with files and abrasive paper and once this was done my opinion of the model significantly changed. There is a wealth of detail, some of it very fine, incorporated into the moulded parts. The kit has the merit that with much of the detail moulded in, there are not many parts to assemble.
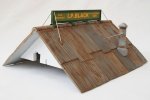
The basic building comprises the four walls, a roof, and chimney. I suspect these are modular, with the same mouldings for the side and rear walls being used on other buildings. Also included is a vacuum formed moulding of three lengths of channel, two channels are intended to be used as guttering, the third being used to form the roof ridge. There is also a length of plastic tube that can be cut to length to use as the downpipes. The roof on this building represents corrugated tin sheets. The instructions state that buildings with tin roofs do not require bargeboards or guttering, so two of the channels and the round tube are surplus to requirement. There is a length of square plastic rod that I have used to add additional window framing.
The strangest item included in the kit is a length of wall that appears to have no use or function. It is the same height as the building but is modelled as being a severely broken and derelict wall. It is very well moulded, as is, but gives the appearance that the slightest puff of wind would bring it crashing down. I cannot believe that such a wall would be left standing, it would immediately be knocked down on safety grounds. As it is only moulded on one side, it is difficult to see where such an item could be used on a layout. It has been consigned to the spares bin. I have also not used the ‘Coal Office’ cast signs as I shall make my own for I.P.Black. Being a coal office, the kit did contain three very well moulded and cast sacks of coal.
Using, as I suspect, modular walls, common to other buildings, the front edifice of the office is actually wider than the rear wall. This is not as strange as it sounds, but it did present one issue, which the builder is warned about it the instruction sheet, that the leading edge of the left hand wall fits very snugly (far too snugly) up to the left hand side of the shop window. This means that there is little or no lip for the edge of the window glazing. To get around this problem, for the sake of symmetry, I glued a length of 4.8mm square plastic tube down each side of the window frame. This does reduce the width of the window slightly, but it does provide the essential lip to hold and hide the edge of the glazing material.
As with the other cast resin buildings I have already assembled, the walls were glued together with Gorilla superglue. Unibond Repair Metal was worked into the brick joints and scribed and a fillet of the same material was run down the inside corners to strengthen them.
The bare shell of the building, the four walls with added window framing from plastic strip.
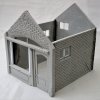
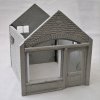
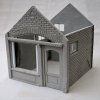
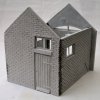
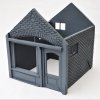
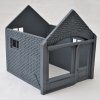
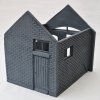
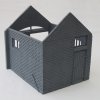
The shell of the building with a coat of spray plastic primer. It is my intention to paint the brickwork and to add some interior features before I put the roof on.
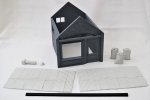
The shell with the other component parts that I shall use.
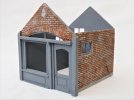
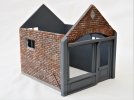
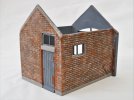
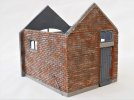
The first painting job was to tackle the brickwork. The method that I used was to treat the overall spray grey plastic primer as the mortar colour. The raised texture of the bricks was painted by means of a sponge wiped across the surface of the bricks using different colours and gently dabbing and blending. The odd bit of detail colour was applied with a paintbrush. I bought some white sponge wedges used for applying and blending makeup, £6 for forty from Amazon. I cut a wedge in half as half a wedge was big enough. Having painted the brickwork, I then painted the cement render around the window frames, the concrete lintel over the rear door and the concrete base.
David
Coal Office for I.P.Black, Coal Merchant, Gernise End
This is one of the four buildings that Father Christmas delivered Christmas 2020. This building, together with the scratch built coal staithes and storage bins and the modified 1941 Plymouth delivery truck, complete the coal yard installations of I.P.Black, Coal Merchant of Gernise End Station.
The building kit is from the British Outline Buildings range as supplied by Garden Railway Specialists (GRS) of Princess Risborough. I must admit that on opening the box my initial impressions were disappointing. The casting material was quite brittle and there was a lot of flash. I did find, however, that the flash was easily cleaned off with files and abrasive paper and once this was done my opinion of the model significantly changed. There is a wealth of detail, some of it very fine, incorporated into the moulded parts. The kit has the merit that with much of the detail moulded in, there are not many parts to assemble.
The basic building comprises the four walls, a roof, and chimney. I suspect these are modular, with the same mouldings for the side and rear walls being used on other buildings. Also included is a vacuum formed moulding of three lengths of channel, two channels are intended to be used as guttering, the third being used to form the roof ridge. There is also a length of plastic tube that can be cut to length to use as the downpipes. The roof on this building represents corrugated tin sheets. The instructions state that buildings with tin roofs do not require bargeboards or guttering, so two of the channels and the round tube are surplus to requirement. There is a length of square plastic rod that I have used to add additional window framing.
The strangest item included in the kit is a length of wall that appears to have no use or function. It is the same height as the building but is modelled as being a severely broken and derelict wall. It is very well moulded, as is, but gives the appearance that the slightest puff of wind would bring it crashing down. I cannot believe that such a wall would be left standing, it would immediately be knocked down on safety grounds. As it is only moulded on one side, it is difficult to see where such an item could be used on a layout. It has been consigned to the spares bin. I have also not used the ‘Coal Office’ cast signs as I shall make my own for I.P.Black. Being a coal office, the kit did contain three very well moulded and cast sacks of coal.
Using, as I suspect, modular walls, common to other buildings, the front edifice of the office is actually wider than the rear wall. This is not as strange as it sounds, but it did present one issue, which the builder is warned about it the instruction sheet, that the leading edge of the left hand wall fits very snugly (far too snugly) up to the left hand side of the shop window. This means that there is little or no lip for the edge of the window glazing. To get around this problem, for the sake of symmetry, I glued a length of 4.8mm square plastic tube down each side of the window frame. This does reduce the width of the window slightly, but it does provide the essential lip to hold and hide the edge of the glazing material.
As with the other cast resin buildings I have already assembled, the walls were glued together with Gorilla superglue. Unibond Repair Metal was worked into the brick joints and scribed and a fillet of the same material was run down the inside corners to strengthen them.
The bare shell of the building, the four walls with added window framing from plastic strip.


The shell of the building with a coat of spray plastic primer. It is my intention to paint the brickwork and to add some interior features before I put the roof on.


The shell with the other component parts that I shall use.

The first painting job was to tackle the brickwork. The method that I used was to treat the overall spray grey plastic primer as the mortar colour. The raised texture of the bricks was painted by means of a sponge wiped across the surface of the bricks using different colours and gently dabbing and blending. The odd bit of detail colour was applied with a paintbrush. I bought some white sponge wedges used for applying and blending makeup, £6 for forty from Amazon. I cut a wedge in half as half a wedge was big enough. Having painted the brickwork, I then painted the cement render around the window frames, the concrete lintel over the rear door and the concrete base.


David
-
1
-
1
- Show all


