Djjerme
Registered
A preface that this did start out as a basic repaint, but I found myself going way further then it was probably worth, and in the end, probably would have been just better off designing and building a car from scratch.
With that out of the way, and just because I do like revealing the ending first (and I already posted the results in another thread), this thread I'll show all the trials and many, many errors of going from this:
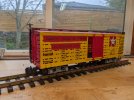
To This:
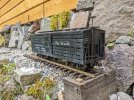
Let's Begin!
To start off with, I picked up this very sad Bachmann Emmet Kelly Circus Train set from someone on OfferUp for fairly cheap. It was in pretty sad shape, and virtually everything was broken in it. But hey, I like kit bashing things and making things live again, and the price was right, so why not..
As my first real large scale project, I thought, well I can do a simple repaint on all the cars, fix and few small things and have a decent little first train for my layout I have yet to build. The stock car became my first victim, I mean patient errr, project. Because who doesn't like animals crammed in a small wood box?
Step 1 (Disassembly):
Lets disassemble this thing and see how much it can come apart. Most parts came off without breaking and it actually wasn't in too bad of shape:
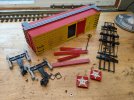
I'm sure most US modelers know what a Bachmann car looks like taken down to components, but for those that don't, this is pretty much what they consist off. The grab irons, walkways, doors and floors do come off as well, I just hadn't taken it that far for this photo. The things that bothered me most (and there was more the deeper I got) was the walkways with the short extensions off the main walkway. I couldn't find a prototype example that had these since most had grab irons on the roof. It was also about this time, I decided I was going to make it "resemble" a DRGW rebuilt stockcar, so the ends and doors would need some major revisions. And with that in mind, lets get to cuttin'..
Step 2 (Those Ends):
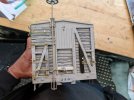
Here is the "as delivered" end of the Bachmann stockcar.
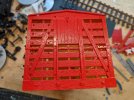
It's close, but needs some surgery to get it to resemble a prototype. And it's also the same at both ends - which is so wrong. And so I grabbed my trusty rotary tool and started cutting out the horizontal boards and the access panel on one end. This does require some careful attention so you don't take off the bits you want to keep:
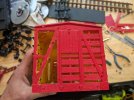
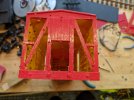
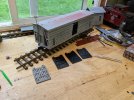
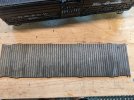
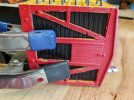
So now it's time to warm up the FDM 3D printer, and print off a couple panels to sit behind those ends. As with anything 3D printed, orientation is important, and on an FDM, even with a .2 nozzle, you'll still get layer lines. So I figured I could use them somewhat to my advantage and laid the panel at about 30 degrees off the build plate:
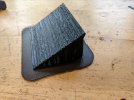
This only required a little clean up and I was then able to epoxy these panels behind the existing uprights:
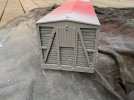
After which, I got over anxious and shot the ends with Primer:
It was about this time, I realized I was going to need to sand down that primer to add the end number boards. Again, printing on the FDM a matching smaller panel and then epoxied to upper left corners.
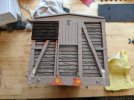
As you can see, I also started filling in the old grab iron holes and removing the inside NBW's on the sill (more on that later).
Step 3 (Sides):
The sides.
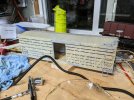
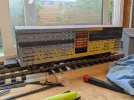
The most noticeable thing about the DRGW cars is those boards laid over the outside bracing that usually had the logo, and numbers stenciled on. So again with the 3D printer... Printed out two different sized boards to epoxy over the outside bracing. Now these, unlike the ends I printed flat on the build plate because I would add not nearly as deep of a wood grain, resorting to just course sandpaper and the razor saw method.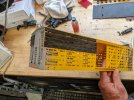
Again, I got antsy and did a little primer on the first few:
Step 4 (Low Rider):
I knew that I was going to get away from bogie mounted couplers, and I'll probably regret that choice some day, but for now, since the car is just going to sit on a shelf, I decided I was going to body mount some Kadee's. There is some 3D models on the various sits to convert Bachman cars to Kadee, and keep them at stock height, but they look weird to me because they require offset couplers. So in order to be a bit more closer to realistic, I decided I was going to lower the body on the trucks. How to do that though?
First plan was sanding the lower frame down so the floor (and hence the main structure) sat lower on it. I hit the frame with a belt sander and took off as much as I felt comfortable on the frame:
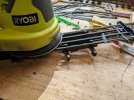
There's actually a lot of material that can be safely removed and it makes a big difference when completed.
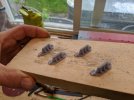
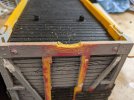
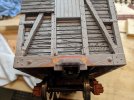
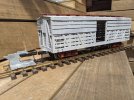
With the body lowered, that does mean the couplers will now intrude on the sills on the end (just like the prototype) and thus will require coupler pocket bolsters/plates/whatever you call them. So then back to the 3D printer, but this time, I designed my own to fit over a Kadee box and match the DRGW stock car ones (that are different from the flatcar/boxcar ones). I also had to notch the sills and then epoxy the new plates on the end, this took A LOT of test fitting and filing because I also had to design a mount more the short box Kadee coupler.
Step 5 (Brake Wheel):
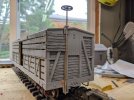
the Bachmann brake wheel isn't bad, but since I went this far, I decided to design up something new with brass. I did reuse the actual wheel and just sanded it a little flatter on both top and bottom to somewhat match the prototype look, but the rest of the stand had to go. So back to design and the resin printer...
With new upper and lower brackets, I got everything printed and mounted on the A end:
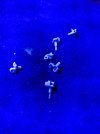
It wasn't long after going through the trouble of this, that I also decided the Bachmann grabirons looked like garbage. So a quick order from Phil's narrow gauge, and again with Tinkercad and the resin printer, I had new grabs and brake lift levers:
...I hit the limit on PIX, so to be continued.
With that out of the way, and just because I do like revealing the ending first (and I already posted the results in another thread), this thread I'll show all the trials and many, many errors of going from this:

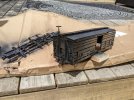
To This:

Let's Begin!
To start off with, I picked up this very sad Bachmann Emmet Kelly Circus Train set from someone on OfferUp for fairly cheap. It was in pretty sad shape, and virtually everything was broken in it. But hey, I like kit bashing things and making things live again, and the price was right, so why not..
As my first real large scale project, I thought, well I can do a simple repaint on all the cars, fix and few small things and have a decent little first train for my layout I have yet to build. The stock car became my first victim, I mean patient errr, project. Because who doesn't like animals crammed in a small wood box?
Step 1 (Disassembly):
Lets disassemble this thing and see how much it can come apart. Most parts came off without breaking and it actually wasn't in too bad of shape:

I'm sure most US modelers know what a Bachmann car looks like taken down to components, but for those that don't, this is pretty much what they consist off. The grab irons, walkways, doors and floors do come off as well, I just hadn't taken it that far for this photo. The things that bothered me most (and there was more the deeper I got) was the walkways with the short extensions off the main walkway. I couldn't find a prototype example that had these since most had grab irons on the roof. It was also about this time, I decided I was going to make it "resemble" a DRGW rebuilt stockcar, so the ends and doors would need some major revisions. And with that in mind, lets get to cuttin'..
Step 2 (Those Ends):
Here is the "as delivered" end of the Bachmann stockcar.

It's close, but needs some surgery to get it to resemble a prototype. And it's also the same at both ends - which is so wrong. And so I grabbed my trusty rotary tool and started cutting out the horizontal boards and the access panel on one end. This does require some careful attention so you don't take off the bits you want to keep:


So now it's time to warm up the FDM 3D printer, and print off a couple panels to sit behind those ends. As with anything 3D printed, orientation is important, and on an FDM, even with a .2 nozzle, you'll still get layer lines. So I figured I could use them somewhat to my advantage and laid the panel at about 30 degrees off the build plate:

This only required a little clean up and I was then able to epoxy these panels behind the existing uprights:

After which, I got over anxious and shot the ends with Primer:

It was about this time, I realized I was going to need to sand down that primer to add the end number boards. Again, printing on the FDM a matching smaller panel and then epoxied to upper left corners.

As you can see, I also started filling in the old grab iron holes and removing the inside NBW's on the sill (more on that later).
Step 3 (Sides):
The sides.
The most noticeable thing about the DRGW cars is those boards laid over the outside bracing that usually had the logo, and numbers stenciled on. So again with the 3D printer... Printed out two different sized boards to epoxy over the outside bracing. Now these, unlike the ends I printed flat on the build plate because I would add not nearly as deep of a wood grain, resorting to just course sandpaper and the razor saw method.

Again, I got antsy and did a little primer on the first few:

Step 4 (Low Rider):
I knew that I was going to get away from bogie mounted couplers, and I'll probably regret that choice some day, but for now, since the car is just going to sit on a shelf, I decided I was going to body mount some Kadee's. There is some 3D models on the various sits to convert Bachman cars to Kadee, and keep them at stock height, but they look weird to me because they require offset couplers. So in order to be a bit more closer to realistic, I decided I was going to lower the body on the trucks. How to do that though?
First plan was sanding the lower frame down so the floor (and hence the main structure) sat lower on it. I hit the frame with a belt sander and took off as much as I felt comfortable on the frame:

There's actually a lot of material that can be safely removed and it makes a big difference when completed.
With the body lowered, that does mean the couplers will now intrude on the sills on the end (just like the prototype) and thus will require coupler pocket bolsters/plates/whatever you call them. So then back to the 3D printer, but this time, I designed my own to fit over a Kadee box and match the DRGW stock car ones (that are different from the flatcar/boxcar ones). I also had to notch the sills and then epoxy the new plates on the end, this took A LOT of test fitting and filing because I also had to design a mount more the short box Kadee coupler.


Step 5 (Brake Wheel):
the Bachmann brake wheel isn't bad, but since I went this far, I decided to design up something new with brass. I did reuse the actual wheel and just sanded it a little flatter on both top and bottom to somewhat match the prototype look, but the rest of the stand had to go. So back to design and the resin printer...
With new upper and lower brackets, I got everything printed and mounted on the A end:

It wasn't long after going through the trouble of this, that I also decided the Bachmann grabirons looked like garbage. So a quick order from Phil's narrow gauge, and again with Tinkercad and the resin printer, I had new grabs and brake lift levers:


...I hit the limit on PIX, so to be continued.

