[quote author=funandtrains link=topic=299489.msg326318#msg326318 date=1409853412]
I would advise you to use crushed stone rather gravel and mix in a little cement rather than glue. The sharps edged stone with its own dust will stick well with a 6:1 or even weaker mix. It will also look more realistic.
[/quote]
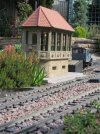
I suppose it depends on what type of ballast you`re trying to represent. For my 1920s-30s light NG railway look, I wanted something which more or less buried the sleepers and yet gave some sort of semblance of chippings. I opted for horticultural/potting grit as has been mentioned, but whereas I`ve previously used cement over which I then dribbled PVA, I`ve recently been trying flexible tile adhesive. My main reason was that I had best part of a bag left over after relaying floor tiles and when using it, I`d noticed it smelled a bit PVA-like, so I suspect it has some sort of dried PVA additive already included. It also includes very fine sand which seems to help with adhesion. However, if you`re wanting the neat chippings effect, then this won`t be for you - but I`m happy.
I brush the mix (roughly 50/50 grit and tile cement) into place dry

and then add water (with a drop of washing-up liquid) from a watering can

I`ve used it for my ground-based sections

and also on the wooden raised sections and so far, it seems to be staying in place well.

You can buy the tile cement in different colours - mine happened to be grey as that was what was needed in the house - but I have tried adding powdered cement dyes to the mix with varying success

As I said, this approach is not to everyone`s taste but it suits my sort of railway as it seems to eventually attract moss growth which gives the track a slightly overgrown and poorly maintained look, which is just right for the interwar depression period I`m modelling.
Rik