Bachmann Tram Conversion - Pole to Pantograph

Gizzy

A gentleman, a scholar, and a railway modeller....
26 Oct 2009
36,173
2,286
63
Cambridgeshire
www.gscalecentral.net
Best answers
0
Country flag
I have a Bachmann tram, which just happens to be Mizzy Gizzy's favourite, that I thought would be ideal to use on Hardyard, the portable layout many of you will have already seen elsewhere on the forum.

Future plans for Hardyard will be to install some catenary posts on the platform road and the middle siding....
 

Gizzy

A gentleman, a scholar, and a railway modeller....
26 Oct 2009
36,173
2,286
63
Cambridgeshire
www.gscalecentral.net
Best answers
0
Country flag
The Bachmann tram though, has a trolley pole. I wanted to fit a scissors pantograph in place of the pole, as to turn the pole every reversal on what is basically a shuttle layout, would be a right royal pain.

Philbahn recently had a few pantographs up for sale, so I snapped one up for a conversion job.

The roof of the tram is curved, and has a walkway along the top. I thought it would be best to cut away a section of the middle of the walkway and mount the pantograph on the roof....
 

Gizzy

A gentleman, a scholar, and a railway modeller....
26 Oct 2009
36,173
2,286
63
Cambridgeshire
www.gscalecentral.net
Best answers
0
Country flag
Having removed the pole, I marked up the walkway where the pantograph would go.

I removed the section, cutting along the outer of the 4 lines, using a razor saw....
 

Gizzy

A gentleman, a scholar, and a railway modeller....
26 Oct 2009
36,173
2,286
63
Cambridgeshire
www.gscalecentral.net
Best answers
0
Country flag
I then fixed the pantograph to the roof, using the four holes in the corners of the panto base.

I used the base as a template to drill four holes in the roof with a pin vice, before securing with some self tapping screws. I also curved the base slightly to the profile of the roof.

Once fitted, I replaced the centre section of the walkway I'd removed earlier, and fastened it using the screw for the pole. However, this screw is now too long, so I will replace it with a shorter one soonest.

The pantograph will not be electrically connected, although I expect I could do so if desired.
 

Philbahn

Registered
24 Oct 2009
12,687
3
74
Swinton Manchester
Best answers
0
Country flag
Looks good . A good deal both ways and it's better than sat in a drawer
 

FatherMcD

Registered
13 Mar 2014
388
35
Idaho
Country
United-States
Best answers
0
Country flag
I then fixed the pantograph to the roof, using the four holes in the corners of the panto base.

I used the base as a template to drill four holes in the roof with a pin vice, before securing with some self tapping screws. I also curved the base slightly to the profile of the roof.

Once fitted, I replaced the centre section of the walkway I'd removed earlier, and fastened it using the screw for the pole. However, this screw is now too long, so I will replace it with a shorter one soonest.

The pantograph will not be electrically connected, although I expect I could do so if desired.
I know this is an old thread, but if you still have the model, I'd be interested in seeing a picture. Thanks,
 

Gizzy

A gentleman, a scholar, and a railway modeller....
26 Oct 2009
36,173
2,286
63
Cambridgeshire
www.gscalecentral.net
Best answers
0
Country flag
I know this is an old thread, but if you still have the model, I'd be interested in seeing a picture. Thanks,
Sorry Ken, but I've now sold this on....
 

SevenOfDiamonds

Registered
3 Jan 2010
503
109
Best answers
0
Country flag
I'd be interested in seeing a picture
Just to prove that there is "more than one way to skin a cat" (!) my pantograph-fitted Bachmann trams use a different method, involving the creation of a plastikard box so the pantograph sits on a flat surface above the walkway. No pictures to hand, but I'll try to take a couple soon.

Cheers

David
 

SevenOfDiamonds

Registered
3 Jan 2010
503
109
Best answers
0
Country flag
Here's a close-up to be going on with . . .

1694520926509.png

I have these on two "toastrack" trams and one enclosed tram. I bought them all second-hand "as is" (but too long ago to know who or where from) rather than doing the conversion myself, but it would be easy to replicate on other Bachmann trams. The pantograph is screwed to the box with 4 self-tappers, and the box is fastened to the roof with a nut and bolt through the hole where the trolley pole used to be.

Cheers

David
 
  • Like
Reactions: 1 user

Mohawk Valley

Registered
11 Feb 2023
245
41
70
Coventry UK
Best answers
0
Country flag
I have a Bachmann tram, which just happens to be Mizzy Gizzy's favourite, that I thought would be ideal to use on Hardyard, the portable layout many of you will have already seen elsewhere on the forum.

Future plans for Hardyard will be to install some catenary posts on the platform road and the middle siding....
I’m just about to start a conversion of a Lilliputian (Bachmann) tram to working overhead collection. My system uses live connection to the panto and negative collection to the facing set of wheels as you look at the side with the A cab pointing to the right. One of the ends is marked A…the other side of the axle does not pick up from the track. I use 2 rail normal collection steam and diesel engines, so with the aid of a second controller, I can run overhead on the same track as normal 2 rail pick up. I suppose collecting the negative to both sides of the axle would be a simple enough task, but it wouldn’t allow 2 rail running without switching things electrically. I’ll be happy to run a blow by blow description with pics when I get back from holibobs…
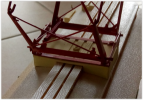
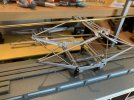
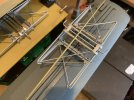
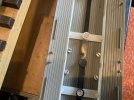
Here are some pics of the work to date. Remove the roof from the tram. This is held in by 6 clips, three on each side. Some careful prising with a flat blade will release the clips if you start at one end and work towards the other. Repeat for the other side, although the roof will probably come away in your hand. The trolley pole is held in place by a screw which goes through the roof and has a nut on the other end, underneath the roof. From the underside of the roof, remove the two tiny screws from the centre black plastic cover. The trolley pole nut is now exposed along with the wiring for the internal lights.
Everything is easy to get at. Once the pole is removed, you can start to fit the panto.
The panto on this model is an ex Piko unit with isolators fitted. The bottom of the isolator is drilled out so a 4 BA screw can be fitted. The tram roof is suitably marked and drilled to match the 4 isolators. From the underside of the roof, push the 4 ba screws through the roof and screw them tightly into the 4 isolators, which has been positioned on the other side of the roof.
If you’re not going to electrify the panto, simply clip the roof back on to the tram and you’re done. You can of course put the screw back where the hole for the trolley pole fitting was to close the hole up where it came from. I’ve left it open as it’s where the live electric feed will pass through the roof.IMG_7687.jpegIMG_7688.jpegIMG_7689.jpegIMG_7690.jpegIMG_7691.jpeg
Cheers

Martin
 
Last edited:
  • Like
Reactions: 1 user

Flying15

Registered
12 May 2015
328
307
London
Best answers
0
Country flag
I’m just about to start a conversion of a Lilliputian (Bachmann) tram to working overhead collection. My system uses live connection to the panto and negative collection to the facing set of wheels as you look at the side with the A cab pointing to the right. One of the ends is marked A…the other side of the axle does not pick up from the track. I use 2 rail normal collection steam and diesel engines, so with the aid of a second controller, I can run overhead on the same track as normal 2 rail pick up. I suppose collecting the negative to both sides of the axle would be a simple enough task, but it wouldn’t allow 2 rail running without switching things electrically. I’ll be happy to run a blow by blow description with pics when I get back from holibobs…
Here are some pics of the work to date. Remove the roof from the tram. This is held in by 6 clips, three on each side. Some careful prising with a flat blade will release the clips if you start at one end and work towards the other. Repeat for the other side, although the roof will probably come away in your hand. The trolley pole is held in place by a screw which goes through the roof and has a nut on the other end, underneath the roof. From the underside of the roof, remove the two tiny screws from the centre black plastic cover. The trolley pole nut is now exposed along with the wiring for the internal lights.
Everything is easy to get at. Once the pole is removed, you can start to fit the panto.
The panto on this model is an ex Piko unit with isolators fitted. The bottom of the isolator is drilled out so a 4 BA screw can be fitted. The tram roof is suitably marked and drilled to match the 4 isolators. From the underside of the roof, push the 4 ba screws through the roof and screw them tightly into the 4 isolators, which has been positioned on the other side of the roof.
If you’re not going to electrify the panto, simply clip the roof back on to the tram and you’re done. You can of course put the screw back where the hole for the trolley pole fitting was to close the hole up where it came from. I’ve left it open as it’s where the live electric feed will pass through the roof.View attachment 318520View attachment 318521View attachment 318522View attachment 318523View attachment 318524
Cheers

Martin
Those insulators are pretty neat!
 
  • Like
Reactions: 1 user

Mohawk Valley

Registered
11 Feb 2023
245
41
70
Coventry UK
Best answers
0
Country flag
Those insulators are pretty neat!
It would be great if someone could 3D print them, they certainly look the part. Problem now is that I’ll have to make two stands for the other pantos to be fitted to…anyone want to start printing them?

Cheers

Martin