You are using an out of date browser. It may not display this or other websites correctly.
You should upgrade or use an alternative browser.
You should upgrade or use an alternative browser.
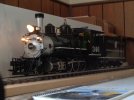
Accucraft C-19 replacement motor and gearbox disassembl
- Thread starter JohnSol
- Start date
Greg Elmassian
Guest
No, but I do have one that is geared too low.... I have a K4 pacific that needs a bit more speed.
What is the reduction ratio on your pittman? It is normally on the outside, if not, the model number will tell.
so you want a minimum speed of 0.11 smph?
Greg
What is the reduction ratio on your pittman? It is normally on the outside, if not, the model number will tell.
so you want a minimum speed of 0.11 smph?
Greg
Greg Elmassian
Guest
yes pretty close, so 3 inches in 30 seconds or .1 of an inch per second... pretty darn slow but not impossible..
JohnSol
Registered
Okay, maybe a minimum speed of six inches / minute is a bit optimistic. I'm simply looking for an acceptable speed with coupling or moving onto a turntable. The new Pittman motor is geared 60.5 : 1 (the same as my C&S 60.)
To complicate things, I've been told that there are several gear train variations over the relatively short production run of this model. Has anyone ever disassembled an Accucraft C-19 down to it's electric gear train?
Thank you for your replies.
To complicate things, I've been told that there are several gear train variations over the relatively short production run of this model. Has anyone ever disassembled an Accucraft C-19 down to it's electric gear train?
Thank you for your replies.
Greg Elmassian
Guest
Not unreasonable at all. Just tested 2 locos at DCC minimum speed step 1, USAT NW2 went 35 inches, USAT Hudson went 9-1/2".
Greg
Greg
Paradise
Registered
From what I have been told some time ago, the first gear ratio used in the Accucraft C16 was in line with other makes for voltage/speed. I can't remember what ratio but it may have been 19:1. Some thought this was too fast for such prototypes so the 1:60.5 was then used. It is more motor/gearbox noisy at medium speeds though. I think some models ended up with a ratio closer to what I have in my disassembled Accucraft C&S 59 B4C which is 38.3:1
Last edited:
Greg Elmassian
Guest
I have a 1:11, a 1:27 and a 1:48 .... the 1:48 won't go over about 30 smph on 22 volts...
I have 2 Accucraft/AML K4 Pacifics...
This page might be helpful: K4 motor & pulling power
Greg
I have 2 Accucraft/AML K4 Pacifics...
This page might be helpful: K4 motor & pulling power
Greg
beavercreek
Travel, Art, Theatre, Music, Photography, Trains
When I had my first run Accucraft C16 quite a time back time back, I replaced the original Pittman motor, as not only was it too fast, it also did not have the grunt that I needed.
I installed a 1:60.5 and although it did make things very s-s-s-l-l-o-o-w-w. it did increase the pulling power one heck of a lot. I then replaced that with a, I think 1:38, geared Pittman. That was a good compromise.
I am not sure if the C19 is the same as the C16... I suspect that it might well be different as the C16 was one of Accucraft's first electric 1:20.3 rod locos (with the K27) and they improved their building techniques later.
It was a little bit of a palaver stripping the loco down, but it is pretty straightforward as long as you take photos of each stage so as you go, especially the handrail and piping into the cab.
This is the help that was given to me on the MLS forum:
"Now look inside the cab. The first thing to do inside is to take the nuts off where the handrails enter from the front. You can then slide the handrails forward and out of the way. Put the nuts back on the end of the handrails so you do not lose them. Now along the bottom of each side are some bolts and nuts that hold the cab on (these are what Kevin was talking about). You will need to remove all of them. On some models the nuts are behind or just above details under the floorboards. Be careful of the piping as you pull the cab off.
At the front of the boiler pull the braces out of the smokebox. They are just a press fit into holes in the smokebox and the deck. Now pull of the smokebox front, it is just pressed in and will come out with a little persuasion. Inside the smokebox you will find the board for the headlight on a bolt. Remove the nut and lift the board off the bolt. Push it out of the way. You do not need to unsolder any wires unless you are rewiring everything and then you are on your own
 .
.
The rest of the work is best done with the loco upside down. I built a cradle to hold it steady, but you can do whatever you want. At the bottom of the smokebox is a curved nut that holds the boiler down. The other end of the bolt is the one the front truck slides on. so first remove the bolt the front truck pivots on. Now holding the curved bolt inside the boiler remove the other bolt for the front truck. One last bolt to remove. If you look between (I think) the second and third driver axles you should see a screw head. If you look inside the boiler you will where where it comes through and is held on by a nut. Remove this bolt and you should be able to lift the boiler off and access everything. "
Unfortunately I sold my C16 a few years back so have not got it at hand to check the bolt placings etc.
I have got the later C16 with updated and also a C&S 2-8-0
good luck!
I installed a 1:60.5 and although it did make things very s-s-s-l-l-o-o-w-w. it did increase the pulling power one heck of a lot. I then replaced that with a, I think 1:38, geared Pittman. That was a good compromise.
I am not sure if the C19 is the same as the C16... I suspect that it might well be different as the C16 was one of Accucraft's first electric 1:20.3 rod locos (with the K27) and they improved their building techniques later.
It was a little bit of a palaver stripping the loco down, but it is pretty straightforward as long as you take photos of each stage so as you go, especially the handrail and piping into the cab.
This is the help that was given to me on the MLS forum:
"Now look inside the cab. The first thing to do inside is to take the nuts off where the handrails enter from the front. You can then slide the handrails forward and out of the way. Put the nuts back on the end of the handrails so you do not lose them. Now along the bottom of each side are some bolts and nuts that hold the cab on (these are what Kevin was talking about). You will need to remove all of them. On some models the nuts are behind or just above details under the floorboards. Be careful of the piping as you pull the cab off.
At the front of the boiler pull the braces out of the smokebox. They are just a press fit into holes in the smokebox and the deck. Now pull of the smokebox front, it is just pressed in and will come out with a little persuasion. Inside the smokebox you will find the board for the headlight on a bolt. Remove the nut and lift the board off the bolt. Push it out of the way. You do not need to unsolder any wires unless you are rewiring everything and then you are on your own
The rest of the work is best done with the loco upside down. I built a cradle to hold it steady, but you can do whatever you want. At the bottom of the smokebox is a curved nut that holds the boiler down. The other end of the bolt is the one the front truck slides on. so first remove the bolt the front truck pivots on. Now holding the curved bolt inside the boiler remove the other bolt for the front truck. One last bolt to remove. If you look between (I think) the second and third driver axles you should see a screw head. If you look inside the boiler you will where where it comes through and is held on by a nut. Remove this bolt and you should be able to lift the boiler off and access everything. "
Unfortunately I sold my C16 a few years back so have not got it at hand to check the bolt placings etc.
I have got the later C16 with updated and also a C&S 2-8-0
good luck!
Paradise
Registered
With the nuts inside the cab, sometimes the paint gets into the thread so they just break off the end of the handrail if forced. Don't ask how I know this.
Soften the paint there with solvent or a soldering iron so they unscrew.
I can't remember all the specific steps involved in the rest of the disassembly but on my C&S B4C 2-8-0 the boiler had to be slid forward off the chassis and every wire in there gets hooked up on the journey so you may need to poke a few things inside around with a stick through the front freeing it a little at a time.
Take detailed pictures along the way and keep each steps screws/parts in separate zip lock bags marked what they are and its sequence in the disassembly.
JohnSol
Registered
Dinkum Die!With the nuts inside the cab, sometimes the paint gets into the thread so they just break off the end of the handrail if forced. Don't ask how I know this.
Soften the paint there with solvent or a soldering iron so they unscrew.
I can't remember all the specific steps involved in the rest of the disassembly but on my C&S B4C 2-8-0 the boiler had to be slid forward off the chassis and every wire in there gets hooked up on the journey so you may need to poke a few things inside around with a stick through the front freeing it a little at a time.
Take detailed pictures along the way and keep each steps screws/parts in separate zip lock bags marked what they are and its sequence in the disassembly.
Working on this beautiful locomotive model is akin to working on a metric watch that's been sealed in epoxy paint. I'll have the solvent ready and will definitely be wearing my Optivisor.
Thank you for the warning, and here's a song in appreciation