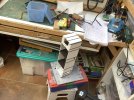
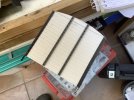
I have had this LGB 4063 OBB Bogie Van for far more years than I can properly remember. It was certainly kicking around when I started building my line at Leagrave back in 1986, but may not be too many years older than that. It has been used and abused, had 4 differing coupling systems and for a time even differing ones at each end to act as a match wagon for open days where it has done sterling service with Live Steam pulling a long string of LGB coupling equipped vehicles. it has even had USA sourced metal wheels that are rusted to hell after years of being left out in the garden at Leagrave 24/7/365, that is where some of its weathering has come from. It has also done sterling service since I got into East German Harz lines and has sported correct type of numbers for that line. However its days are numbered as every time it is in a consist it shouts “hey I am an Austrian 750mm gauge wagon” at me. However it has been very useful as a dumping ground and a couple of plasticard boxes, one is seen from the one poking out of the door have been useful storage for all sorts of stuff.
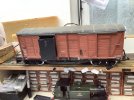
So I have grabbed the nettle and am making a more appropriate body for the chassis, however one day I may decide to go the while hog and do a chassis as well, there are a couple of spare LGB Bogies kicking around somewhere. Then it can go into its box and storage in the loft.
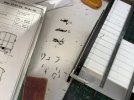
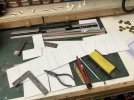
I started by using my Scheers and Wall book of the Harz lines to get some measurements, this showed that I should really be making something much longer but as we are strapped for space at certain Stations on the DR the chassis length will be retained and I will be doing an LGB with my flexible ruler. After I had got a way on with the sides and ends I remembered this sad beast at Wernigerode Hasserode Station.
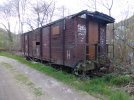
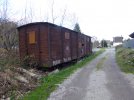
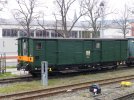
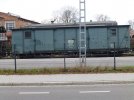
This was pretty much what I was aiming for and I wish I had remembered the picture before cutting! However I found a couple more bogie vans had been photed by me in 2016 as below. Clearly both are not quite what I am doing as the Green one is clearly some kind of Track Inspection Van, the Blue one is somewhat similar but without the end windows. Both do not have a balcony and I wanted to retain that with the roof extending over it as the old wreck had. Clearly much has occurred over the years to these bogie vans and as I am predominantly in the 1980’s era the one I have chosen was around as I am modeling the line in 1989 as a Gerätewagen (Equipment Cart) meaning some sort of Engineers use. This I guess fits in quite well as the Wagon waybills send Vans all over the system so this can use them with no issues.
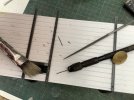
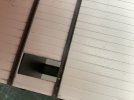
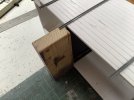
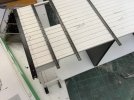
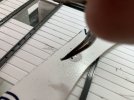
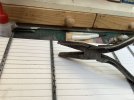
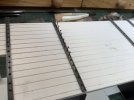
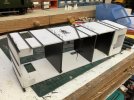
This is progress up to now, I have used for the first time on a wagon 3mm plastic coated foamboard. It scribes nicely and shoild be sufficiently strong enough for the odd scrape or two. Inhabe ellected not to add grain detail as you can see they have all had so much paint over the years it is non existent. The LGB chassis will ensure good running though a little extra weight may be called for. Plenty of room in that body.
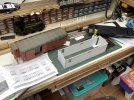
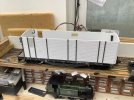
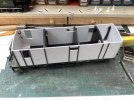
Glue used has been predominantly UHU Power to stick the sides and ends together and the plastic U that has been used for the strapping. Unibond Contact has been used for the inside strengthening pieces and Peco Track pins have started to be used for Rivets. There will be lots of them to add so this will be a little at a time job, quite a few will pass through into the black inner strengthening cross pieces that will also act as internal support for the roof. This is the situation at close of play today. Project started yesterday lunch time.

So I have grabbed the nettle and am making a more appropriate body for the chassis, however one day I may decide to go the while hog and do a chassis as well, there are a couple of spare LGB Bogies kicking around somewhere. Then it can go into its box and storage in the loft.
I started by using my Scheers and Wall book of the Harz lines to get some measurements, this showed that I should really be making something much longer but as we are strapped for space at certain Stations on the DR the chassis length will be retained and I will be doing an LGB with my flexible ruler. After I had got a way on with the sides and ends I remembered this sad beast at Wernigerode Hasserode Station.


This was pretty much what I was aiming for and I wish I had remembered the picture before cutting! However I found a couple more bogie vans had been photed by me in 2016 as below. Clearly both are not quite what I am doing as the Green one is clearly some kind of Track Inspection Van, the Blue one is somewhat similar but without the end windows. Both do not have a balcony and I wanted to retain that with the roof extending over it as the old wreck had. Clearly much has occurred over the years to these bogie vans and as I am predominantly in the 1980’s era the one I have chosen was around as I am modeling the line in 1989 as a Gerätewagen (Equipment Cart) meaning some sort of Engineers use. This I guess fits in quite well as the Wagon waybills send Vans all over the system so this can use them with no issues.


This is progress up to now, I have used for the first time on a wagon 3mm plastic coated foamboard. It scribes nicely and shoild be sufficiently strong enough for the odd scrape or two. Inhabe ellected not to add grain detail as you can see they have all had so much paint over the years it is non existent. The LGB chassis will ensure good running though a little extra weight may be called for. Plenty of room in that body.


Glue used has been predominantly UHU Power to stick the sides and ends together and the plastic U that has been used for the strapping. Unibond Contact has been used for the inside strengthening pieces and Peco Track pins have started to be used for Rivets. There will be lots of them to add so this will be a little at a time job, quite a few will pass through into the black inner strengthening cross pieces that will also act as internal support for the roof. This is the situation at close of play today. Project started yesterday lunch time.


