Want To Weather Toy Train Stock

Madman

Registered
25 Oct 2009
17,187
2,984
Pennsylvania, USA
Best answers
0
Country flag
In the past I have tried my hand at weathering. Mostly it was the Field Railway stock made by LGB and Hartland. I was never really happy with the results. Now I would like to try it albeit at the next, or should I say at a more informed level.

I have a bunch of LGB Toy Train wagons, both the boxcar type and open gondolas. Before I delve into the task I wonder if any of you weathering gurus can point me in the right direction as far as what to use goes. Examples in the way of photos would be helpful. I know the forum has had many photos of finely weathered stock, but a few here would expedite things.

Thank you in advance.
 

dunnyrail

DOGS, Garden Railways, Steam Trains, Jive Dancing,
Staff member
GSC Moderator
25 Oct 2009
26,229
5,000
75
St.Neots Cambridgeshire UK
Best answers
0
Country flag
In the past I have tried my hand at weathering. Mostly it was the Field Railway stock made by LGB and Hartland. I was never really happy with the results. Now I would like to try it albeit at the next, or should I say at a more informed level.

I have a bunch of LGB Toy Train wagons, both the boxcar type and open gondolas. Before I delve into the task I wonder if any of you weathering gurus can point me in the right direction as far as what to use goes. Examples in the way of photos would be helpful. I know the forum has had many photos of finely weathered stock, but a few here would expedite things.

Thank you in advance.
Have a look at this link, post 3 shows and describes the weathering.
 

Madman

Registered
25 Oct 2009
17,187
2,984
Pennsylvania, USA
Best answers
0
Country flag
I remember reading your post. I thought you did an excellent job on that gondola. Shows what can be done with less than perfect stock.
 

Flying15

Registered
12 May 2015
328
307
London
Best answers
0
Country flag
In the past I have tried my hand at weathering. Mostly it was the Field Railway stock made by LGB and Hartland. I was never really happy with the results. Now I would like to try it albeit at the next, or should I say at a more informed level.

I have a bunch of LGB Toy Train wagons, both the boxcar type and open gondolas. Before I delve into the task I wonder if any of you weathering gurus can point me in the right direction as far as what to use goes. Examples in the way of photos would be helpful. I know the forum has had many photos of finely weathered stock, but a few here would expedite things.

Thank you in advance.
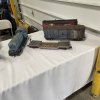
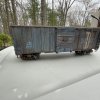
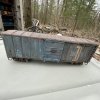
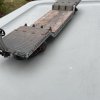
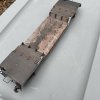
I use powders as per military modellers and old (out of date make up). It’s not permanent and can be wiped off or added to( a bit like real weathering)3E915D7A-08AC-4702-AAC1-A0921F3679E9.jpeg
 

dunnyrail

DOGS, Garden Railways, Steam Trains, Jive Dancing,
Staff member
GSC Moderator
25 Oct 2009
26,229
5,000
75
St.Neots Cambridgeshire UK
Best answers
0
Country flag
Using pint can be permanent, which is fine if you don't make an error, or don't wish to move the stuff on at a later date
But the secret is little then build up if you are not sure. Dry brushing can also be a build up weathering tool. Just takes a bit of bravery, confidence in your abilities and for the beginner a good coloured picture of weathering that you would like to emulate. One of my early efforts was a 00 Hornby 9f that I weathered to a picture of a very mucky one I foted at Carnforth. Sorry cant show the result as it was sold on to a very happy buyer when I got rid of most of my 00 stock in the 70’s.
 

Madman

Registered
25 Oct 2009
17,187
2,984
Pennsylvania, USA
Best answers
0
Country flag
  • Like
Reactions: 1 user

PhilP

G Scale, 7/8th's, Electronics
5 Jun 2013
33,639
3,532
Nottingham
Best answers
0
Country flag
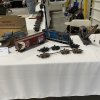
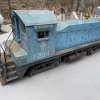
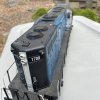
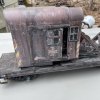
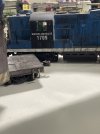
I especially like the GP9(?) and the crane..

PhilP
 
  • Like
Reactions: 1 users

ColinK

Registered
14 Apr 2017
271
140
67
Lancaster
Best answers
0
Country flag
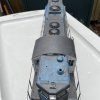
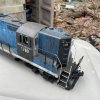
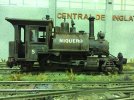
I've weathered most of my stock. Starting point is a photo of the real thing to show what muck is where. You may want to mask the windows before starting painting.

First step is to paint (one side at a time) with dark dirty black or grey paint, then remove most of it with a rag using downward strokes. That leaves a nice residue in all the nooks and crannies. The harder you rub, the more that comes off. Make sure you get the majority off. You need to work very fast and/or do small areas at a time) especially if using acrylic paints as they dry very quickly.

Second, do some detailed weathering by dry brushing. Including rusty areas, gunmetal on steps etc where there is plenty of wear, exhaust streaks etc.

Third, using an airbrush I spray 'roof dirt' a greyish colour very lightly on the roof. You can always do a second coat if need be, but let it dry before deciding.

Fourth, turn the model upside down, mask the wheels and pickups, and airbrush the under frame with 'under frame dirt', a brownish shade.

At this stage the roof and under frame will have different coloured weathering.

Fifth, lightly airbrush a very light coat of 'general dirt', a similar, but slightly different shade to the dirty black used in the first step. That brings everything together, Job done.

Note for further refinement for stages three, four and five, instead of using a single colour for each step, use several very slightly different shades eg take the base colour and paint areas at random, then add a drop of white to lighten the shade and paint different areas, then add drop of another colour, eg dark brown, and paint the remaining areas.


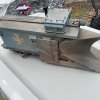
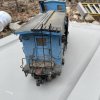
F7C3E940-FCFD-4B73-BA10-07CFC85DA547.jpeg
 

Paul M

Registered
25 Oct 2016
11,941
1,706
61
Royston
Best answers
0
Country flag
Like most things, done well looks brilliant, badly, looks awful. Colin must have had plenty of practice to get it that good.