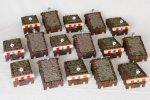
David1226
Registered
The Claptowte Railway was always intended, from concept, to be a Freelance British Outline railway. To that end, when looking for buffer stops, for the various sidings, I chose a rail and timber built item produced by Garden Railway Supplies (GRS) as they were very much in keeping with a British railway. Having lately decided to alter the whole design and concept of the Claptowte Railway these buffer stops would no longer be suitable as nothing on the base boards could be above rail height.
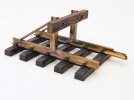
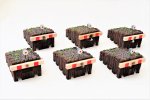
I decided to go with the LGB sleeper built buffer stop, being relatively inexpensive second hand, and could be clipped and unclipped from the rails, as required. The LGB buffer stop used to be offered unlit or with a working lamp powered from the track. The moulding was identical in both cases, only the working lamp being the extra item. This means that on the unlit version there are screw holes on each side, at rail height, and a hole on top where the working lamp would fit. There is also a small slot on top of the ballast, the purpose of which eludes me. I have no need of working lamps as all accessories on the layout are purely scenic and need to be removable.
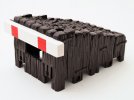
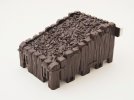
I unclipped the white/red buffer beam to assist with painting. At the same time I scored the top, bottom and end surfaces of the beam, by drawing the teeth of a razor saw across the surface, in order to impart a wood grain effect, where there was none previously. I then filled in all the extraneous holes. The only filler I had to hand was a tube of grab adhesive for fixing skirting boards. This worked fine, but beware, it does shrink slightly, so will probably need two fills.
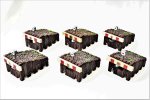
I drilled a new hole centrally above the buffer beam to take a dummy lamp of my own design. The body of the lamp is a short section of square tube, blocked off at the rear. with an off cut of plasticard, and at the front with a marker disc The marker disc is an old tiddley wink game counter, redundant as it’s now a long time since I’ve tiddled my wink, or winked my tiddle.
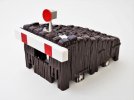
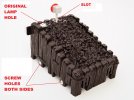
The body and dummy lamp were given a spray of Halfords grey plastic primer. The grey primer forms the base colour for the ballast top.
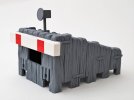
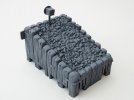
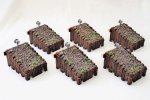
As with the majority of my modelling the biggest transformation is brought about with the humble paintbrush.
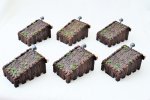
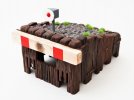
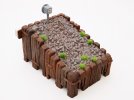
The finishing touches are to add a red 5mm self adhesive gem to the centre of the marker disc to simulate the lamp lens. When the light catches it just right, it looks as if it’s lit. I printed a location identification sign to attach to the rear of the lamp housing. The numbering system was devised by the line’s Chief Mechanical Engineer, oh, hang on, that’s me. Finally some tufts of 4mm spring grass were added to the old ballast. These tufts are produced by a company called Serious Play, located in Cornwall, UK, and bought on Evilbay.
David

I decided to go with the LGB sleeper built buffer stop, being relatively inexpensive second hand, and could be clipped and unclipped from the rails, as required. The LGB buffer stop used to be offered unlit or with a working lamp powered from the track. The moulding was identical in both cases, only the working lamp being the extra item. This means that on the unlit version there are screw holes on each side, at rail height, and a hole on top where the working lamp would fit. There is also a small slot on top of the ballast, the purpose of which eludes me. I have no need of working lamps as all accessories on the layout are purely scenic and need to be removable.


I unclipped the white/red buffer beam to assist with painting. At the same time I scored the top, bottom and end surfaces of the beam, by drawing the teeth of a razor saw across the surface, in order to impart a wood grain effect, where there was none previously. I then filled in all the extraneous holes. The only filler I had to hand was a tube of grab adhesive for fixing skirting boards. This worked fine, but beware, it does shrink slightly, so will probably need two fills.
I drilled a new hole centrally above the buffer beam to take a dummy lamp of my own design. The body of the lamp is a short section of square tube, blocked off at the rear. with an off cut of plasticard, and at the front with a marker disc The marker disc is an old tiddley wink game counter, redundant as it’s now a long time since I’ve tiddled my wink, or winked my tiddle.


The body and dummy lamp were given a spray of Halfords grey plastic primer. The grey primer forms the base colour for the ballast top.


As with the majority of my modelling the biggest transformation is brought about with the humble paintbrush.
The finishing touches are to add a red 5mm self adhesive gem to the centre of the marker disc to simulate the lamp lens. When the light catches it just right, it looks as if it’s lit. I printed a location identification sign to attach to the rear of the lamp housing. The numbering system was devised by the line’s Chief Mechanical Engineer, oh, hang on, that’s me. Finally some tufts of 4mm spring grass were added to the old ballast. These tufts are produced by a company called Serious Play, located in Cornwall, UK, and bought on Evilbay.


David

