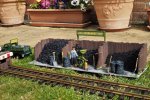
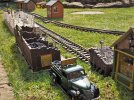
The Claptowte Railway - Coal Staithes

David1226

Registered
Country flag
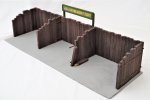
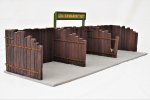
Up until now, all of my G Scale modelling has been items of rolling stock, initially goods vehicles and then passenger stock. I always purchased, modified and created stock to a strict plan, although admittedly that plan has broadened over the years and I still have some items, in the pipeline, for which I have the component parts but as yet not had the time to complete. The enforced shutdown of everything due to Corona virus meant that I should have had the time but then having gone blind in my right eye, due to delayed surgery for cataract removal, my modelling efforts have been frustrated. To break the cycle I decided to make a start on scenic items for the Claptowte Railway and made a start with some coal staithes.

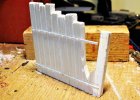
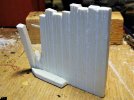
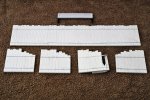
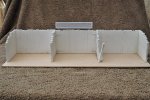
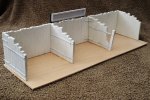
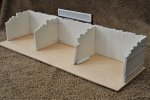
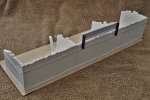
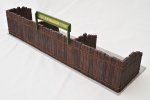
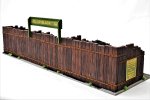
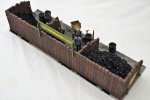
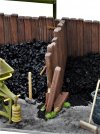
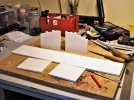
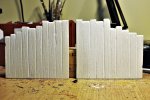
My preferred medium has always been plasticard sheet. Having pondered over the size and design of the staithes, I used a 3mm thick sheet of birch plywood for the base. I decided that the ‘wooden’ walls would be scribed and grained plasticard that would have to be 6mm thick. The thickest material that I had to hand, of a suitable size, was 2mm thick, so the first step was to glue together three layers to give the required 6mm thickness. I then set about marking out, scribing and graining the walls. The tops of the planks were carved in a typical uneven, random manner. Strapping was applied using plastric strip material and bolt heads were added using 1mm self adhesive decorative pearls, purchased on Ebay. I thought it would be a bit of fun, and add some interest if one of the walls had some damage with a couple of bent/broken planks, perhaps where a lorry driver had been less than careful.
dig 200701001.JPG

dig 200701002.JPG

dig 200702002.JPG

dig 200702003.JPG

dig 200704001.JPG

dig 200704004.JPG

dig 200704005.JPG

dig 200704006.JPG

dig 200704007.JPG

David
 
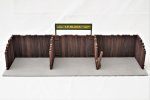
Next came the painting, before which the whole assembly was given a spray of grey plastic primer. As a happy outcome, apart from priming the plastic, the primer slightly raised the grain of the plywood base to give a tamped concrete effect, which as the base was to be painted a weathered concrete colour, was perfect. While I cannot pretend that my modelling and painting of weathered wood is in the same league as Jaime, I am satisfied with my effort.

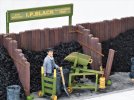
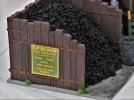
I printed some white card with the Coal Merchants name. This was done in as near to the merchants corporate colours as I could reasonably match. In keeping with my tongue in cheek approach to model railway names, I decided to call the coal merchant I.P.Black, possibly a suitable name for someone who spends all day shovelling coal.

dig 200725001.JPG

dig 200725002.JPG

dig 200725003.JPG

dig 200725004.JPG

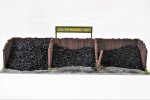
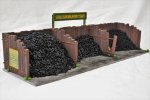
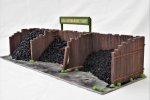
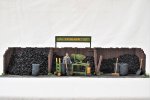
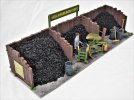
Having painted the staithes, they needed a delivery of coal. The heaps were carved to shape from layers of scrap expanded polystyrene which were then pained matt black. The coal was then applied. The left and centre bays were filled with an item sold as G Scale artificial coal. I think I bought mine from Garden Railway Supplies (GRS), some time ago, when I was filling some coal wagons. It is actually ground up rubber. I believe you can buy a big bag of the stuff from Dunelm who sell it as a medium to put into flower vases, into which artificial flowers can be arranged.

To ring the changes, in the right hand bay I wanted to simulate coke. I had the idea of breaking up barbecue charcoal. All I could get hold of at the time were the compressed barbecue briquettes, but having broken some up, that worked well enough. At least the medium is a different colour and texture to the other two bays. In all cases the medium was initially stuck down by coating the polystyrene with white PVA clue, then scattering on and pressing down the coal. Once this was dry it was consolidated by dripping on a diluted mixture with a bit of washing up liquid, in the same way that you would glue down track ballast. The ‘concrete’ base was liberally smeared with coal dust from the barbecue briquettes. The tufts of spring grass are from the same pack of 4mm tall tufts, bought from Serious Play, on Ebay, that I used on the Claptowte Railway Sleeper Built Buffer Stops. These grass tufts are self adhesive but in order to make sure, each tuft was dipped in PVA glue before placing into position.

dig 200802003.JPG

dig 200802004.JPG

dig 200802005.JPG

dig 200802006.JPG

David
 
The final stage was to ‘accessorise’ the coal staithes. I have already described how I built some scratch built coal weighing scales,for information, here is a link to that thread

The Claptowte Railway - Coal Weighing Scales - G Scale Central

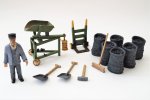
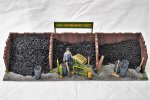
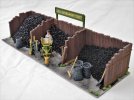
The other scratch built item was the broom with a head from a shaped offcut of plasticard, the bristles from a shaped offcut of clear plastic, extensively scribed to represent the bristles, and a handle from a wooden cocktail stick. The sacks of coal are Modeltown cast resin items. The sack trolley, shovels and sledge hammer are 3D printed items from SLR. These items are made to 16mm scale and are slightly oversize for G Scale. The sack trolley is dimensionally perfect for hauling around the Modeltown coal sacks, except for the height. I have reduced the height to a more acceptable size for G Scale. Similarly I have reduced the length of the sledge hammer shaft to be more in scale. I cannot do anything about the slightly oversize shovels but once everything is painted the difference should be less noticeable, especially with some careful placement. The figure is a Bachmann G Scale Scenecraft loco crew. I do believe it may be Mr I.P.Black himself.

dig 200802002.JPG


So here are the finished coal staithes.

dig 200802007.JPG

dig 200802008.JPG

dig 200802009.JPG

dig 200802010.JPG

dig 200802018.JPG

David
 
The coal staithes have some fresh air in the garden, 18.4.2021

P4180005.JPG

P4180004.JPG

David
 
Back
Top Bottom