Fallowfield Light Railway 2020

Chris Vernell

Tortoise
24 Oct 2009
9,038
1,814
77
Nepean, ON
Country
Canada
Best answers
0
Country flag
Lest Fred think I've been completely inert in the heat wave, I have been puttering on the FLR before the sun gets high or late in the afternoon.
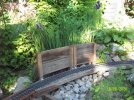
100_4088 _Copy_.JPG
I have constructed a "retaining wall" from old fence boards and 2x2 PT to try to keep the Siberian iris leaves from flopping across the track. Leaves on the line were a problem last year :oops:.

100_4075 _Copy_.JPG
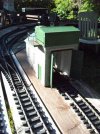
The loco shed is now out where it should be instead of gathering dust in the basement. It needs more work -- once I can find styrene cement.
100_4096 _Copy_.JPG
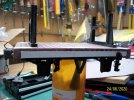
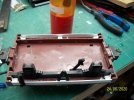
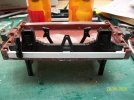
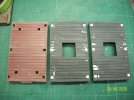
Down in the basement in the a/c coolness, I am working on three HLW mini wagons: The two black ones will become gravel hoppers loosely based on the Snailbeach wagons, by way of GE-rik's excellent sand hoppers for the Peckforton line. The brown one will remain a V-tipper with slight adaptations. All will get small Bachmann metal wheels and my last sets of Andel couplings.
 
  • Like
Reactions: 1 user

Chris Vernell

Tortoise
24 Oct 2009
9,038
1,814
77
Nepean, ON
Country
Canada
Best answers
0
Country flag
Holes drilled in the HLW buffer beams and Andel buffer/coupler blocks for screws to hold the couplers in place, along with glue.
Probably the second-most fiddly job in the project, what with the aged eyeballs having trouble locating a centre hole :nerd:.
(The most fiddly job will be placing rivet heads :eek:).
 
  • Like
Reactions: 1 user

Chris Vernell

Tortoise
24 Oct 2009
9,038
1,814
77
Nepean, ON
Country
Canada
Best answers
0
Country flag
Further work on the HLW wagons.
100_4097 _Copy_.JPG
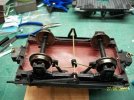
Tipper wagon: I found a scrap piece of styrene to make outer solebars, which give me a place to attach AnDel brake pieces. ANDel couplings attached to buffer beams with screws and CA.

100_4098 _Copy_.JPG
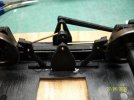
Upside-down. The sharp-eyed will detect the brass 00 hex head screws reinforcing the join between couplings and buffer beams. I cut away HLW's attachment point for hook-and-loop couplers. I thought at first I would use a single brake shoe ...

100_4101 _Copy_.JPG
... but I decided two would keep the Board of Trade happier. My impecunious, if non-piratical, railway cannot afford four shoes per wagon. I have run out of AnDel V-hangers, so I shall have to make a couple from more leftover styrene sheet.

The two hopper wagons have been similarly equipped. Still waiting for delivery of the styrene to make the hoppers.
 

Chris Vernell

Tortoise
24 Oct 2009
9,038
1,814
77
Nepean, ON
Country
Canada
Best answers
0
Country flag
Added homemade internal V-hangers to the hopper wagons. The brake rod cannot extend across to the other solebar as it would interfere with the hopper discharge chute. The white styrene will be painted dark, which should disappear it well.

100_4102 _Copy_.JPG 100_4103 _Copy_.JPG 100_4104 _Copy_.JPG
Yes, Fred, I obtained a can of lacquer thinner from Cdn Tire, and it works nicely as a welder. Thank you for the tip.

Several hours later:
I have applied black paint to the white V-hangers and solebars. It has indeed made them less obvious, especially with the wagon the right way up
 
Last edited:

Chris Vernell

Tortoise
24 Oct 2009
9,038
1,814
77
Nepean, ON
Country
Canada
Best answers
0
Country flag
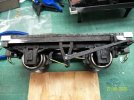
Today I assembled the brake gear on the HLW wagons from AnDel components.

100_4105 _Copy_.JPG 100_4106 _Copy_.JPG 100_4107 _Copy_.JPG
Hopper wagon chassis with the homemade inner V-hanger, which is definitely less visible in black paint. The brass wire will get the same treatment.

100_4108 _Copy_.JPG
V-tipper with regular V-hangers.
I have run through most of my AnDel parts :cry:, so further wagon brake projects may involve (shock! horror! :eek:) scratch-building.
And HLW has shut down production :oops: because of the Covid mess.
 

Chris Vernell

Tortoise
24 Oct 2009
9,038
1,814
77
Nepean, ON
Country
Canada
Best answers
0
Country flag
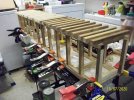
Spent some hours in the basement piecing together the transfer siding trestle.

100_4122 _Copy_.JPG
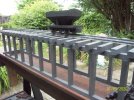
I ripped 5/8" PT fence boards into 5/8" square timbers, pretty much 12" square in 1:19 scale, or 15" in 1:24. Looking at the only two photos (small, from a distance and at an unhelpful angle) I've seen of the Snailbeach prototype, I'm guessing its timbers were pretty close to this. It was certainly a very basic construction; I can see no evidence of diagonal bracing. Elfin Safty would have conniptions.
The posts are fastened to the longitudinal beams with Titebond III and deck screws. The crossbeams/sleepers (ties) are Titebonded to the longitudinals. I shall fasten rails directly to these sleepers.
I am pondering a cheap and dirty way to make the standard gauge track that runs under the trestle. I don't want to spend good money on Gauge 3 track (or wagons, for that matter) that are simply going to be scenery.
 

Chris Vernell

Tortoise
24 Oct 2009
9,038
1,814
77
Nepean, ON
Country
Canada
Best answers
0
Country flag
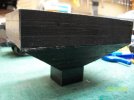
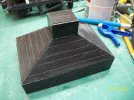
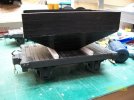
Where I have got to in the hopper wagon project:

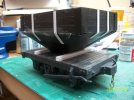
100_4126 _Copy_.JPG100_4127 _Copy_.JPG100_4128 _Copy_.JPG
Being less dedicated than ge-rik (may his name be blessed) I chose not to cut away the HLW flat wagon floor to make an open frame. You can see ge-rik's work on his Peckforton blogs.

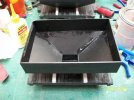
100_4129 _Copy_.JPG
I also used 60-thou styrene rather than 80-thou, and was somewhat liberal with the adhesive.
Strapping, corner plates and many rivets :eek: to come.
Anyone attempting to count the rivets will be fed to the squirrels.
 

Chris Vernell

Tortoise
24 Oct 2009
9,038
1,814
77
Nepean, ON
Country
Canada
Best answers
0
Country flag
Strapping glued to the hopper bodies:

100_4135 _Copy_.JPG
So that means I have arrived at the point where I have to apply rivet heads :eek:
Anna Maria! ANNA MARIA! Where's my electron microscope?!

And just to get it on file in this thread:

100_4130 _Copy_.JPG
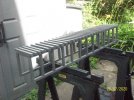
The trestle that will carry these hopper wagons to dump their loads into standard gauge wagons underneath (only in the imagination).
The trestle has had a couple of coats of spray varnish and is now under cover in the shed as we might get some rain -- and I might win the lottery :rolleyes:.
 

Chris Vernell

Tortoise
24 Oct 2009
9,038
1,814
77
Nepean, ON
Country
Canada
Best answers
0
Country flag
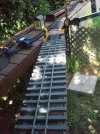
I installed the rails for the hopper dump track atop the trestle today.

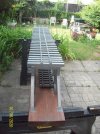
100_4136 _Copy_.JPG 100_4137 _Copy_.JPG
I removed the tie strips from a "five-foot" length of Aristocraft track that is well weathered, so fits in nicely.

100_4139 _Copy_.JPG100_4140 _Copy_.JPG
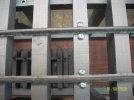
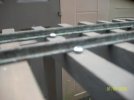
And screwed the rails down to the 5/8" trestle sleepers with 3/8" #6 steel screws. I could have used rail spikes, but it would have been more laborious, and I don't have fond memories of doing it in H0. I set the gauge with a pencil and yardstick, using a section of LGB track as a template. I expect time and rust will take the shine off the screws.

100_4146 _Copy_.JPG
Proof of the gauge pudding: after initial testing with an HLW wagon on Bachmann metal wheels, which rolled well, I double checked with a Swift Sixteen wagon, also with no problems. No locos will be allowed on the trestle, so dirty rail is no problem.
I intend to install standard gauge track (G3) under the trestle, most likely home-made as I can't see spending yonks of money on G3 track that will never be more than scenery, or on G3 wagons for that matter. Imagination is a wonderful thing.
The sleepers outside the rails will be covered with footboards for the unloading crew: I shall rip them from another fence board when time and energy permit.

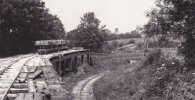
snailbeach.jpg
The Snailbeach District Railways original in dilapidated condition: Note that I did not even think of reproducing the curve.
 

Chris Vernell

Tortoise
24 Oct 2009
9,038
1,814
77
Nepean, ON
Country
Canada
Best answers
0
Country flag
My eyes declared they would focus on no more rivets today, so I sauntered out in the afternoon sun (not as fierce as I had feared) to test fit the trestle siding structure in its position adjoining the branch terminus. To my chagrin but not surprise :blush:, my calculations didn't quite match the reality.

100_4147 _Copy_.JPG 100_4149 _Copy_.JPG
And there she be, not quite level but lined up pretty closely.

100_4150 _Copy_.JPG
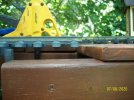
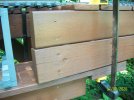
But my careful o_O measurements didn't quite pan out: The base of the trestle track needs to be ~1/4" higher to match the "land surface".

100_4151 _Copy_.JPG
So I shall get out the table saw in the morning and trim 3/8" or so off the bottom of the lower 2x4 and the one hidden behind it.

100_4154 _Copy_.JPG
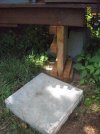
And then there's this leg structure, which is ~2" too long to get that paver under it (I don't want direct contact between wood and soil). I have the choice of digging a shallow hole for the paver and levelling it :oops:, or taking my wee circular saw and trimming the uprights -- much easier.
The ground at the other end is lower, so that leg just needs adjusting rather than trimming.
So that's Saturday planned out ("best laid schemes of mice and men ...").
 

Paul M

Registered
25 Oct 2016
11,881
1,696
60
Royston
Best answers
0
Country flag
I have the choice of digging a shallow hole for the paver and levelling it :oops:,
That might not be a good idea anyway, if the paving slab sits below the surface, you'll get a puddle on it .
 

Chris Vernell

Tortoise
24 Oct 2009
9,038
1,814
77
Nepean, ON
Country
Canada
Best answers
0
Country flag
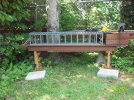
Saturday, 15th August: Sunny, but neither as hot or humid as days past, so I dared to go out and finish the installation of the trestle siding.

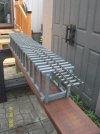
100_4161 _Copy_.JPG 100_4162 _Copy_.JPG
So here we are. I thought I might have to shorten the leg structure on the left, but it's only a fraction high, and the paver will probably sink with time, so I didn't. Cut a joiner section of track with the Dremel, added a couple of rail clamps and Bob's your uncle (not mine; I have no uncles).
The right-hand leg, hidden behind the plastic trellis, is actually floating above its paver, so some plastic shims are in order

100_4163 _Copy_.JPG
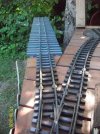
The branch terminus trackage is complete. Umm, I'd better install a stop at the end of the siding before opening it to traffic. And some walkways outside the rails for the workers. I trust that tree will not thicken too much in the next few years.


100_4164 _Copy_.JPG
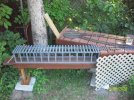
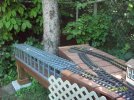
And the 30-foot view. I'd better connect up the branch line and run a train or two before winter.
 
  • Like
Reactions: 1 user

Chris Vernell

Tortoise
24 Oct 2009
9,038
1,814
77
Nepean, ON
Country
Canada
Best answers
0
Country flag
Got out my table saw this morning and ripped a fence board into 1/8"-thick planks.

100_4171 _Copy_.JPG100_4172 _Copy_.JPG
I will install them the next time we get a pair of dry days (next week, by the look of the forecast), so I can stain them safely.