Converting a loc to battery power? how?

justme igor

Registered
Country flag
I am not sure if this is the right section?
I bought a diesel loc on Cata wiki, for experimental use.
I would be surprised if this one is a good runner, judging by the condition of the wheels. (Pretty dented)

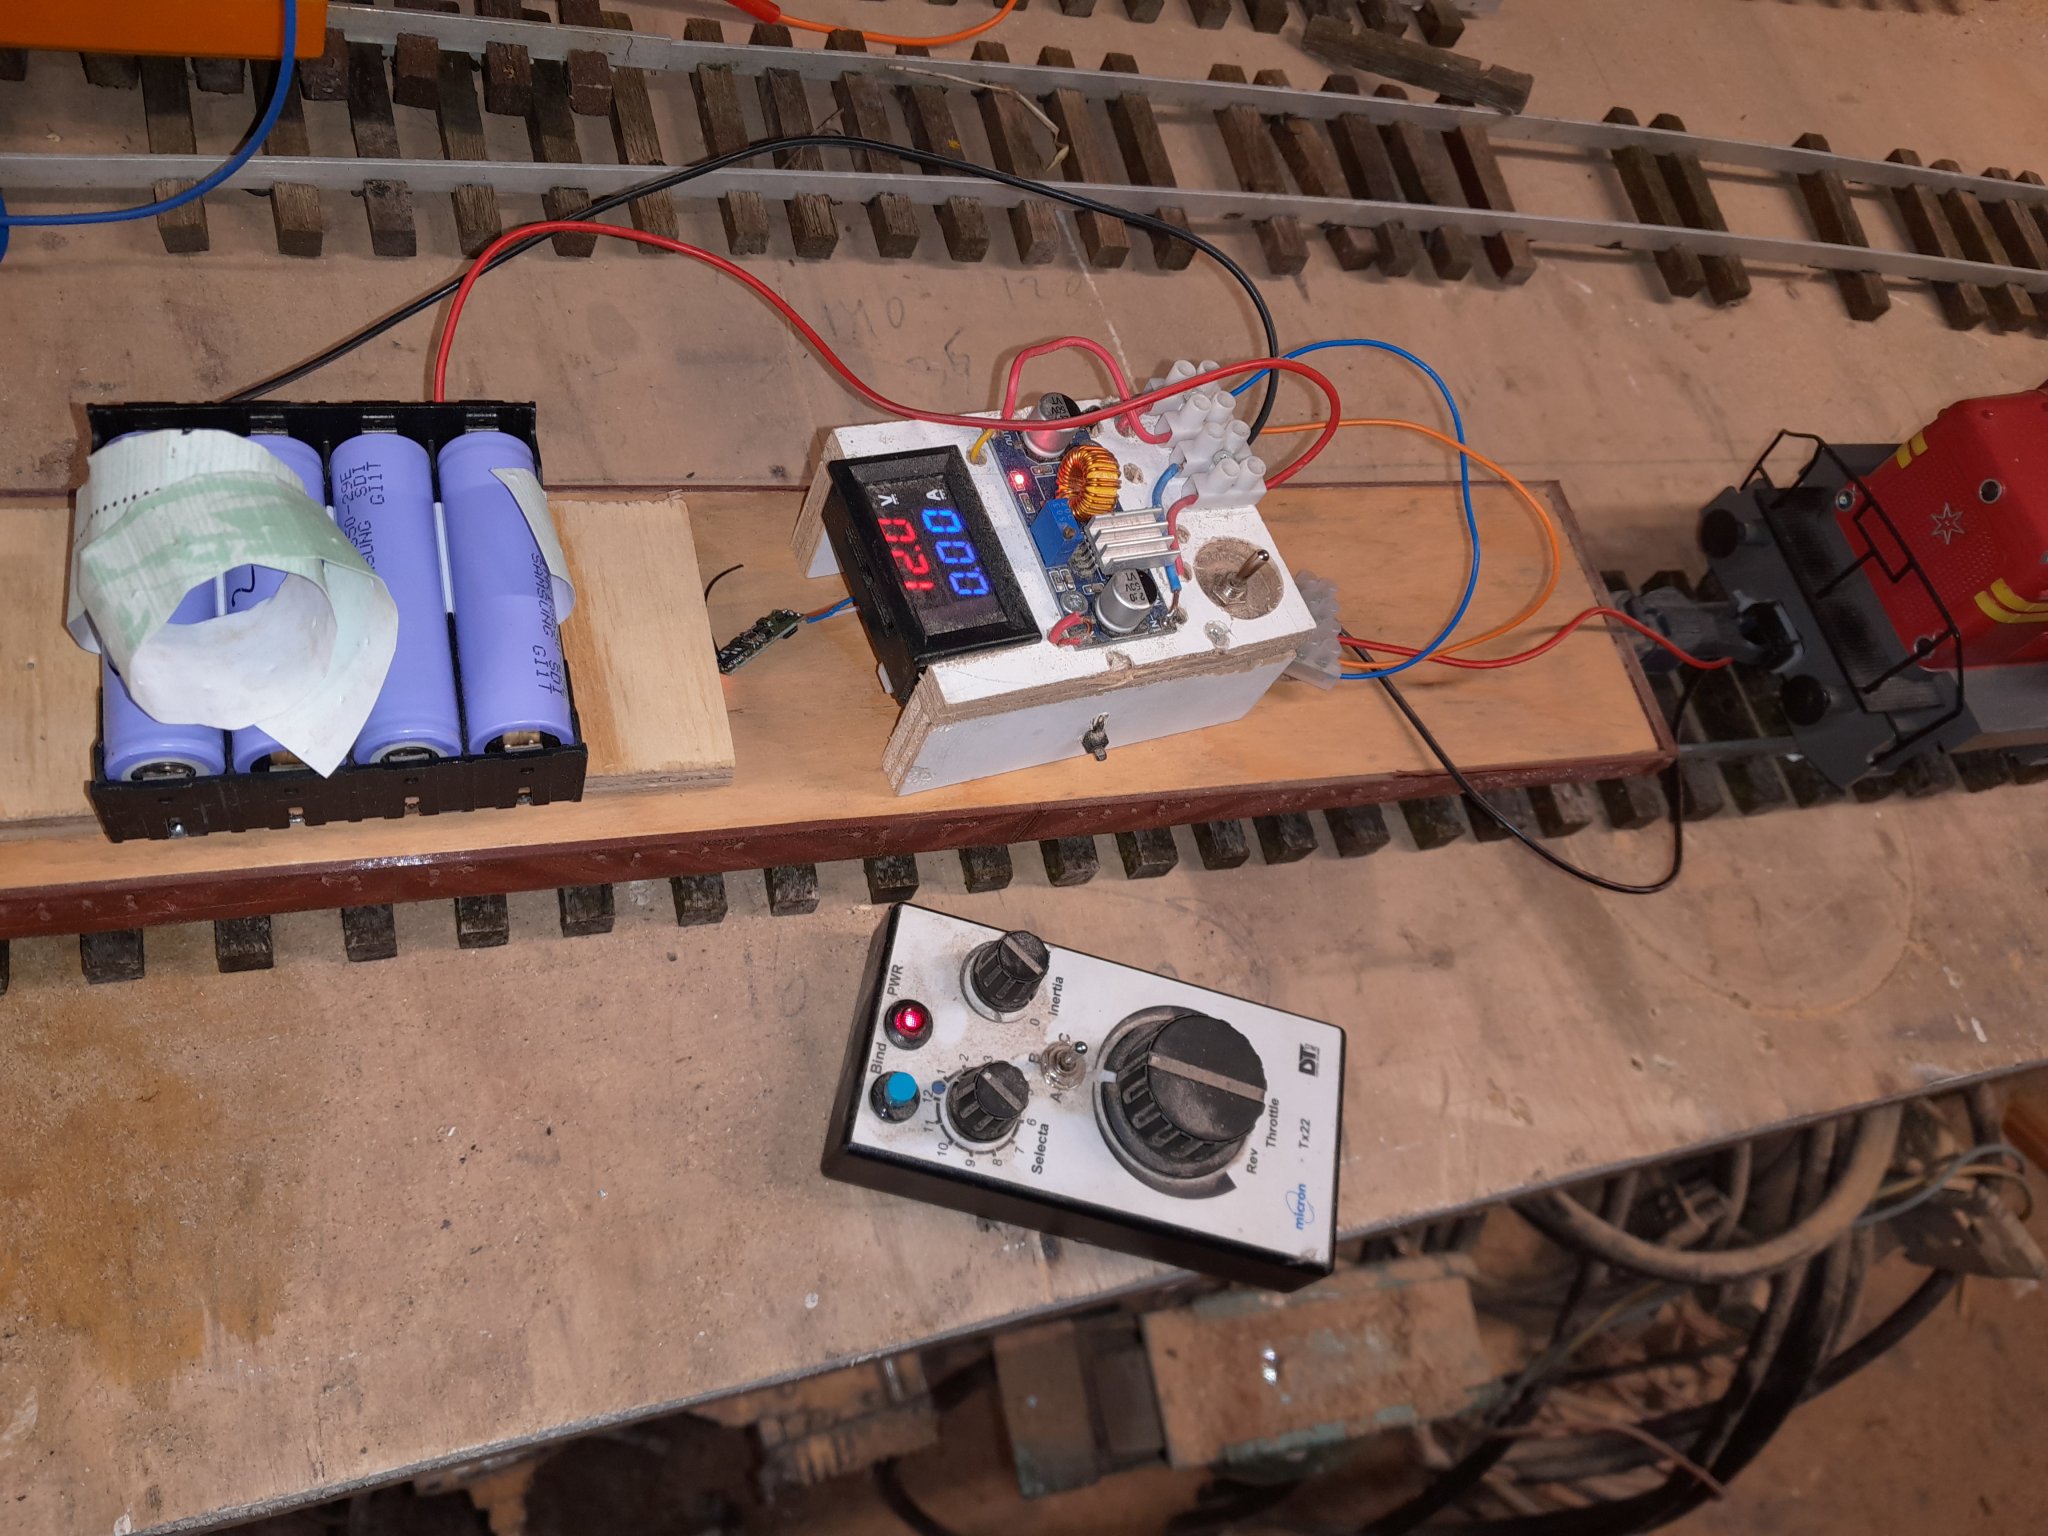
But i bought it as a experimental loco, already figured out that there is a difference in hight between the European, Usa and the Ussr couplers:confounded::confounded::confounded:

Anyway: Were to connect the new wires that are going to lead to the new dc battery?
I dont think that there are any ac motors. i could be very wrong in this?

How much voltage can apply??? max 24Vdc?
Its a Marklin btw

20240705_163553.jpg
I think i must solder onto those two? This would be my first guess.
You see those diodes in the next picture? they are from a single point, i think that could be one lead and the frame is the other lead?


20240705_163645.jpg.Or on those two? i think not? cous they lead to the LED's but i could be very wrong?

I really hope someone can shed a light on this were i need to solder to get him on battery power, and how much voltage max.

With best regards Igor.
 
Second picture :
I don't see a diode, but do see a small ceramic capacitor.

Wires running off could well be to LEDs.

A meter, on continuity, should let you work out how power gets from the wheels up to the motor..

If you have a length of 'dead' (nothing connected) track, you don't even need to isolate the pickups/wheels.

9.6V - 12V will be plenty to test running on your track..
The model number should allow you to discover the specifications for the system the model is designed for. - Hence the maximum voltage.

Have fun!

PhilP
 
A meter, on continuity, should let you work out how power gets from the wheels up to the motor..
Fully agree, but i would like to make sure, before smoke apears....where there is smoke is fire....euh oh no...where there is smoke nothing works anymore...:D:D:D:D

If you have a length of 'dead' (nothing connected) track, you don't even need to isolate the pickups/wheels.
Also good one! my tracks are connected with metal(turnouts), i think i need to isolate the pickups /wheels.
Snipping a wire off, done!
(some length? i am aiming for 1200 meters in my garden....no, i am not mad:cool::cool::cool:....without the track length (or the connection to) of Amsterdam cs.in 1936....:tmi::giggle::giggle:)

9.6V - 12V will be plenty to test running on your track..
Deltang can do this, yes!!!! i am happy.

The model number should allow you to discover the specifications for the system the model is designed for. - Hence the maximum voltage.
NO. OF ITEMS
1
BRAND
Märklin
SCALE
1
CATALOGUE NUMBER
5719
POWER SUPPLY
DC - Direct current
CONTROL
Analogue
CONDITION
Good condition
PACKAGING
Without original box
ADDITIONAL INFORMATION
Work locomotive no. 25

Hence the maximum voltage.
That was all the info, no max voltage was stated.
For track making i am pretty good, for my next step i miss a lot of info.....((converting/building) locos to battery and rc powered.(some with Deltang))
Just wanted a piece or two to test my tracks.


I made some better pictures...i am glad i did not put the soldering iron on it yet.....
20240705_181539.jpg
Where the screwdriver is pointing those wires are coming from the frame.
Maybe connection to the other wheel set/side that has not the "pick up's" (still have to get my meter....)


20240705_181447.jpg
Where the screwdriver is pointing is the wire that is from the "pick-up's".

20240705_181600.jpg
What is this third wire doing there?
20240705_181654.jpg
The third wire is leading to this point of the screw driver, I think it is a "branch" for lower V for the LED's
So solder a wire from the frame(picture one) before the diodes.
And the second wire directly after the pickups.(picture two)
Max at 12V as stated or max at 24V? cous those LGB power supplies deliver 24V( i am assuming also for cable/track length losses!) but max V motor?

With best regards and thanks in advance Igor.
 
All sounds good.

It looks like the frame/chassis is live to one rail?

As long as the other pickup (from the wheels) is isolated, you are good to go.

Diodes are for lighting. - You can leave these.
There should be a resistor (resistors) somewhere..

Start with 12V. - If it is too low, the loco will run slow.
Then increase the supply. - Beware! Some of the later Deltang receivers do not like more than 18V!

PhilP
 
Diodes are for lighting. - You can leave these.

Ah, no. They are essential to the correct operation of the motor on DC current.

The motor in the photos is a basic Marklin AC type with a twin field coil magnet (that is, there is no permanent magnet in the motor, as there would be in a common model railway loco).

The diodes "steer" the DC voltage into the correct field coil for the desired direction of travel. In a Marklin AC loco the diodes are replaced by an over-voltage toggling/latching relay which performs the same function.
 

I would suggest you get hold of an 8X AA Battery Holder Coil Spring Contact, Snap Fit, this will give you 12v on standard non-rechargeable AA batteries. Connection this with one connector on a clip the other with loose wire should allow you to understand what is occurring and where plus giving you an indication of how fast the motor will run on 12v. It should also allow you to play around with mixing and matching various wires with power not permanently attached to see how things are.​

I used to have a chassis much like this but sold it many moons ago so not able to play with it to help further.​

 
20240707_130102.jpg
Well i made a battery and toke a voltage regulator.
All went well.
To get a movement i had to go to 8V.
With the help of my dmm i could figure out where the dcv was going to.
20240707_130415.jpg

This one was a no brainer, direct with contact on the wheels and rails.
How ever the other lead?


20240707_130350.jpg
Was a copper spring in the frame that pick up the power via the other side of the wheel....
Never saw that one.
Both contacts were pretty poor, i think the copper spring is a bit done also the other pick ups are done aswel.

The loco was also bone dry, dry as a dessert regarding oil.
Adding up everything yes this was a very bad runner, electronically and mechanically speaking.
Some compressor oil and the bad noises were gone....
Heated up my soldering iron.

20240707_131222.jpg

And also soldered the other wire after snipping it of to avoid short circut.

20240707_163001.jpg
I can go with deltang to 13.0V just to be save i set the max volt to 12v.
With the tlc that the loco received it starts to run from 3.0v instead of 8V.
It purrs like a kitten....But i also think the carbon brushes in the motor needs to be replaced?
They spark a lot, not smelly yet.
I think i will make some new ones in the future of good old ferriet.

With best regards and thanks.
 

Attachments

  • 20240707_162916.jpg
    20240707_162916.jpg
    457.7 KB · Views: 0
Quick set up in the shed, was to wet outside to make a testing track.
Was very nice to see all running good, no derailments.
Tested also my siccor crosover (prototypical) derailments in a instand...
For track making i need wider gaps, 2.7mm to max 3mm and not below 2mm.
Screenshot_20240707_194514_Gallery.jpg

It even made the realistic "squeaking" sounds when it toke the curve.

with best regards Igor
 
Back
Top Bottom