David1226
Registered
Having built two water towers, one for Gernise End Station and one for Phidell Yard, and two water cranes to go with them, I was in need of a pair of locomotive coaling stages to complete the loco servicing facilities at those locations. I looked at the few commercially produced items and decided that none would fit into the space available, i.e. in the gap between the tracks, as they were all too wide. I was left with no choice other than to scratch build.
My preferred building medium has always been polystyrene sheet, or plasticard. For these builds, I used 3.0mm thick sheet. The rear and left hand walls are double thickness glued together, the front and right hand walls are single thickness, but doubled up where the corners meet. The decking and steps are single thickness. The ‘steel’ strip reinforcing bars are 2.0mm wide strips of 0.5mm plasticard. The bolt heads are the usual 1.0mm self adhesive pearl jewels. As with most of my scratch builds, I start with an idea and design it as I go along. This time, I got it wrong, the rear/side walls were too high, it didn't look right, I had to saw 15.0mm off the height and remodel the tops of the walls, at least I would have the dimensions right for when I started the second model.
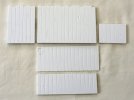
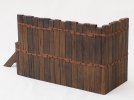
Below is a view of the completed walls and decking, prior to assembly. I scribed the planking and wood grain then added some extra areas of distress. I cut to tops of the tall walls, and the front edge of the decking, to give an uneven rustic appearance.
The final footprint of the assembled models, not including the footsteps, is 156mm long x 70mm wide. The models measure 53mm to the top of the deck and 98mm to the top of the walls.
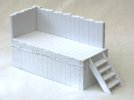
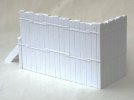
I glued together a couple of layers of scrap expanded polystyrene foam and carved them into the rough shape of the coal heap, which I then glued into place.
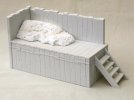
Having built the model, it was given a spray coat of grey plastic primer, prior to painting. Unfortunately the primer paint reacted with the expanded polystyrene and melted it. The overall effect was not too catastrophic, but it did require a bit of reshaping once everything had set and dried. To cover the white areas that had either melted or been cut away, I gave the coal heap a coat of black paint, which I would have had to have done anyway, before gluing on the artificial coal. At this stage, prior to painting, the steps are not yet glued on
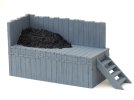
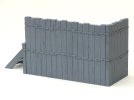
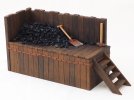
Here is the first of the completed coaling stages. It has been painted and the artificial coal glued on using PVA wood glue. As a finishing touch a 3D printed shovel and a sledge hammer, from SLR Models, have been painted and glued on. As the hammer is 16mm scale, the length of the handle was reduced by 15mm to give a more suitable appearance.
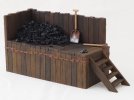
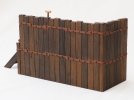
Here is a view of the second coaling stage, finished in the same way as the first.
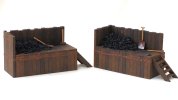
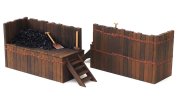
Here are a couple of views of the two coaling stages together.
David
My preferred building medium has always been polystyrene sheet, or plasticard. For these builds, I used 3.0mm thick sheet. The rear and left hand walls are double thickness glued together, the front and right hand walls are single thickness, but doubled up where the corners meet. The decking and steps are single thickness. The ‘steel’ strip reinforcing bars are 2.0mm wide strips of 0.5mm plasticard. The bolt heads are the usual 1.0mm self adhesive pearl jewels. As with most of my scratch builds, I start with an idea and design it as I go along. This time, I got it wrong, the rear/side walls were too high, it didn't look right, I had to saw 15.0mm off the height and remodel the tops of the walls, at least I would have the dimensions right for when I started the second model.
Below is a view of the completed walls and decking, prior to assembly. I scribed the planking and wood grain then added some extra areas of distress. I cut to tops of the tall walls, and the front edge of the decking, to give an uneven rustic appearance.

The final footprint of the assembled models, not including the footsteps, is 156mm long x 70mm wide. The models measure 53mm to the top of the deck and 98mm to the top of the walls.


I glued together a couple of layers of scrap expanded polystyrene foam and carved them into the rough shape of the coal heap, which I then glued into place.

Having built the model, it was given a spray coat of grey plastic primer, prior to painting. Unfortunately the primer paint reacted with the expanded polystyrene and melted it. The overall effect was not too catastrophic, but it did require a bit of reshaping once everything had set and dried. To cover the white areas that had either melted or been cut away, I gave the coal heap a coat of black paint, which I would have had to have done anyway, before gluing on the artificial coal. At this stage, prior to painting, the steps are not yet glued on


Here is the first of the completed coaling stages. It has been painted and the artificial coal glued on using PVA wood glue. As a finishing touch a 3D printed shovel and a sledge hammer, from SLR Models, have been painted and glued on. As the hammer is 16mm scale, the length of the handle was reduced by 15mm to give a more suitable appearance.


Here is a view of the second coaling stage, finished in the same way as the first.


Here are a couple of views of the two coaling stages together.


David
