David1226
Registered
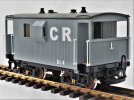
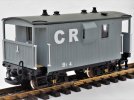
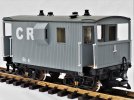
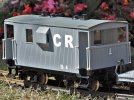
Some time ago I decided that the Claptowte Railway needed a third goods brake van to help handle to freight traffic. In order to ring the changes I thought it would be nice to have a bogie brake van. I looked around for a suitable donor vehicle, to kit bash, and found a LGB bogie caboose on eBay. I obtained the caboose for not a lot of money as it was missing a ladder top from one end, this was not an issue as the ladder and all of the roof detail was to be discarded anyway. I set about modifying it into something more British in appearance. This was about two and a half years ago, but having made a start it was put aside, until now, while I got on with other projects, I have only just finished it.
The donor caboose
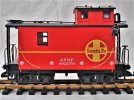
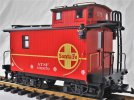
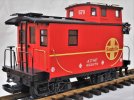
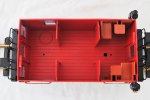
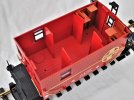
The first alteration that I carried out was to remove all walkway, ladder and handrail detail from the cabin and cupola roofs. I then removed the cupola which left a large aperture in the cabin roof. Fortunately the radius of the cupola roof exactly matched the cabin roof, so it was just a case of cutting off the cupola roof and trimming it to size, to fit the aperture.
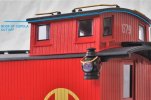
It was necessary to extend the length of the roof by gluing on a 5mm strip of plasticard to each end. There were numerous holes, in the roof, left by the removal of the various detail items. These were all filled in, as was the joins where the cupola roof was fitted, and everything was sanded flush.
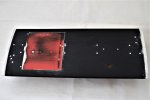
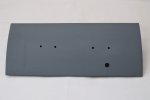
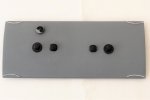
After this I sprayed the roof with grey plastic primer. I retained the hole for the stove cowl and I drilled new holes, on the centre line, to take a pair of GRS lamp tops and a pair of air vents. On the four corners I glued on some thin strips of plasticard to act as rain strips.
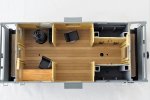
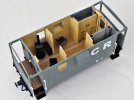
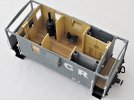
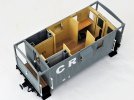
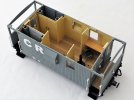
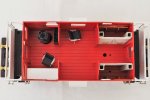
My next task was to set about altering the interior of the cabin. The elevated tables and chairs that sat beneath the cupola had to be removed. This was no simple task as they were well and truly glued in and had to be hacked out. This left the walls of this compartment in a bit of a state, so, to cover the damage, I made up some dummy cupboard and drawer fronts, from plasticard, to turn this into a storage area
At the opposite end of the cabin I noted that there were raised lines on the floor, identical to those in LGB Jackson Sharp coaches, to locate a stove and associated coal bin. While these items were not fitted to the caboose when I purchased it, I had these items in my spares box, left over from my buffet car conversion. These were allocated for later fitting. On the opposite side of this compartment I fabricated a table/bench/desk from plasticard.
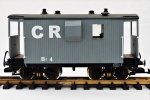
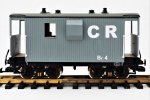
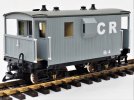
On the outside of the body, I removed all of the wire handrails, carved off the fixing points and filled in the holes. The lamps were removed and mounting slots filled. I cut apertures, centrally, in each side of the body and fabricated guards duckets over each one, using plasticard.
I cut off the railings from the end balconies and replaced them with closed in ends, again fabricated from plasticard. I attached a GRS etched brass lamp iron to each end. On the buffer beams I glued on LGB Toy Train buffers, salvaged from a past conversion when making a single bogie coach from two Toy Train 4-wheel coaches. I glued spacers, from off-cuts of 3mm plasticard, to each buffer beam, and drilled them to receive brake pipes from the same source as the buffers. On the four corners, each side of the balcony steps, I drilled and fitted handrails made up from GRS white metal handrail knobs and brass wire.
The plastic wheels were replaced with Al Kramer bright nickel plated solid turned brass wheels, imported from the US. These are the standard wheels on Claptowte Railway rolling stock, they impart a low centre of gravity due to their weight.
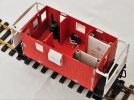
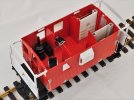
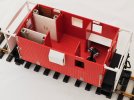
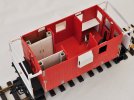
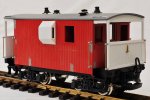
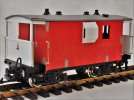
Everything was then temporarily assembled for photographs ‘in the raw’ prior to painting and final assembly.
The final addition to the interior was to add a couple of 1/24 scale swivel chairs, from eBay.
David
The donor caboose


The first alteration that I carried out was to remove all walkway, ladder and handrail detail from the cabin and cupola roofs. I then removed the cupola which left a large aperture in the cabin roof. Fortunately the radius of the cupola roof exactly matched the cabin roof, so it was just a case of cutting off the cupola roof and trimming it to size, to fit the aperture.

It was necessary to extend the length of the roof by gluing on a 5mm strip of plasticard to each end. There were numerous holes, in the roof, left by the removal of the various detail items. These were all filled in, as was the joins where the cupola roof was fitted, and everything was sanded flush.

After this I sprayed the roof with grey plastic primer. I retained the hole for the stove cowl and I drilled new holes, on the centre line, to take a pair of GRS lamp tops and a pair of air vents. On the four corners I glued on some thin strips of plasticard to act as rain strips.


My next task was to set about altering the interior of the cabin. The elevated tables and chairs that sat beneath the cupola had to be removed. This was no simple task as they were well and truly glued in and had to be hacked out. This left the walls of this compartment in a bit of a state, so, to cover the damage, I made up some dummy cupboard and drawer fronts, from plasticard, to turn this into a storage area
At the opposite end of the cabin I noted that there were raised lines on the floor, identical to those in LGB Jackson Sharp coaches, to locate a stove and associated coal bin. While these items were not fitted to the caboose when I purchased it, I had these items in my spares box, left over from my buffet car conversion. These were allocated for later fitting. On the opposite side of this compartment I fabricated a table/bench/desk from plasticard.
On the outside of the body, I removed all of the wire handrails, carved off the fixing points and filled in the holes. The lamps were removed and mounting slots filled. I cut apertures, centrally, in each side of the body and fabricated guards duckets over each one, using plasticard.
I cut off the railings from the end balconies and replaced them with closed in ends, again fabricated from plasticard. I attached a GRS etched brass lamp iron to each end. On the buffer beams I glued on LGB Toy Train buffers, salvaged from a past conversion when making a single bogie coach from two Toy Train 4-wheel coaches. I glued spacers, from off-cuts of 3mm plasticard, to each buffer beam, and drilled them to receive brake pipes from the same source as the buffers. On the four corners, each side of the balcony steps, I drilled and fitted handrails made up from GRS white metal handrail knobs and brass wire.
The plastic wheels were replaced with Al Kramer bright nickel plated solid turned brass wheels, imported from the US. These are the standard wheels on Claptowte Railway rolling stock, they impart a low centre of gravity due to their weight.
Everything was then temporarily assembled for photographs ‘in the raw’ prior to painting and final assembly.
The final addition to the interior was to add a couple of 1/24 scale swivel chairs, from eBay.


David
Last edited:

