NCS from Qbyn
Registered
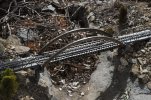
OK, so I had this really nice little wooden bridge that I had made for me in the USA by Lonestar Bridges [oddly enough in Texas, but now I think they have ceased trading] and shipped out to Australia. This is what it looked like a few years ago.
Then, in November last year disaster struck, in the form of a huge tree branch that fell from a great height - fortunately, when I was nowhere too close! My bridge then looked like this:
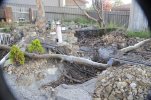
and from another angle:
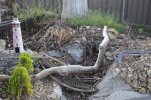
You will note that the deck of the bridge acquired a V shape profile - the wood was splintered. The arches were also rather bent and one was broken in two and a small piece was missing altogether. [I still haven't found that bit!]
My initial reaction was that the deck was a write-off and I thought of repurposing the arches for a less elegant home made replacement bridge. However, after some reflection and the purchase of a chain saw to remove and deal with the offending branch, I thought I would try to repair the bridge to something close to its original state. So first I had to deal with the splintered V shaped profile. I was able to carefully clamp the two sides of the split to get it almost flat. Then I bolted two strips of wood under the deck to one half and then bolted them to the other, while also applying glue to the splintered join. This process served to flatten the deck and restore its strength. I then filled in the several gaps in the structure with a self-hardening putty-like two-part polymer repair compound covered with some plastic wood.. Finally, I sanded off all the previous varnish and prepared the bridge for a new varnish treatment.
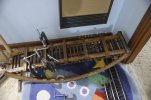
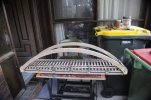
This left the bridge looking somewhat restored - as shown above.
I then put 2 coats of Cedar varnish followed by a clear coat - the last was to improve UV resistance.
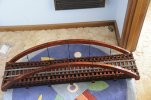
Then I had to repair the bent and broken cable stays, including adding a piece that had simply vanished.
The net result of all this work can be seen in the next pic.
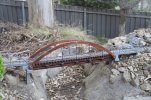
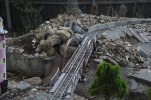
Then I just needed to re-install the bridge and tidy up the track ballast. The following final pics show the end result.
It wasn't such a write-off, after all!

Then, in November last year disaster struck, in the form of a huge tree branch that fell from a great height - fortunately, when I was nowhere too close! My bridge then looked like this:

and from another angle:

You will note that the deck of the bridge acquired a V shape profile - the wood was splintered. The arches were also rather bent and one was broken in two and a small piece was missing altogether. [I still haven't found that bit!]
My initial reaction was that the deck was a write-off and I thought of repurposing the arches for a less elegant home made replacement bridge. However, after some reflection and the purchase of a chain saw to remove and deal with the offending branch, I thought I would try to repair the bridge to something close to its original state. So first I had to deal with the splintered V shaped profile. I was able to carefully clamp the two sides of the split to get it almost flat. Then I bolted two strips of wood under the deck to one half and then bolted them to the other, while also applying glue to the splintered join. This process served to flatten the deck and restore its strength. I then filled in the several gaps in the structure with a self-hardening putty-like two-part polymer repair compound covered with some plastic wood.. Finally, I sanded off all the previous varnish and prepared the bridge for a new varnish treatment.


This left the bridge looking somewhat restored - as shown above.
I then put 2 coats of Cedar varnish followed by a clear coat - the last was to improve UV resistance.
Then I had to repair the bent and broken cable stays, including adding a piece that had simply vanished.
The net result of all this work can be seen in the next pic.

Then I just needed to re-install the bridge and tidy up the track ballast. The following final pics show the end result.
It wasn't such a write-off, after all!


