OK, just a little more info, then!
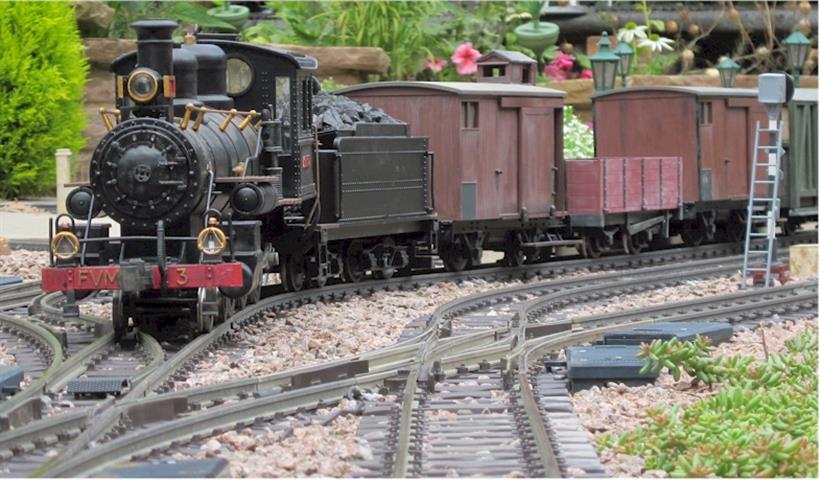
The tender had previously been shortened to look more like the ones shipped to Spain. I did this by eye with a 12inch hacksaw and you can hardly see the join, which was lucky! About 30mm was removed and real coal was used to fill it up.
The loco has several replacement parts from a cannibalised battery model and so I was able to create a cab again more like the Spanish locos, with round spectacle plate windows and partially blanked side windows. The more understated chimney was used in place of the original model's huge smokestack, as this Baldwin is supposed to be one of the later (20th Century) imports - though ones supplied to Spain in the previous century did indeed have the full 'Wild West' look about them, including cowcatcher. The whistle was shifted, a cosmetic reach rod added and the footplate extended so that there is no visible gap between tender and loco, even on tight curves.
The cab has been tarted up with some extra bits of pipework and valves etc, the latter being haberdashery poppers, as is the replacement handle on the smokebox.
Lamps are GRS whitemetal castings, drilled to accommodate the wires, and there is just enough room in the hollow buffer beam to fix some screw connectors. Plasticene takes care of surplus cable, the intention being to allow a bulb swap without having to disassemble everything, handy as I am going to replace the GoW bulbs with LEDs now. Most fiddly was the brass triangle that is fitted to lamps in Spain - despite my fat fingers, I managed to make tiny shapes from 15A fuse wire and attach with epoxy resin. All three lamps are wired in parallel. An LGB vacuum pipe was added after this photo was taken.

Side-facing number plates on the top lamp are cobbled from plasticard and Dymo label, though for this second instalment of the bash I got all posh and used proper Slaters letters for the bufferbeam brasswork (I found a 40 year old packet which luckily had the right characters!). Brass nameplates were commissioned a while ago, when I wasn't living on just a pension! With no cowcatcher required, I was able to carefully cut off the front steps and stick them further inboard, as they were in danger of fouling my curved platforms.
The model is a lovely runner and for someone like me, with a very limited budget, it has provided an authentic-looking big loco for relatively few pounds.


")