You are using an out of date browser. It may not display this or other websites correctly.
You should upgrade or use an alternative browser.
You should upgrade or use an alternative browser.
Assistance needed please.What should i do different without any woodworking skill.Very Unlevel Loco issues when running.
- Thread starter Rob1962
- Start date
Northsider
Modelling the Northern half of the Isle of Man
Hi Robert, and welcome to the Forum!
Firstly, congratulations on choosing this scale -you've got some beautiful locomotives! And using tables is a decent start, but if the floor isn't level, you are building in problems. So your best way forward is probably to Google 'model railroad baseboards', which will give you loads of information. You could buy a kit, or have a go yourself. The advantage of a kit (or plans) is that someone else has made their mistakes and learnt from them, so you don't have to. Some kits/plans come with adjustable legs -usually a screw device on each 'foot'- which will help with your uneven floor. A frame which has your plywood boards screwed to it should give you a good base to work from, and give good, reliable running.
Firstly, congratulations on choosing this scale -you've got some beautiful locomotives! And using tables is a decent start, but if the floor isn't level, you are building in problems. So your best way forward is probably to Google 'model railroad baseboards', which will give you loads of information. You could buy a kit, or have a go yourself. The advantage of a kit (or plans) is that someone else has made their mistakes and learnt from them, so you don't have to. Some kits/plans come with adjustable legs -usually a screw device on each 'foot'- which will help with your uneven floor. A frame which has your plywood boards screwed to it should give you a good base to work from, and give good, reliable running.
Rhinochugger
Retired Oik
The secret for those of us who can't cut a straight line across a piece of wood is to cheat. So:
For uneven floors - use a screw foot at the bottom of the legs so that you can adjust each one up and down to suit.
For timber pieces - use the square cut corner of the board as a starting point. If you need accurate pieces, see if you can find a local timber merchant who will cut timber and board to size ................... because they always cut straight, using equipment that we would not have at home.
Remember the old builder's rule for defining a right angle - 3, 4, 5 - where you measure 3, or 30 or 300 of any unit along one side, 4, or 40, or 400 of the same unit along the other side and then 5, or 50, or 500 of the same unit for the diagonal (hypotenuse if you can remember Pythagoras's theorem from school) and that will always give you a right angle.
Lastly, take time and do it slowly, and even bodgers like me sometimes get it right
FatherMcD
Registered
Wow, right into the deep end with live steam! I'm impressed. You've emphasized your lack of wood working skills, so I'll assume you want something as simple as possible using what you already have. I'd start with over center catches or chest catches like these from Home Depot https://www.homedepot.com/p/Everbil...tin-Nickel-Chest-Door-Latches-29107/314151353 to hold the plywood pieces in alignment. They can be screwed to the top or bottom of the plywood so the top surface will be more stable. Then get some door shims, wood or plastic, from Home Depot, Lowe's or your local builders' supply and put them under the legs of the tables until the plywood top is level. Those aren't particularly stable or permanent, but will help until you get to the next step which would be shopping for "round tube leveling feet" on eBay or elsewhere. Measuring the thickness of the shims will give you and idea how much adjustment you need. Replace the end caps on the table feet with leveling feet that match the tubing size. I did this on the feet of a folding ping-pong table base that I used as the base for my version of the two-door railroad. I had to cut about an inch off the end of the legs to match the height of the casters on the center section, but you probably won't need to. Your three tables are probably adequate for what you are trying to do, but the file cabinet may need to be moved so that the plywood tops are supported just by the tables. For more stability, you could bolt the plywood to the tables. These ideas would help with the leveling issue using what you already have. After that, I'm sure you will be inundated with many creative ideas from other forum members on how to proceed and at some point warpage of the plywood may become an issue. I'm sure I've seen posts with someone running live steam over plastic grass, so hopefully they will chime in with their advice. Best of luck!
maxi-model
UK/US/ROW steam narrow gauge railways 1:1
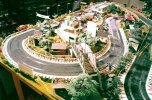
Personally I would frame the underside of each board (I used 9mm ply boards on my layout) with 2" x 2" and add a couple of cross braces. Glue and screw. No need for fancy mitre joints, butts will do. Then 2" x 2" again for legs to provide the working height you want. Secure and glue into corners of frames. Into these legs you need to either screw in some large coach screws, at the bottom, to act as levellers or drill in holes to leg bases and fit adjustable levelling feet. Finally when you get the bases on their feet, leveled and lined up drill a couple of holes to allow you to pass coach bolts through to secure them together to stop bases falling apart or out of level. All I had to do was measure up, contact a wood supplier who precut everything then all there was to be done was screw and glue it all together. Thankfully I got the measuring right, went together like CKD job.
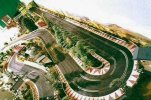
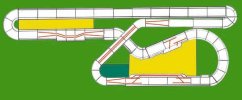
This is how I built my 14' x 9' scenic Scalextric layout where similar uneven floor conditions, quarry tile, were the issue. Picture below. Edit - I have 0 woodworking skills. I just winged it, how hard could it be ? Well, I built a very wobbly set of stepladders at my primary school woodworking sessions. Otherwise it's IKEA prefabs all the way with me.
If nothing else ditch those tables under your bases they don't help. Bit flimsy. Max


Last edited:
Welcome to the forum! Good advice has already been given, but just one more suggestion. Remove a straight length of track from each side, "G" scale locos are heavy, live steamers even more so. The track seems to be almost off the edge of your boards, a guaranteed disaster!
People are genuinely happy to help with little tips etc, but beware of the humour!
People are genuinely happy to help with little tips etc, but beware of the humour!
Welcome to the forum, as Rhino says much good advice there and by others in their replies. For my part, woodwork need not be difficult but the right tools do help.
A Square to mark where the cut will go if you decide to make supports (2x1 inch timber is good) for the boards.
A new saw with a lot of blades for nice neat cuts.
A couple of clamps to hold the work while you are cutting tgen to hold the supports to the boards.
You could join the boards as suggested with bolts or easy release clips either will do a good job.
This suggests an electric drill, one that can drill and take screw attachments.
Screws, decide your type PZ or PH and use the correct size screw bit to screw them in, a pilot hole a short way heps get the screws in easier, use a slow speed on the drill do up the screws carefully.
If the screws do not fit in level with the board, take them out and slightly use a counter sink, then screw back to get in place.
maxi-model
UK/US/ROW steam narrow gauge railways 1:1
Regarding the scenic bit. Remember you are using live steam locos. You need a separate "steam up area". Preferably using wooden sleeper track, or a hardwood panel with 45 mm gauged grooves, butted onto a siding. LGB track has a habit of melting under live steamers left to brew up for too long (as do nice expensive Massoth rolling roads). Don't ask me how I know. Join Narrow Gauge Railways in your Garden - Association of 16mm Narrow Gauge Modellers they have members in US and a number of groups operate indoor tracks. They even have a group wide "Modular" layout team.
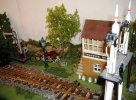
My garden railway has an indoor section, photos below. Its a simple 2 line siding that joins by a hole in a wall (catflap) to go into my garden. All the vegitation you see on there was recycled from the scenery on the slot car layout I posted. Waste not want not. The base was painted mid green, and as the paint dried scatter material was applied. Track was laid and pinned on this. Then in went the ballast (potting grit) mixed with watered down PVA. Added "clumping" material to give it some texture, like weeds growing. Then liberal quantities of dyed litchen (varied to give it some interest. There are various bits of cork bark and bits to represent a rock face. Then I added trees, they come from various sources LGB, Buch, etc'. Off the shelf large scale are out there, some artisan made too. Most of this comes from regular model railroader suppliers. Then add buildings to suit, I used mostly shallow profile because of limited space - the sidings live behind my sofa as top of back cushion height ! You can Use Pola (LGB) and Piko kits, there are plenty of resin and laser cut wood specialists too. Then finally populate. Again lots of choice there, LGB, Preiser, Schleisch, Bachmann. But check your scale, most available are 1:22.5, your live steamer looks like a UK made 1:19.3 scale (16 mm). Oh, and one very important thing, I keep a small (about 12 " high) fire extinguisher handy.
Main thing have fun and let your creativity rip. Do it your way. I have seen some layouts that use 2 very disparate scales for fun effects. Like a miniature railways running by a full size one. Oh, by tge way I got so wrapped up in this I forgot to say wellcom. Max
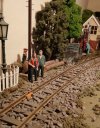
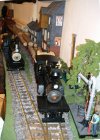
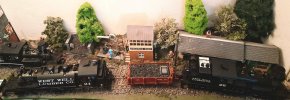


AlanL
Registered
Your railway looks pretty level so why do you want it perfectly level?
A real railway (live steamers are usually narrow gauge) of what you are running wouldn't be perfectly level.
I assume that you want to keep things simple and easy to implement.
Do you need to pack away the railway on occasions or will it be permanent?
If it will be a permanent structure then add some structure and extras as others have suggested.
If it is a temporary base then certainly add an extra table or 2 and if the levels are seriously off then simply pack between the tables and the plywood as necessary using anything suitable and discreet.
AL
ARIA31
Registered
My own experience, I started by putting a large table under a flat wood plate.
Now I would like to remove this table but it is totally impossible ! because it is locked by the layout growth.
Then my layout is made of several surfaces placed asides each other.
They are linked by clamps or screwed together.
Several surfaces are placed on metallic feet found in the french home depot we have here.
At last I built from scratch several tables with a large quantity of unused wood I have under storage.
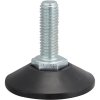
To get all built tables leveled I put a screw device at the bottom side of all the feet, got from the same DIY shop.
What is important is to select the right heigth, the higher is the best so that your train are closer to your eyes level.


