beavercreek
Travel, Art, Theatre, Music, Photography, Trains
It has been a long time since I started a thread that wasn't selling something on the forum.
My layout has been sidelined a bit for the last two or three years but I have run some live steam and battery but not electric.
The ballast in places had become an issue after five years as the trackbed had 'heaved' with the clay soil and cracked the ballast apart so it was time for a bit of intensive re-ballasting.
There are three tunnels on the layout, two constructed from rocks and sandstone stepping stones, the third is really just a hole through two largish overhanging bushes.
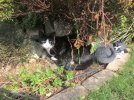
One of the bushes that made the bush tunnel had died and the area around the tunnel had become pretty unkempt.....
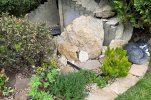
So...cut out the dead bush, pretty up the area and installing a proper tunnel had to be done.
First the PVA glued ballast had succumbed to the heaving soil and was being sucked up when I hoovered off the pine needles from the tree above (so so many of them!) so it had to be all renewed with 1-2mm granite.
For the tunnel portals and the retaining walls I had purchased, years ago from a meeting, some Aristocraft hard foam pieces.
The Aristo pieces were dark grey and so they needed painting and weathering to fit into my layout's 'ambience'. The weathering was also done to the retaining walls
The tunnel lining was constructed from a large sheet of flexible hard coated foam-board with wooden struts longitudinally stuck to the outside for strengthening.
I used textured preprinted brick/block sheets to decorate the inside of the lining...theses were soaked in anti slug fluid and then dried before being stick onto the lining and then sprayed with matt varnish
The lining was rolled and tied in that condition to give it a 'natural' curl for when it would be fixed to the portals.
I glued wooden pieces to the back of the portals to act as a 'former' to keep the lining curled in the correct arc when it was fixed to the portals.
Also some wooden blocks were screwed to the lining with brackets to screw to the wood on the portal back... I wanted this tunnel to be impervious to anything!
With the dead bush removed, the new ballast in place and rocks ready to site, the portals and lining and then retaining walls were installed.
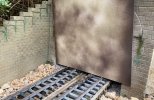
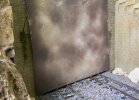
I had a couple of offcuts of foam-board so the tunnel now has 'plugs' to keep leaves and critters out.
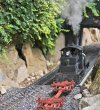
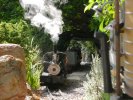
The first photos show a live steam shay emerging from the bush tunnel before the bush died...
The old 'bush' tunnel lower portal
The old 'bush' tunnel upper portal
The dead bush and untidy area around the 'bush' tunnel
'Dead overhanging bush gone and area cleaned up'
Finished 'real' tunnel lower portal
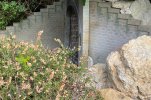
Finished 'real' tunnel lower portal (2)
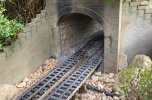
Finished 'real' tunnel upper portal
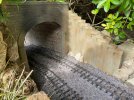
Finished 'real' tunnel upper portal (2)
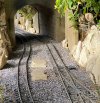
Tunnel 'plug' lower from foamboard offcut
Tunnel 'plug' upper from foamboard off cut
My layout has been sidelined a bit for the last two or three years but I have run some live steam and battery but not electric.
The ballast in places had become an issue after five years as the trackbed had 'heaved' with the clay soil and cracked the ballast apart so it was time for a bit of intensive re-ballasting.
There are three tunnels on the layout, two constructed from rocks and sandstone stepping stones, the third is really just a hole through two largish overhanging bushes.
One of the bushes that made the bush tunnel had died and the area around the tunnel had become pretty unkempt.....
So...cut out the dead bush, pretty up the area and installing a proper tunnel had to be done.
First the PVA glued ballast had succumbed to the heaving soil and was being sucked up when I hoovered off the pine needles from the tree above (so so many of them!) so it had to be all renewed with 1-2mm granite.
For the tunnel portals and the retaining walls I had purchased, years ago from a meeting, some Aristocraft hard foam pieces.
The Aristo pieces were dark grey and so they needed painting and weathering to fit into my layout's 'ambience'. The weathering was also done to the retaining walls
The tunnel lining was constructed from a large sheet of flexible hard coated foam-board with wooden struts longitudinally stuck to the outside for strengthening.
I used textured preprinted brick/block sheets to decorate the inside of the lining...theses were soaked in anti slug fluid and then dried before being stick onto the lining and then sprayed with matt varnish
The lining was rolled and tied in that condition to give it a 'natural' curl for when it would be fixed to the portals.
I glued wooden pieces to the back of the portals to act as a 'former' to keep the lining curled in the correct arc when it was fixed to the portals.
Also some wooden blocks were screwed to the lining with brackets to screw to the wood on the portal back... I wanted this tunnel to be impervious to anything!
With the dead bush removed, the new ballast in place and rocks ready to site, the portals and lining and then retaining walls were installed.
I had a couple of offcuts of foam-board so the tunnel now has 'plugs' to keep leaves and critters out.
The first photos show a live steam shay emerging from the bush tunnel before the bush died...
The old 'bush' tunnel lower portal

The old 'bush' tunnel upper portal

The dead bush and untidy area around the 'bush' tunnel

'Dead overhanging bush gone and area cleaned up'

Finished 'real' tunnel lower portal

Finished 'real' tunnel lower portal (2)

Finished 'real' tunnel upper portal

Finished 'real' tunnel upper portal (2)

Tunnel 'plug' lower from foamboard offcut

Tunnel 'plug' upper from foamboard off cut

Last edited:
