You are using an out of date browser. It may not display this or other websites correctly.
You should upgrade or use an alternative browser.
You should upgrade or use an alternative browser.
A new body for an LGB Austrian Bogie Van, now it will be East German
- Thread starter dunnyrail
- Start date
Been a nice cool day with some rain, just what I was waiting for to spend a few hours on this project. So I have managed a couple of the doors and the other 2 are started thus I am happy with todays progress.
First thing to understand with sliding van doors are that they need to pass over any strapping. Thus they need to be blocked out from the bodywork. Either side of and on the opening this is carried out by a rail at the bottom and a rod at the top. The rail has wheels and the rail and rod keep the door in place as it slides open. Tricky to make. Anyhow first pic shows the 3mm plastic coated foamboard being glued to the doors, yes. Mine will not actually work, life is too short but I do like to make them look as real as possible. The doors were all made up and scribed for planks in one piece then cut to length for each door opening. Note the doors are numbered, they are all slightly different!
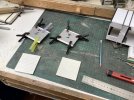
Here you can see I am putting one of the end strappings in place, this is the end that would theoretically slide open thus it has been blocked up to Give the impression that the door can indeed open. The other end is glued to be at the base on the false opening thus partially acting as a stop on the other ends strapping. Though springs or other bump devices are used as well for this purpose on the real thing. These will also be replicated.
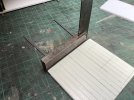
I have added much of the strapping to the door and am on with the wheels that would allow them to slide. I use this punch to make circles out of 10 thou plasticard. Another piece of strapping over the top and extending beyond the door will take the 2 fabricated wheels.
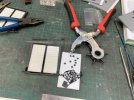
Here you should be able to make out one of the fake wheels made with 3 circle cutouts.
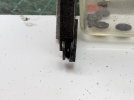
Now I have added the bar that it slides on (3mm deep) and the top tube made out of circular plasticard rod. This stuff does not like to be glued without keying it with emery paper. Odd bits of strapping and other plasticard make up the spacers. The doors will not be glued in place till after I have sprayed everything up.
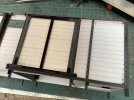
First thing to understand with sliding van doors are that they need to pass over any strapping. Thus they need to be blocked out from the bodywork. Either side of and on the opening this is carried out by a rail at the bottom and a rod at the top. The rail has wheels and the rail and rod keep the door in place as it slides open. Tricky to make. Anyhow first pic shows the 3mm plastic coated foamboard being glued to the doors, yes. Mine will not actually work, life is too short but I do like to make them look as real as possible. The doors were all made up and scribed for planks in one piece then cut to length for each door opening. Note the doors are numbered, they are all slightly different!

Here you can see I am putting one of the end strappings in place, this is the end that would theoretically slide open thus it has been blocked up to Give the impression that the door can indeed open. The other end is glued to be at the base on the false opening thus partially acting as a stop on the other ends strapping. Though springs or other bump devices are used as well for this purpose on the real thing. These will also be replicated.

I have added much of the strapping to the door and am on with the wheels that would allow them to slide. I use this punch to make circles out of 10 thou plasticard. Another piece of strapping over the top and extending beyond the door will take the 2 fabricated wheels.

Here you should be able to make out one of the fake wheels made with 3 circle cutouts.

Now I have added the bar that it slides on (3mm deep) and the top tube made out of circular plasticard rod. This stuff does not like to be glued without keying it with emery paper. Odd bits of strapping and other plasticard make up the spacers. The doors will not be glued in place till after I have sprayed everything up.

The other 2 doors have been completed today and all given a coat of their Brown Livery, this to give things a day or so to dry out before extensive masking prior to Black Spraying the Ironwork. Note that I also put in the Triangled Ironwork on the door tops. Bolt heading will be attacked probably before I spray the Black. I have decided to keep the doors separate for the time being as I need to do window framing before the main body of the van can be sprayed up, again with much masking.
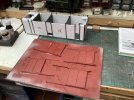

Bit more spraying today, main body got done after I cut out and placed the Window Frames. Another bash at my supply of Coffee Stirrers, But this did not make much of a dent in them. Individual parts were cut using my NW Short Lines Chopper the cut parts being just a little tight so that they would push into place and stay with a dab of Hafix. Glazing will be fitted once the van has been sprayed complete. Fortunately I had a supply of stirrers the correct width for this job.
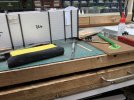
Van body shown sprayed up Halfords Rattle Can Red Primer, this is my standard Brown for German Wagons.
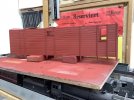
I have started Bolt Heading to the doors, this time no cutting of the pins just a partial Drill through and push fit with my trusty flat headed pliers. The foam that the door is sat on is quite firm so pushing all the way through into it works well. After all done the end 2 lines had a few loose ones where I drilled through to far as there is no Foamboard under those end straps. So a blob of Hafix the other side on all them has been applied with the end of a bent paper clip. Progress is moving on, in the next day or so I should be able to use masking tape so that all the metalwork can be sprayed matt black.
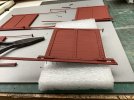

Van body shown sprayed up Halfords Rattle Can Red Primer, this is my standard Brown for German Wagons.

I have started Bolt Heading to the doors, this time no cutting of the pins just a partial Drill through and push fit with my trusty flat headed pliers. The foam that the door is sat on is quite firm so pushing all the way through into it works well. After all done the end 2 lines had a few loose ones where I drilled through to far as there is no Foamboard under those end straps. So a blob of Hafix the other side on all them has been applied with the end of a bent paper clip. Progress is moving on, in the next day or so I should be able to use masking tape so that all the metalwork can be sprayed matt black.

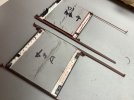
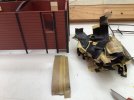
Work today has concentrated on completing the remaining bolt heads on the doors and then cutting off the excess on the rear of the doors as they will be mounted flat on the van sides thus bolt pins sticking out would be undesirable. Where there was no foamboard the pins were cut off with nippers, holding them over a box helps to stop them pinging all over the place with sundry undesirable effects. A strong magnet nearby helps as well. The ones that have passed through the foamboard were cut off using a carborundum disk in my mini drill. Below a before and after view.
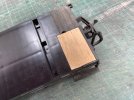
The LGB chassis having a Guards Cabin is missing some platform, I cut a piece of wood to shape but it was still a little thin so some 30thou plasticard was Hafix’d below to get a matching height. My trusty scriber was used to make individual plank scores.
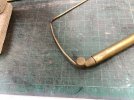
Having today finally worked out what to do to bend small brass tube (heat to red and allow to cool before bending) I bent up a 12 inch piece of 2mm brass tube for the roof overhand and end handrails.
This fits into short lengths of 3mm brass tube held in place by 2 12ba nuts and bolts. The handbrake is made of similar sized tube with a paper slider used for the brake handle. Small pieces of 2mm brass square tube have been soldered in place for Tail Markers. cross pieces are of 2mm square brass and 2x1mm brass flat. The brass all Now been etch sprayed prior to black spraying.
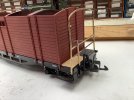

The LGB chassis having a Guards Cabin is missing some platform, I cut a piece of wood to shape but it was still a little thin so some 30thou plasticard was Hafix’d below to get a matching height. My trusty scriber was used to make individual plank scores.

Having today finally worked out what to do to bend small brass tube (heat to red and allow to cool before bending) I bent up a 12 inch piece of 2mm brass tube for the roof overhand and end handrails.

This fits into short lengths of 3mm brass tube held in place by 2 12ba nuts and bolts. The handbrake is made of similar sized tube with a paper slider used for the brake handle. Small pieces of 2mm brass square tube have been soldered in place for Tail Markers. cross pieces are of 2mm square brass and 2x1mm brass flat. The brass all Now been etch sprayed prior to black spraying.

Riograndad
Model Railroading, boats and oil painting,
Just caught up,great job,looking good.

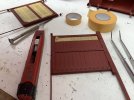
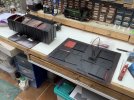
Got on with masking the varying bits for spraying the metal work black. 10 and 18mm Tamiya masking tape used, note also tweezers and a trusty screwdriver for gently pressing in at the edges. On the closest door you can see how I have used the Scalpel (start this sort of project with a new blade) to cut off the triangle corner piece. This was subsequently used to fill in a less than perfectly cut edge that would have let black get onto where it was not wanted. The scalpel is also used to cleanly cut off the tape.
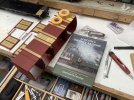
Started on the van main body and got distracted by the posty delivering this book. Needless to say I had to look at the pictures before carrying on. Oh dear distracted by a District Railway book. At the rear can be seen the Leather Scribervthat I have also purchased via the net, an thinking of making an up market mibole phone belt holder.
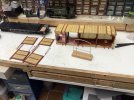
Finally all done, note the end supports in a chunk of wood for spraying after a coat of Etching Primer. That shelf is getting more junked up and those blessed Traffic Cones still not painted.
Spraying up will involve a second coat over all the edges in the hope of sealing the joints then the black spray when the 2nd brown dry, though inevitably a little black may bleed through to the scribed plank lines. All is revealed at the reveal!
Needless to say as I was completing this job it started to rain.

Started on the van main body and got distracted by the posty delivering this book. Needless to say I had to look at the pictures before carrying on. Oh dear distracted by a District Railway book. At the rear can be seen the Leather Scribervthat I have also purchased via the net, an thinking of making an up market mibole phone belt holder.

Finally all done, note the end supports in a chunk of wood for spraying after a coat of Etching Primer. That shelf is getting more junked up and those blessed Traffic Cones still not painted.

Spraying up will involve a second coat over all the edges in the hope of sealing the joints then the black spray when the 2nd brown dry, though inevitably a little black may bleed through to the scribed plank lines. All is revealed at the reveal!
Needless to say as I was completing this job it started to rain.
Now is the reveal time. Having waited a day or so for coat 2 of the Red Oxide to dry off it was time for the Black for the Ironwork. 1st bit of masking removed and looking ok.
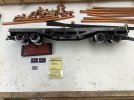
A little diversion to Numbers and the new Wagon Card that have been produced. I have numbered the Van in the correct sequence for Bogie Vans in the Harz even though this one is somewhat fictional. Bits of pipe for Water Cranes littering the workbench started while waiting for paint to dry. Well that is such a boring process. It is always so tempting to get that masking off but it does need a good 24 hours to harden off no matter how dry it may feel to the finger.
Now the bodywork is revealed, note the bit of Masking showing that it has done its job with the Oxide lines that will have ultimately sealed the edges. If that second coat had not worked you would be looking at black lines.
Not a 100% success, just a tiny bit of bleed top right at the end. But that is pretty well all thankfully, that will be resolved by spraying a small quantity of the Oxide into a Spray Can Top so that I can apply a little to loose that black with a brush.
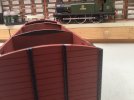
The doors now all revealed.
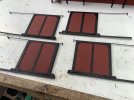
On test fitting the doors I realised there was some view of the inside so the edges have been hand splashed black. Could have saved myself some masking there!
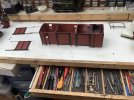
Fitting the doors, the varying slides have been hafixed in place hence the weights from a Trainline Mallet being used to keep things in place, these have proved very useful since being removed from the loco to make space for the Battery Conversion. The van body has been held in place on the donor chassis with LGB crews drilled through into cross pieces of Foamboard within the van body
Next job to sort out the roof.

A little diversion to Numbers and the new Wagon Card that have been produced. I have numbered the Van in the correct sequence for Bogie Vans in the Harz even though this one is somewhat fictional. Bits of pipe for Water Cranes littering the workbench started while waiting for paint to dry. Well that is such a boring process. It is always so tempting to get that masking off but it does need a good 24 hours to harden off no matter how dry it may feel to the finger.

Now the bodywork is revealed, note the bit of Masking showing that it has done its job with the Oxide lines that will have ultimately sealed the edges. If that second coat had not worked you would be looking at black lines.

Not a 100% success, just a tiny bit of bleed top right at the end. But that is pretty well all thankfully, that will be resolved by spraying a small quantity of the Oxide into a Spray Can Top so that I can apply a little to loose that black with a brush.

The doors now all revealed.

On test fitting the doors I realised there was some view of the inside so the edges have been hand splashed black. Could have saved myself some masking there!

Fitting the doors, the varying slides have been hafixed in place hence the weights from a Trainline Mallet being used to keep things in place, these have proved very useful since being removed from the loco to make space for the Battery Conversion. The van body has been held in place on the donor chassis with LGB crews drilled through into cross pieces of Foamboard within the van body

Next job to sort out the roof.
So we are petty well done with this now. Last few build pics.
The roof was attacked with a sub roof of 30thou black plasticard scribed at 5mm intervals along its length then pinned and glued on using the ends and internal bracing. As this would have shown the pins at the next stage I cut out an oblong of Cardboard as a cover.
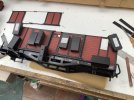
Below you can make out where the supporting pins are and the copious scribing carried out. An end support for the roof has also been cut from HIPS and is being held in place while the UHU glue dries.
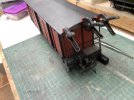
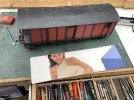
Roof and the card cut to shape, she will forever be preserved in aspic with her face stuck to some plasticard! I,mediately after this pic I did a coat of full strength PVA to hold the Card in place.
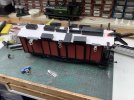
Here it is with sundry weights and clips to hold it overnight whilst drying. Next up I gave the card a coat of Shellack to harden it up.
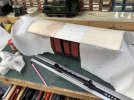
Here a layer of Workshop Paper has been shellecked to the roof to represent roofing felt. Just the middle piece to be added when the ends have dried off.
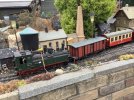
A hand splash of Matt Grey on top of all that and here she is in service today at long last. Finito.
The roof was attacked with a sub roof of 30thou black plasticard scribed at 5mm intervals along its length then pinned and glued on using the ends and internal bracing. As this would have shown the pins at the next stage I cut out an oblong of Cardboard as a cover.
Below you can make out where the supporting pins are and the copious scribing carried out. An end support for the roof has also been cut from HIPS and is being held in place while the UHU glue dries.

Roof and the card cut to shape, she will forever be preserved in aspic with her face stuck to some plasticard! I,mediately after this pic I did a coat of full strength PVA to hold the Card in place.

Here it is with sundry weights and clips to hold it overnight whilst drying. Next up I gave the card a coat of Shellack to harden it up.

Here a layer of Workshop Paper has been shellecked to the roof to represent roofing felt. Just the middle piece to be added when the ends have dried off.

A hand splash of Matt Grey on top of all that and here she is in service today at long last. Finito.

casey jones snr
Registered
Another superb project Jon. Excellent modelling skills to produce a unique model.
Riograndad
Model Railroading, boats and oil painting,
Excellent build Jon,I like that a lot

