Painting LGB Plastic — Am I planning this right?

Bombastic

Registered
29 Jun 2023
22
5
34
Eagle Point, Oregon USA
Best answers
0
Country flag
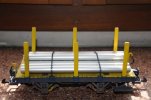
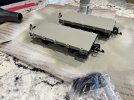
Hi all! I've obtained a couple of LGB ToyTrain stake wagons that I'd like to repaint. It's the first time I've attempted to paint any of my LGB gear, so I'm a bit nervous. Based on what I've read on this forum and others about painting LGB plastics, here is how I'm thinking to tackle this:

1. Sand the model very lightly with 1000-1200 grit sandpaper. I'm a bit worried about sanding out the wood grain detailing in the deck planking, however.

2. Wash thoroughly with dish soup.

3. Clean with rubbing alcohol before painting.

4. Use Krylon Primer, and let it dry a LOOOONG time.

5. Paint. (in this case, Testors spray paint that matches the LGB gray on my existing cars)

Does this seem like a reasonable strategy? Is there anything better than Krylon for primer for LGb plastics (I'm wondering especially about using a Testors primer)?

Also, is there any value to removing the existing LGB lettering on the wagons before painting? Or is it safe to simply paint over it?

Thanks!

(bonus question — does anyone know what color of Testors spray paint closest matches the dark green plastic LGB used for many of its cars, like the LGB 4135S sound boxcar?)
IMG_3738.jpeg
 

dunnyrail

DOGS, Garden Railways, Steam Trains, Jive Dancing,
Staff member
GSC Moderator
25 Oct 2009
26,225
5,000
75
St.Neots Cambridgeshire UK
Best answers
0
Country flag
Hi all! I've obtained a couple of LGB ToyTrain stake wagons that I'd like to repaint. It's the first time I've attempted to paint any of my LGB gear, so I'm a bit nervous. Based on what I've read on this forum and others about painting LGB plastics, here is how I'm thinking to tackle this:

1. Sand the model very lightly with 1000-1200 grit sandpaper. I'm a bit worried about sanding out the wood grain detailing in the deck planking, however.
NOT REQUIRED
2. Wash thoroughly with dish soup.
YES WORTHWHILE BUT WASH OFF WELL WITH WARM WATER AFTER TO REMIVE ANY SOAP RESIDUE
3. Clean with rubbing alcohol before painting.
POSSIBLY A BIT IVER THE TOO BUT PROBABLY NOT HURT
4. Use Krylon Primer, and let it dry a LOOOONG time.
I USE CAR RATTLE CAN UNDERCOATS COLOURS
5. Paint. (in this case, Testors spray paint that matches the LGB gray on my existing cars)
GOOD PLAN
Does this seem like a reasonable strategy? Is there anything better than Krylon for primer for LGb plastics (I'm wondering especially about using a Testors primer)?

Also, is there any value to removing the existing LGB lettering on the wagons before painting? Or is it safe to simply paint
I USE A FIBRE BRUSH TO REMOVE LETTERING, WILL TAKE IFF SOME OF THE UNDER-PAINT BUT STEP 4 WILL COVER NICELY SO LONG AS YOU HAVE NOT OVERDONE CREATING DEPRESSIONS WHEN REMOVING THE LETTERING.
over it?

Thanks!

(bonus question — does anyone know what color of Testors spray paint closest matches the dark green plastic LGB used for many of its cars, like the LGB 4135S sound boxcar?)
I TEND TO LOOK FOR A NEAR MATCH IN CAR RATTLE CANS, THE REAL THING WAS NEVER 100% CONSISTENT IN ITS COLOURS.
 

David1226

Registered
24 Oct 2009
7,931
7,931
74
Abingdon, Oxfordshire
Country
United-States
Best answers
0
Country flag
Every item of my LGB stock, freight, passenger, locomotives, even some trackside items have been repainted without any issues,

1. No need to sand, why would you want to, as you say it might damage detail.
2. Yes essential, gets rid of dust, dirt, greasy finger marks, etc. Dry every surface thoroughly. I usually finish off with a hair drier to blast any droplets out of any hidden crevices to
ensure everything is dry.
3. Why would you bother if every thig is clean and dry, as at #2, are you over thinking this.
4. Do not know what Krylon is, is that a trade name for something. My next stage is to spray with a rattle can of automotive grey plastic primer. A number of light coats as appropriate
to obtain the necessary cover, each coat is dry in about 20 minutes. Do not over spray, you don't want to hide any fine detail. Remember dry in 20 minutes.
5. Once the model is primed, you are free to use whatever paint you choose, I still use enamel paints, seen by many as old fashioned these days, but it's what I have grown up with.
Although i have bought air brushes, I have never used them, all of my models are painted by brush.

Yes remove all unwanted lettering at the start, you will not want is showing through on your finished model.

dig 150613005.JPG

dig 150713001.JPG

xdig 130608021 - Copy.JPG

dig 190216002.JPG

David
 
  • Like
Reactions: 1 user

PhilP

G Scale, 7/8th's, Electronics
5 Jun 2013
33,632
3,532
Nottingham
Best answers
0
Country flag
I would echo removing the lettering. - It always seems to show-through.

Then an automotive primer for plastics...

PhilP
 

Bombastic

Registered
29 Jun 2023
22
5
34
Eagle Point, Oregon USA
Best answers
0
Country flag
Awesome! I'll simplify the process and proceed as recommended. If all goes well I'll post my painted cars here later — they won't be anything fancy or as well done as David's, but if they look clean and uniform I'll be happy with them.
 

ge_rik

British narrow gauge (esp. Southwold and W&LLR)
24 Oct 2009
10,705
1,244
Cheshire
www.riksrailway.blogspot.com
Best answers
0
Country flag
Hi
I've painted quite a few LGB items over the years. My process is a lot simpler.

1. Mask off the chassis and undercarriage.
2. A couple of coats of Halfords (car) rattle can grey primer.
3. Once dry, some light weathering (just a day or so after priming)

The default colour for my goods stock is Halfords grey primer so apart from the weathering I've never over-coated.

I've never removed lettering and, to be honest, never noticed it showing through. I've never washed or sanded as a precursor to painting and never had any issues with paint not adhering. Maybe I've just been lucky. On the other hand, I want my stock to look time-served and tired so I'm not that interested in a showroom finish.

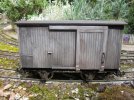
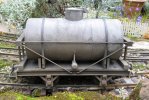
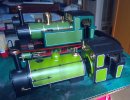
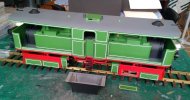
All these are ex-LGB ToyTrain:

IMG_6515.JPG

IMG_0592.JPGIMG_5602.JPG

Where I have over-painted the primer (eg locos) I've never waited very long for the primer to dry. In fact sometimes, I've over-painted within the 15 minutes suggested drying time between coats. Again, never run into any issues of paint lifting.

Rik
PS Why not paint one with all the prep and paint the other without it, then you can make a direct comparison?
PPS My only warning is not to mix paint brands when you do over-paint. On one of my locos, the top coat reacted badly with the primer (from a different manufacturer) and it was a nightmare having to rectify it.
 
Last edited:

dunnyrail

DOGS, Garden Railways, Steam Trains, Jive Dancing,
Staff member
GSC Moderator
25 Oct 2009
26,225
5,000
75
St.Neots Cambridgeshire UK
Best answers
0
Country flag
Hi
I've painted quite a few LGB items over the years. My process is a lot simpler.

1. Mask off the chassis and undercarriage.
2. A couple of coats of Halfords (car) rattle can grey primer.
3. Once dry, some light weathering (just a day or so after priming)

The default colour for my goods stock is Halfords grey primer so apart from the weathering I've never over-coated.

I've never removed lettering and, to be honest, never noticed it showing through. I've never washed or sanded as a precursor to painting and never had any issues with paint not adhering. Maybe I've just been lucky. On the other hand, I want my stock to look time-served and tired so I'm not that interested in a showroom finish.

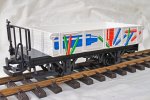
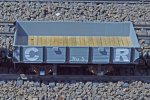
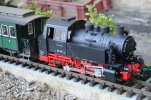
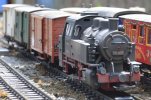
All these are ex-LGB ToyTrain:

View attachment 324063

View attachment 324061View attachment 324062

Where I have over-painted the primer (eg locos) I've never waited very long for the primer to dry. In fact sometimes, I've over-painted within the 15 minutes suggested drying time between coats. Again, never run into any issues of paint lifting.

Rik
PS Why not paint one with all the prep and paint the other without it, then you can make a direct comparison?
PPS My only warning is not to mix paint brands when you do over-paint. On one of my locos, the top coat reacted badly with the primer (from a different manufacturer) and it was a nightmare having to rectify it.
That is good advice, I always use Halfords automotive colours so I would suggest the enquirer does the same with whatever brand available locally.
 

John Fedak

Registered
2 Dec 2019
28
2
58
Ottawa Ontario
Best answers
0
Country flag
Hi all! I've obtained a couple of LGB ToyTrain stake wagons that I'd like to repaint. It's the first time I've attempted to paint any of my LGB gear, so I'm a bit nervous. Based on what I've read on this forum and others about painting LGB plastics, here is how I'm thinking to tackle this:

1. Sand the model very lightly with 1000-1200 grit sandpaper. I'm a bit worried about sanding out the wood grain detailing in the deck planking, however.

2. Wash thoroughly with dish soup.

3. Clean with rubbing alcohol before painting.

4. Use Krylon Primer, and let it dry a LOOOONG time.

5. Paint. (in this case, Testors spray paint that matches the LGB gray on my existing cars)

Does this seem like a reasonable strategy? Is there anything better than Krylon for primer for LGb plastics (I'm wondering especially about using a Testors primer)?

Also, is there any value to removing the existing LGB lettering on the wagons before painting? Or is it safe to simply paint over it?

Thanks!

(bonus question — does anyone know what color of Testors spray paint closest matches the dark green plastic LGB used for many of its cars, like the LGB 4135S sound boxcar?)

View attachment 324023
Never had to sand the model unless there was a repair/modification in an area but I do media blast the decals off it with kitchen baking soda.
Yes it is a bit dusty but it retains the integrity of the details better and gets rid of any raised decal areas.

Always wash well with dish soap and water followed with a alcohol rub.
 

pugwash

impecunious pirate
Staff member
GSC Moderator
17 Nov 2009
21,221
1,826
61
Luxembourg
Best answers
0
Country flag
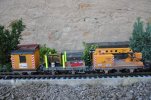
I never bothered with rubbing, washing or removing lettering, to be honest any preparation (unless the truck was dirty from a previous owner). After that no primer and straight into the paint shop for a blow over using the airbrush and acrylic paint. Following that a blast over with matt varnish - I also did that to untouched trucks as I dislike the plastic look. After that, while the varnish was still fresh wipe it off the 'glass' areas using a q-tip or similar, this gives the impression of being wiped with a dirty rag. The only time I did anything afterwards was on the BR80 where I put gloss varnish under the water filler covers to look like spillled water.
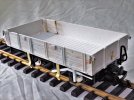
Just one thing, if you have the stakes and they are dark brown you need to paint them white before applying a lighter colour - guess how I know this, wasted loads of coloured paint before putting on white then they only needed one coat.
Ignore the wheels on the stake wagon, they were replaced with black metal ones before the truck hit the rails.

1.JPG
2.JPG
3.JPG

BR80 before:

BR80 before.JPG

BR80 after:

BR80 after.JPG

Matra crane train:

Crane train.JPG

Permanent way train:

Repairs train.JPG
 

David Price

Registered
29 Jan 2024
3
3
23
Australia
Best answers
0
Country flag
Never had to sand the model unless there was a repair/modification in an area but I do media blast the decals off it with kitchen baking soda.
Yes it is a bit dusty but it retains the integrity of the details better and gets rid of any raised decal areas.

Always wash well with dish soap and water followed with a alcohol rub.
I agree with John's suggestion - using an air eraser with either a soft cutting compound or baking soda will remove decals/lettering in a non-destructive way (Jerry Kits of Foothill Models put me onto this many years ago).

I'm now applying the same techniques I have used for my 1/48 scale On30 work to my first Fn3 scale project ( a rebuild of a wreck of a Bachmann 3 Truck Shay).

This was my first weathering job done a number of years a go - a bright yellow Bachmann Bumblebee (now has TCS Wowsound decoder, lights, etc.):

Blackwood-1.jpg
 
  • Like
Reactions: 1 user

TempLayout

Registered
5 Feb 2024
13
2
43
W. Washington
Best answers
0
Country flag
Just a thought, but has anyone considered using RIT Dyemore as a first pass for base color? Of course, you'll only get close to the color of the dye if you were starting with white plastic, but if going for something dark, a dark brown, grey, or black might be a useful first step? I really have no idea as to how well the plastics used by various manufacturers would do with the temps used in the dying process. 180° to 220°F (82° to 104°C) for synthetics.
 

dunnyrail

DOGS, Garden Railways, Steam Trains, Jive Dancing,
Staff member
GSC Moderator
25 Oct 2009
26,225
5,000
75
St.Neots Cambridgeshire UK
Best answers
0
Country flag
I agree with John's suggestion - using an air eraser with either a soft cutting compound or baking soda will remove decals/lettering in a non-destructive way (Jerry Kits of Foothill Models put me onto this many years ago).

I'm now applying the same techniques I have used for my 1/48 scale On30 work to my first Fn3 scale project ( a rebuild of a wreck of a Bachmann 3 Truck Shay).

This was my first weathering job done a number of years a go - a bright yellow Bachmann Bumblebee (now has TCS Wowsound decoder, lights, etc.):

View attachment 324191
Well done getting DCC sound in that, I tried to shoehorned a sound setup in my old one many years ago and what a faff it was getting to the motor and running wires into the tender. Gave up in the end, I guess newer ones have 4 wire to a blank decoder point in the tender?
 

stevedenver

Registered
24 Oct 2009
5,699
255
Best answers
0
Country flag
Fwiw, i have used both meths and acetone to remove printed lgb lettering.
The first takes work, the second demands that you quickly apply, rub, and remove the acetone.
Both will alter any other paint under the lettering.

Lgb printing will show through if not otherwise removed.

Thanks for the info…im about to repaint many old green bachmann side dumps..have always used oxide primer, only, but may now use a grey under primer-primer..lol.
 

borsig1963

Registered
26 Oct 2016
35
38
60
Italy
Best answers
0
Country flag
ciao, for me: no sanding, 1 washing, 2 primer, 3 light paint spray (2 -3 times), 4 transparent matt

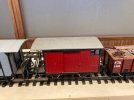
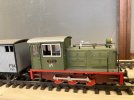
here a small selection of my repainted LGB models
 

Attachments

  • IMG_3283.jpg
    IMG_3283.jpg
    74.8 KB · Views: 0
  • IMG_3284.jpg
    IMG_3284.jpg
    78.8 KB · Views: 0

Bombastic

Registered
29 Jun 2023
22
5
34
Eagle Point, Oregon USA
Best answers
0
Country flag
Thanks for the continuing insights, everyone!

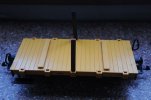
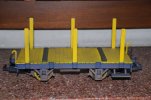
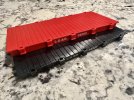
I'm pretty happy with what I've gotten out of this:

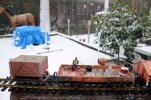
IMG_3790.jpeg

For the moment I'm planning to keep the stakes the default black so everything is a two-toned grey and black. I may decide to brush on a bit of black to pick out a few details, but I have shaky hands and generally anything I do with a fine brush ends up looking worse than when I started.

I assume it's smart to put on a clear finish to protect the paint?

And again, for anyone else who is interested, the updated process I used was this: (1) Removing the LGB lettering from the model (I used very fine sandpaper), (2) Thoroughly washing the model, (3) Priming (I applied about 3 very light coats of white primer), and (4) Painting (again, I applied the paint in about 3 light coats). This all seemed to work out fine for me, and the mistakes I made (a couple of drips, and a couple of dust specks in the wet paint) were easily remedied with the fine sandpaper and another coat of paint.
 

Software Tools

Registered
18 Jan 2013
311
56
Sydney, Australia
Best answers
0
Country flag
but I have shaky hands and generally anything I do with a fine brush ends up looking worse than when I started.

You might want to consider using weathering dust rather than paint for enhancing the appearance of detail. It's applied with a soft "make-up" style brush, doesn't require a lot of fine motor control over your fingers, and is not permanent until you put a clear coat over it.

See here for an example....


dunnyrail

DOGS, Garden Railways, Steam Trains, Jive Dancing,
Staff member
GSC Moderator
25 Oct 2009
26,225
5,000
75
St.Neots Cambridgeshire UK
Best answers
0
Country flag
Thanks for the continuing insights, everyone!

I'm pretty happy with what I've gotten out of this:

View attachment 324347

For the moment I'm planning to keep the stakes the default black so everything is a two-toned grey and black. I may decide to brush on a bit of black to pick out a few details, but I have shaky hands and generally anything I do with a fine brush ends up looking worse than when I started.

I assume it's smart to put on a clear finish to protect the paint?

And again, for anyone else who is interested, the updated process I used was this: (1) Removing the LGB lettering from the model (I used very fine sandpaper), (2) Thoroughly washing the model, (3) Priming (I applied about 3 very light coats of white primer), and (4) Painting (again, I applied the paint in about 3 light coats). This all seemed to work out fine for me, and the mistakes I made (a couple of drips, and a couple of dust specks in the wet paint) were easily remedied with the fine sandpaper and another coat of paint.
Depending on your needs I would suggest Matt Varnish, Gloss will make your super efforts look very toylike IMHO. You could do some light weathering with powders prior to this as suggested by Software Tools Software Tools .
 

ge_rik

British narrow gauge (esp. Southwold and W&LLR)
24 Oct 2009
10,705
1,244
Cheshire
www.riksrailway.blogspot.com
Best answers
0
Country flag
They are looking good. It's important to keep the aerosol moving while you're spraying, which helps to avoid runs. And you're right, a few light coats is better than fewer thick coats.

If you want to highlight details such as planks and grain etc, then try a very thin coat of black or dirty brown water-based acrylic paint - the cheap stuff is fine. This will find its own way into the cracks and crevices and so will automatically highlight them. You can wipe off any excess with a paper towel.

Rik
PS - You may not want to weather your wagons more heavily, but this is how I do most of mine. It's not a sophisticated approach - there are some on this forum who are a lot more artistic and adept than me - but my approach is fairly quick and easy and obeys the 10 yard rule.
 
Last edited:

polaroyd

Registered
25 Oct 2011
38
10
South East England
Best answers
0
Country flag
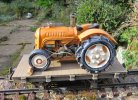
I would echo the others comments about automotive plastic primer, but an alternative for the top coat is graffiti cans (in my case molotow fine art) which are available in a larger selection of useful colours (ie non metallic). They adhere as well as automotive acrylic sprays, dry fast and tend to be easier to get coverage without sagging especially when a 'skinny' nozzle is used you can work close and get right into corners.
 

Attachments

  • WIN_20210906_11_33_43_Pro.jpg
    WIN_20210906_11_33_43_Pro.jpg
    487.3 KB · Views: 0
  • WIN_20211210_11_34_55_Pro (2).jpg
    WIN_20211210_11_34_55_Pro (2).jpg
    357.7 KB · Views: 0