Will it work?I think it will!!!!! It did..

Riograndad

Model Railroading, boats and oil painting,
6 Jul 2013
2,161
639
69
Northampton UK
Best answers
0
Country flag
About 5 years or so ago I started a project on a private car build from a cheapy Chinese car,lots of work done on the thing such as it was cut down to window level and a new boarded body built over it as it was flat sided and so on but the roof didn"t work very well and when a Bachmann item came along on a visit to Glendale the project was scrapped,it never ran only to test and has laid forlorn in the box in the garage since then.
No 3 son came to me a few weeks ago and asked if, "I could use these",3 Bachmann JS bodies with all the interiors intact and a box car body,needless to say I took them off him with pleasure,the box car body has replaced an old worn out item,one of the roof sections will go on an old combine to bring that back into service but what to do with the other bodies?
So after giving it some thought I asked myself if I could mount the Bachmann body on the Chinese frame,testing it all this morning it seems it just might work although the body and frames are different lengths ,two bodies spliced together would give me a result,the main thing I noticed is that the body will ride higher on the frame but this if not too noticeable may look OK behind Connie for instance.
Over all I think I may just give it a go,nothing ventured nothing gained and a very cheap bash if it doesn`t work,my bash from a boxcar to a long caboose worked fine so why not this,,a little more thought needed before starting but I have decided to try at least:D;)IMG_20200523_075308.jpgIMG_20200523_075315.jpgIMG_20200523_075220.jpg
 
Last edited:

Riograndad

Model Railroading, boats and oil painting,
6 Jul 2013
2,161
639
69
Northampton UK
Best answers
0
Country flag
None done on the bash front but a lot of thought gone into it,the seating will be too low,balconys,steps need modification,where to splice the body and roof and so on,,oh there`s a lot of work in this one!!!!!!:cry:.

Trying to post a pic but doesn`t seem to want to play tonight?:swear:
 
Last edited:

Riograndad

Model Railroading, boats and oil painting,
6 Jul 2013
2,161
639
69
Northampton UK
Best answers
0
Country flag
Hopefully I can post pics tonight:clap: I have started on the bash,first a major clean and scrub down to get the old shed and garden junk off to give me a clean start,I pulled both bodies apart(2 of the 3) and did some quick measurements,I did think that I could extend the car by one window but a result,,,,,extend by 2,
The balcony ends on the original car are wider at the steps than the Bachmann cars so the first job was to cut and make these narrower to match the Baccy roof line at each end,next step was to decide where the cut in the body was to be,I had to take some things into consideration before committing the razor saw,window and board spacing,the reusable glazing and the roof mounting screw fixings so the roof would go back on in the original fix using the screws,the lighting in all 3 cars was intact albeit the 9v battery system but I will reuse at least some to light the interior when I get that far.
So to the body cut,I had to cut at the window frame(scary) on one car and board line on the other to space the windows,the glazing fits over the join inside perfectly and to be honest I was amazed!!!!!!:sweating:.
Pics show the body as far as I have got,some plasticard glued in to strengthen the joint and as yet no filler used but will need just a spot to make good.next job is the roof cut.
IMG_20200525_095231 _2_.jpgIMG_20200525_095244.jpgIMG_20200525_095304.jpg
 
Last edited:

Capt. Jack

Registered
12 Mar 2017
582
652
Florida
Best answers
0
Country flag
Great work so far . Excited to see it progress. I really like the look of the 3rd picture down . The one that says Rio grande.
 

Riograndad

Model Railroading, boats and oil painting,
6 Jul 2013
2,161
639
69
Northampton UK
Best answers
0
Country flag
Great work so far . Excited to see it progress. I really like the look of the 3rd picture down . The one that says Rio grande.
Thanks Capt,the car you mention has been retired and scrapped to use the underframe and trucks,It just didn`t work out,the Rio Grande lettering was sign written on as an experiment ;)
 
  • Like
Reactions: 1 user

Riograndad

Model Railroading, boats and oil painting,
6 Jul 2013
2,161
639
69
Northampton UK
Best answers
0
Country flag
Some more work done on the bash,a lot of checking and re checking measurements before cutting the roof sections to match together and to match the screw fixing holes from the cars,when I thought it was correct the razor saw did the deed and I went together after a very little file finishing,a little filler to disguise the cut mark,a rub down and paint.
I have also started on the interior extension for the extra seating,4 seats from another car interior added to the end of a complete set of seats,i trimmed the end on the full set and squared it off and cut the extension directly behind the second set of seats after a measure and the new interior fits the extended car body exactly and strengthened on the underside at the join with styrene sheet,once I was happy with it the paint came out and transition started.
The car body has first coat of body and roof colour and is beginning to take shape,glazing,toplights have also been checked,cut and ready to go in.
My next problem is the body to frame mounting as the body at the moment is just sitting on the frame but I`m working on that one!!;)IMG_20200526_174746 _1_.jpgIMG_20200526_174719 _1_.jpgIMG_20200528_123645.jpgIMG_20200528_123939.jpgIMG_20200528_123903.jpg
 
Last edited:
  • Like
Reactions: 1 user

Paul M

Registered
25 Oct 2016
11,881
1,696
60
Royston
Best answers
0
Country flag
Brilliant
 

PhilP

G Scale, 7/8th's, Electronics
5 Jun 2013
33,566
3,521
Nottingham
Best answers
0
Country flag
Love the colour! :)
 

Riograndad

Model Railroading, boats and oil painting,
6 Jul 2013
2,161
639
69
Northampton UK
Best answers
0
Country flag
Some more done on the car,I took off the old observation railing and replaced it with some proper railing,the end wall outside handrails now on and the car ends now painted to catch up with the sides,the paint on the balcony ends and steps has been tidied up and the steps have had some minor work done too,I am short of a brake wheel but I `m sure I have one somewhere,if I can locate another chassis(possible ECR site looks promising)I have enough bits left for another build,thinking maybe a combine;)IMG_20200530_151710.jpgIMG_20200530_151754.jpgIMG_20200530_151821.jpg
 

Paradise

Registered
28 Jan 2010
1,244
299
Back Yard
Country
Australia
Best answers
0
Country flag
Looking good. I once measured up a Bachmann car comparing it to an Accucraft Jackson Sharp car and determined that it was 1:24 on average except it was about 1.8 mtr shorter. Otherwise some measurements a little more and some a little less. Assuming that the Accucraft car was in scale. So your car is probably more to scale length now, however you have an extra window compared to the Accucraft version of the Jackson sharp car. The Accucraft version has the window boarded up where the stove is. I counted that area as a window so you still have one more. I think the Jackson Sharp cars varied anyway.
 

Gizzy

A gentleman, a scholar, and a railway modeller....
26 Oct 2009
36,140
2,273
63
Cambridgeshire
www.gscalecentral.net
Best answers
0
Country flag
I've done similar, using a cut down NQD chassis for a couple of LGB coach bodies I acquired from Ebay Mike.

Your coaches are nicely done too....
 

Riograndad

Model Railroading, boats and oil painting,
6 Jul 2013
2,161
639
69
Northampton UK
Best answers
0
Country flag
Looking good. I once measured up a Bachmann car comparing it to an Accucraft Jackson Sharp car and determined that it was 1:24 on average except it was about 1.8 mtr shorter. Otherwise some measurements a little more and some a little less. Assuming that the Accucraft car was in scale. So your car is probably more to scale length now, however you have an extra window compared to the Accucraft version of the Jackson sharp car. The Accucraft version has the window boarded up where the stove is. I counted that area as a window so you still have one more. I think the Jackson Sharp cars varied anyway.
Knocking this thing together was just an experiment to see if it would work and is really still a Bachmann 1;22 and just really has a higher roof although a little longer and to be honest I have not compared the heights of the standard car and the bash as yet side by side,most of my locos are LGB and Bachmann ;22 but I have a Connie and k27 in 1;20 and the standard cars seem a little low behind these so a little higher profile may just look a little better(must try behind a loco and see),but the car is nowhere near a true 1;20 scale,too low,too short and too narrow and when its done it will be boxed until I do the next planed car and will run as a pair as it seems silly not to use the other cars I was given,as for the number of windows,yes I thought I would get another in making 13 but managed 14:clap:.I looked on the web and checked some drawings before I started and the maximum I found for narrow gauge cars was 15 on a Rio Grande Southern item but I assume that other railroads had the same(Feel thread drift on that one coming on!)but its not modeled on any prototype,,,oh the joy of freelancing!!!!;):clap:
 
Last edited:

Riograndad

Model Railroading, boats and oil painting,
6 Jul 2013
2,161
639
69
Northampton UK
Best answers
0
Country flag
Thanks everyone for the positive feedback:D.A little more done on the car,the glazing trimmed and fitted back in as are the toplights,the bulbs from the car bodies were checked,all worked so two fitted in the roof section using the original fixings,the battery box has been made up on the underframe and ready for the holes to be drilled for the wiring and battery connection,all the metal strips that were in the cars were damaged so I soldered some wire in to replace them,sorted.
Still to do,find a brake wheel,passenger(s) to go in,ends to have second coat,find a way to fit the body on,try and find some lettering and may call it about done.IMG_20200601_203851_LI _2_.jpgIMG_20200601_203826.jpg
 

musket the dog

Registered
31 Oct 2009
787
143
Leicester
nlrr.webs.com
Best answers
0
Looking really good :) I'm doing some work on a Jackson Sharpe myself at the moment, I'm really impressed by how well you've hidden the joins between the bodies.
 

Riograndad

Model Railroading, boats and oil painting,
6 Jul 2013
2,161
639
69
Northampton UK
Best answers
0
Country flag
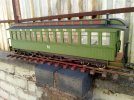
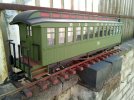
A little more done towards completion,the stove and WC replaced in their original places,the second brake wheel has been fitted (as I was sure I had one somewhere )and some gloss on the handrails to show some use;),the body mounted to the chassis and that needed some thought,the original balcony floors stood proud of the floor so I matched the height with some scrap styrene sheet in a strip down the center of the seat section and then screwed the seats to the frame so under each side of the underside of the seats there was a gap and also leveled the seats along the car,when I was happy with the set up I cut a small section out of a couple of seat sides out to allow a couple of 10mm plastic strips and reinforcement bar to be super glued to the car interior sides and the drilled 4 holes through the chassis and plastic strip to take the fixing screws,to release the body,remove the screws and gently lever the car sides out to release the strip and it seems to work,I tried to take a pic but alas they would not turn out properly so I gave up on those.
The wires for the battery and the battery box knocked up from some styrene sheet now all in position,I didn`t put a switch in so when the battery is in and connected the lights are on and when taken out there off,if no battery is located on the car for say daytime running the wires sit snugly in the box out of the way and will not foul on the track.
I added some lettering and numbers for now but will probably change the lettering to some dry rubs when I can locate some,if and when I change a simple repaint of the letter boards is all that's needed.
As for passengers,I have only one spare figure at the moment so I may add some more or just leave it as one sole patron in this car at least,I am reworking a Bachmann conductor to stand on one of the balconies getting ready for the next stop along the tracks and will then probably call this one done,I have noticed a few little bits that need a paint touch up but overall its an experiment that seems to have worked so its time to source another chassis for the next one;):clap:
IMG_20200613_091636.jpgIMG_20200613_091647.jpg
 
Last edited:
  • Like
Reactions: 1 user

Riograndad

Model Railroading, boats and oil painting,
6 Jul 2013
2,161
639
69
Northampton UK
Best answers
0
Country flag
Looking really good :) I'm doing some work on a Jackson Sharpe myself at the moment, I'm really impressed by how well you've hidden the joins between the bodies.
Thanks musket,it took a long time to commit to the razor saw:tmi:
 

Riograndad

Model Railroading, boats and oil painting,
6 Jul 2013
2,161
639
69
Northampton UK
Best answers
0
Country flag
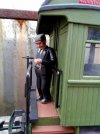
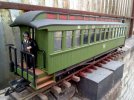
A little more done today,I have touched in a few areas that needed a touch up and added(well almost) the conductor to one of the balcony ends,he too needs a little more work but I have run out of black paint as he needs a tidy up on his jacket lapels as his shirt does not appear to be ironed!!!!All he has had done is a complete repaint and chain added,his watch chain is brass,I have used 9k gold on previous figures but alas I have run out of that too:(,so once he is finished and glued on I suppose I can call it done!:clap: and on with the next one I think?IMG_20200615_162434.jpgIMG_20200615_162536.jpg