Playmobil bashing - Brakevan build

Rich Skuse

Registered
10 Dec 2017
97
104
36
Bristol
Best answers
0
Country flag
Decided to copy some of the loco bashing i've been doing in the Playmo forum over to this one too, see what the reception of it is.
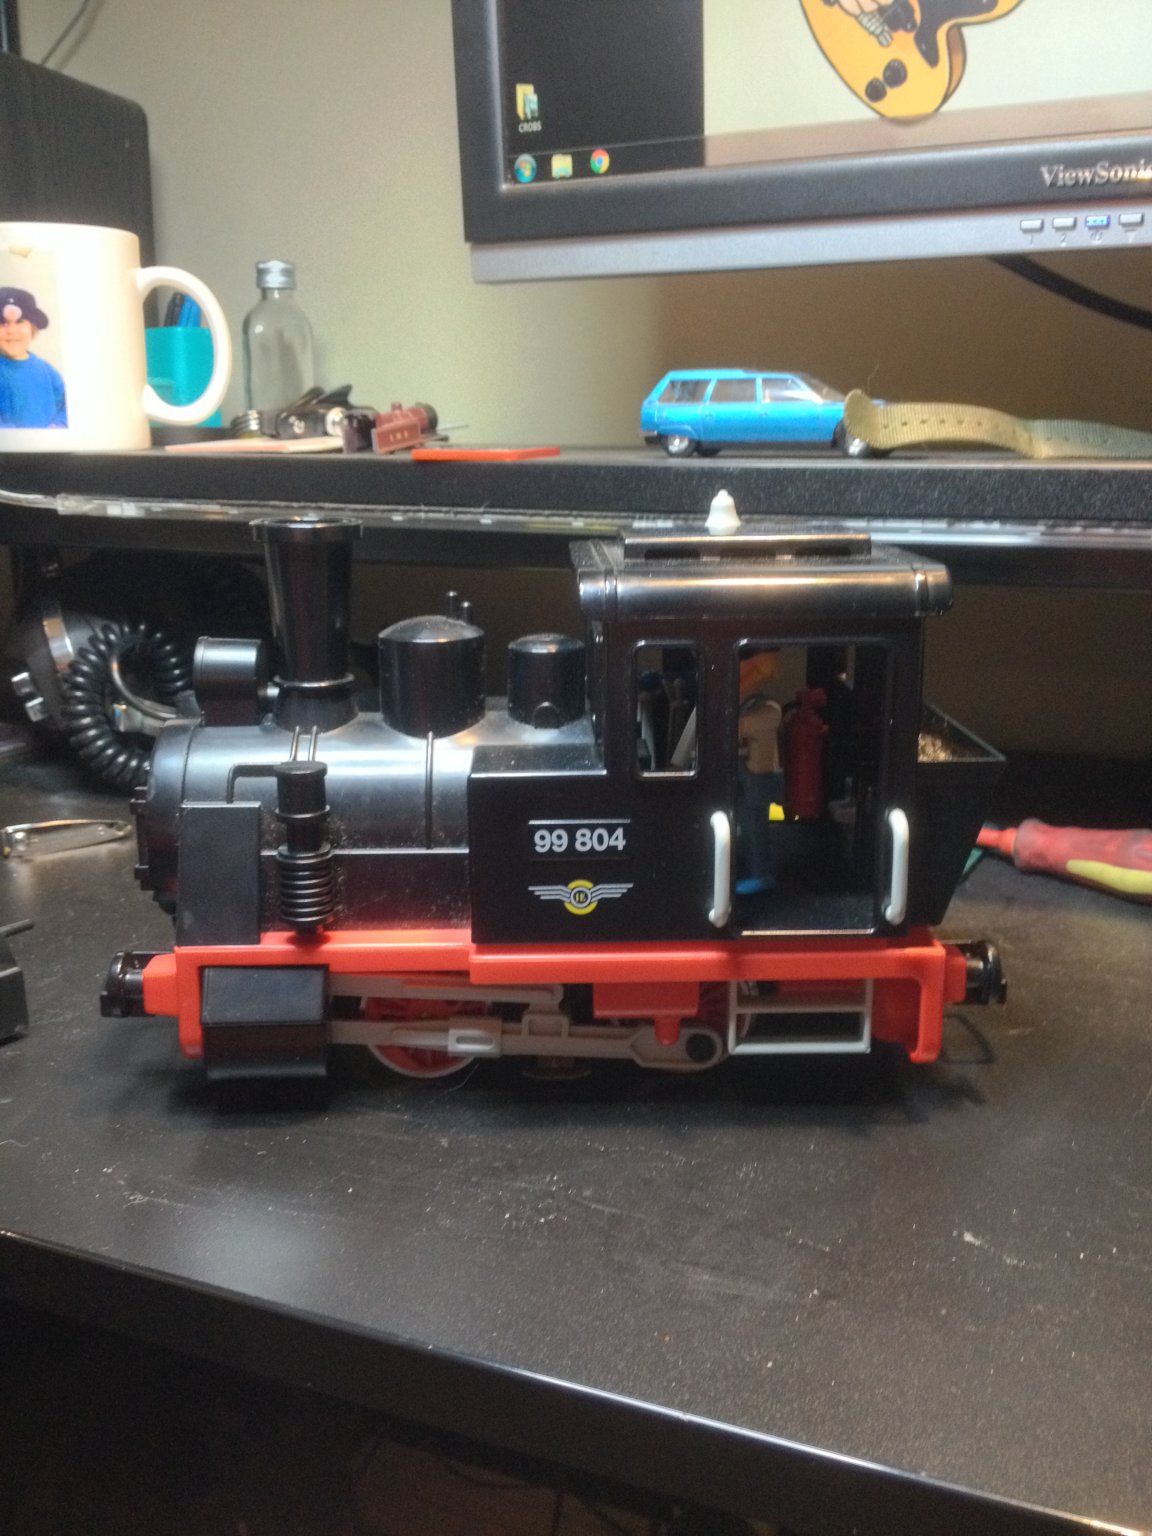
Started as a regular Playmobil DC steam loco
IMG_1608.JPG

I got some spare boiler parts so had a bash at sorting one of the biggest aesthetic irregularities out on the loco, ergo, the funnel placement.
IMG_1649.JPG
IMG_1651.JPGIMG_1652.JPGIMG_1653.JPGIMG_1701.JPG
IMG_1658.JPG

However, i've entered phase 2 and am going full RC (having made an RC/DC track power system which worked well but I still got bored of chasing track faults and I don't even have a permanent line yet)

Tore it all back down to nothing, wheels got re-quartered, as they were all over the place.
IMG_2263.JPG

Motor block ready for RC. The lead clips are perfect for holding the battery in!

IMG_2268.JPG

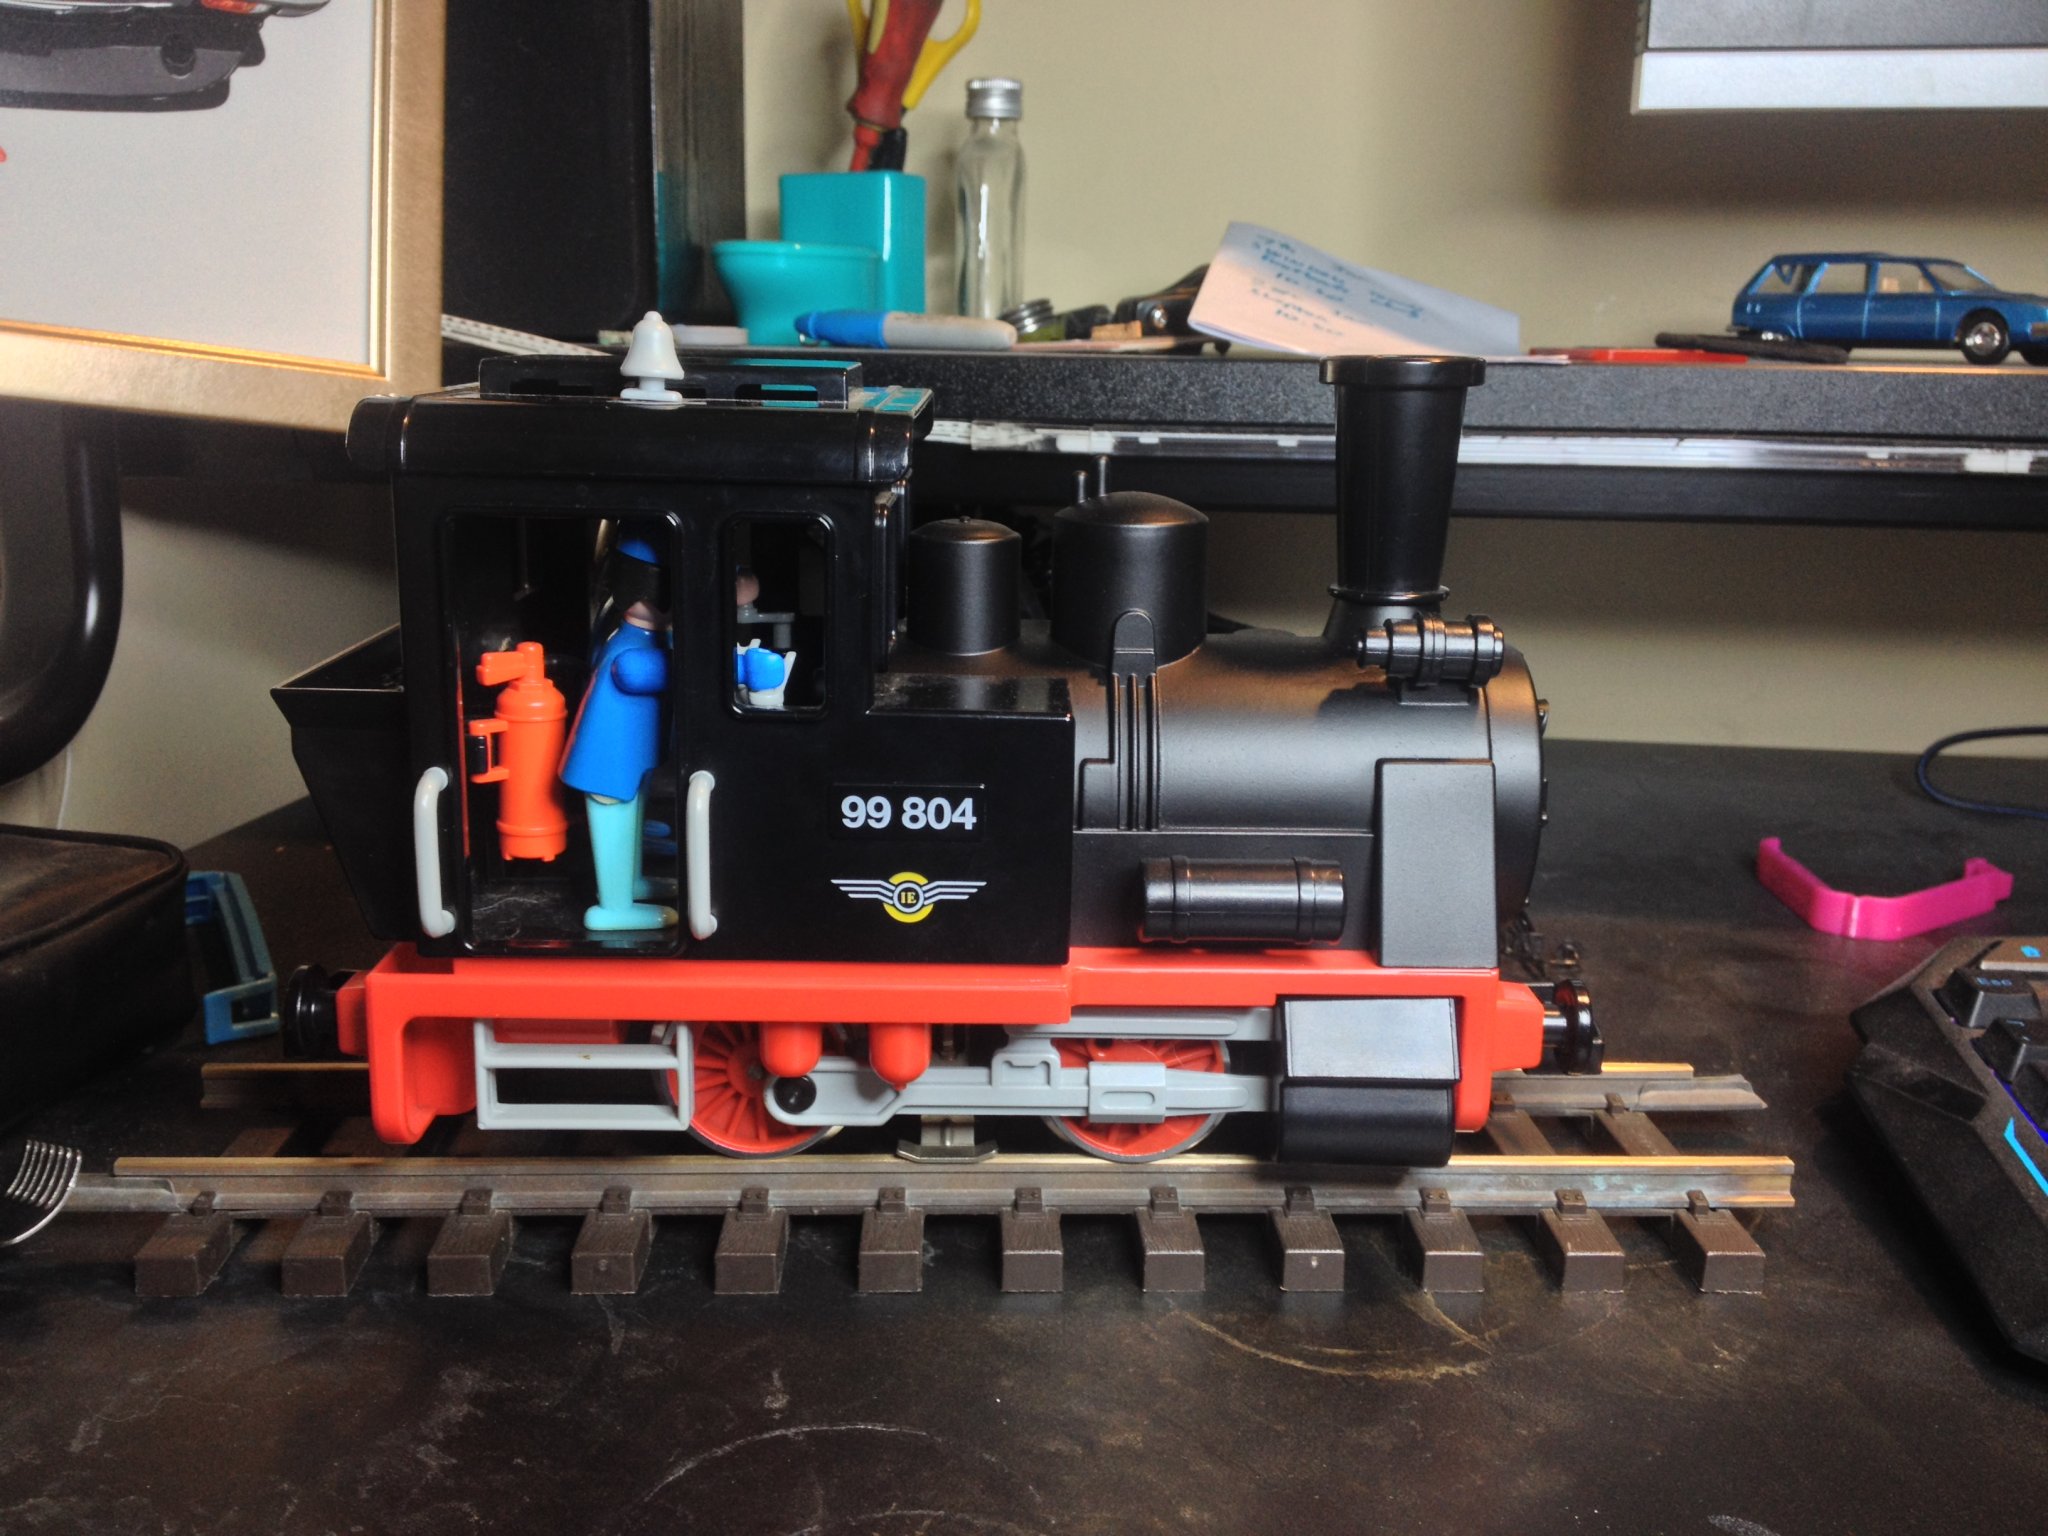
And I've lost a few more bits of trinketry from the boiler, the brake pump, tanks and dynamo are gone now, as I wanted to totally declutter the boiler as it's a dumpy little loco, too much gets a bit crowded on the eye.
IMG_2270.JPGIMG_2271.JPG

Thats it til next time!
 

Attachments

  • IMG_1650.JPG
    IMG_1650.JPG
    238.1 KB · Views: 0
  • IMG_1702.JPG
    IMG_1702.JPG
    403 KB · Views: 0
Last edited:
  • Like
Reactions: 1 users

Rich Skuse

Registered
10 Dec 2017
97
104
36
Bristol
Best answers
0
Country flag
So moving on, I needed to make some brackets to take the new lamps I received from SLR Models, great service and turnaround. Bit of picture hook for the rear..
IMG_2275.JPG
Bit of straigened L bracket for the front behind the smokebox door
IMG_2276.JPG
Boiler got painted and the lamp tested..
IMG_2277.JPGIMG_2278.JPG
Cab got repainted..
IMG_2280.JPG
All the radio gear got shoved in and it got a quick re-assemble. waiting on the roof to dry, I also removed the bell. Need to add a bit more detail as yet but getting there. Need to build the valve gear at some point. Tis a little daunting!
IMG_2282.JPGIMG_2283.JPGIMG_2284.JPG
 
  • Like
Reactions: 2 users

QC Rwy.

Registered
21 Mar 2018
67
76
71
Virginia Beach, VA USA
Best answers
0
Country flag
Nice paint job Rich........really gives it a good look at the cab rear. Thanks for posting as I enjoy the kit-bashing as much as operating......tom
 

Rich Skuse

Registered
10 Dec 2017
97
104
36
Bristol
Best answers
0
Country flag
Nice paint job Rich........really gives it a good look at the cab rear. Thanks for posting as I enjoy the kit-bashing as much as operating......tom

Cheers! I am going to line all the maroon panels I think, will tidy up my slightly cack handed masking and help make it look a little more believable. :)
There's a video of the loco in action here
 

Rich Skuse

Registered
10 Dec 2017
97
104
36
Bristol
Best answers
0
Country flag
That lining I was on about. Hides my cack masking excellently. In progress..
IMG_2347.JPG

Hopefully (if it all stays on) finished!IMG_2348.JPGIMG_2349.JPG

I cheated a bit and used 2mm automotive styling stripes. I never have much luck with waterslide stuff and this is big enough to just get away with using vinyl. I think it helps break it up nicely.
 
Last edited:
  • Like
Reactions: 5 users

Rich Skuse

Registered
10 Dec 2017
97
104
36
Bristol
Best answers
0
Country flag
So now the steam engine has undergone it's overhaul and has been returned to service (awaiting a little weathering and further detail) I thought I'd turn my attentions to the diesel engine. I was unhappy with the way it ran, I tried various combos of diodes and couldn't really get it running as well as I wanted. The engine was cheap enough to warrant me doing some work on it so away we go!

Box of electrical gubbins. Using another identical setup to the steam engine means I can pair it to my current controller and just use the one handset for now.IMG_2387.JPG

Stripped the motor block to beef up the wiring as it was pretty puny. I'm absolutely sure it was fine, but while I was in there..
IMG_2380.JPG
Started modifying the body to take the RC gear and new battery. Pointless 'bulkhead' removed, battery will live under the original battery box location so I can use the 'battery access bonnet' to charge the new Li-po battery.

IMG_2386.JPG
Frames also received a bit of surgery, all fits easier than the steam engine though so happy with that. Now in paint. Watch this space.
IMG_2388.JPG
 
  • Like
Reactions: 1 users

Rich Skuse

Registered
10 Dec 2017
97
104
36
Bristol
Best answers
0
Country flag
Bit more got done, radio gear starting to go in:
IMG_2390.JPG
Grungy buffer beams
IMG_2391.JPG
Mucky underframes. Camera has picked it out a bit too much, looks nicer than the photo.
IMG_2392.JPG
Tidying the wiring into final runs. Power switch will be a total battery isolator inside the cab as per the steam engine rather than using the ESC's power switch.
IMG_2416.JPG
Modified body having trail paint before main primer.
IMG_2417.JPGIMG_2418.JPG
 
  • Like
Reactions: 1 users

Rich Skuse

Registered
10 Dec 2017
97
104
36
Bristol
Best answers
0
Country flag
Bit of colour and dirt going on the body. I know the model doesn't actually have any wipers but I've decided they park under the roof canopy so you can't see them when not in use. It looks good anyway in my mind..
IMG_2419.JPGIMG_2420.JPG
 
  • Like
Reactions: 1 users

-bbbb

Registered
21 Dec 2017
589
129
Idaho
Best answers
0
Country flag
I'm curious how much your electrical set up cost per loco. I'm also wondering what the 3 capacitors on the motor are for.
-bbbb
 

Rich Skuse

Registered
10 Dec 2017
97
104
36
Bristol
Best answers
0
Country flag
I'm curious how much your electrical set up cost per loco. I'm also wondering what the 3 capacitors on the motor are for.
-bbbb

The first loco was slightly more because I had to buy the transmitter, which weighed in at about £25 as a TX/RX bundle. But from there on out I only have to buy batteries, receivers and ESCs, which comes in at £11 for the 6 channel r/x, £13 for the battery and £15 for the ESC, which I could get cheaper but I went for the same one I used before as its a good size.
My assumption on the caps, which were original, is to reduce motor EMF which can upset or damage control systems and reduce sparking at the brushes. If anyone knows any better I'll happily listen :)
 
  • Like
Reactions: 1 user

-bbbb

Registered
21 Dec 2017
589
129
Idaho
Best answers
0
Country flag
But from there on out I only have to buy batteries, receivers and ESCs, which comes in at £11 for the 6 channel r/x, £13 for the battery and £15 for the ESC,
That seems cheaper than I expected. I want to do something like this for my 4034, but I need to find the appropriate ESC and receiver. I see a lot of stuff for RC cars and boats but I'm not sure how many of those are also suitable for trains. I'm now wondering what kind of ESC you're using.
-bbbb
 

Rich Skuse

Registered
10 Dec 2017
97
104
36
Bristol
Best answers
0
Country flag
That seems cheaper than I expected. I want to do something like this for my 4034, but I need to find the appropriate ESC and receiver. I see a lot of stuff for RC cars and boats but I'm not sure how many of those are also suitable for trains. I'm now wondering what kind of ESC you're using.
-bbbb

Just a hobbywing quickrun 1060 60A brushed motor ESC, anything along those lines will do the job coupled with an 11V lipo and digital receiver. 60a is definitely overkill, and you can now (it transpires) with a bit of shopping around get ESC units quite a bit smaller that what I'm using.
 

-bbbb

Registered
21 Dec 2017
589
129
Idaho
Best answers
0
Country flag
Do you know the voltage range on the receiver/ESC you're using? The playmobil RC motors seem to use a lot less voltage than the older electric train motors, and I'm wondering if the components you're using would work with the old playmobil electric motors which can use somewhere around 16 volts.

-bbbb
 

Rich Skuse

Registered
10 Dec 2017
97
104
36
Bristol
Best answers
0
Country flag
Do you know the voltage range on the receiver/ESC you're using? The playmobil RC motors seem to use a lot less voltage than the older electric train motors, and I'm wondering if the components you're using would work with the old playmobil electric motors which can use somewhere around 16 volts.

-bbbb

That depends on the battery's, if you use a an 11.2V one then the maximum output will only ever be that, lower that the motor rated voltage. You'll loose a smidge of top speed but at full chat they don't look right anyway. Only exception is the RC playmobil stuff which is lower voltage, but the components in the yellow diesel are rated to 10V so I just need to be careful with the throttle. ;)
 

PhilP

G Scale, 7/8th's, Electronics
5 Jun 2013
33,566
3,521
Nottingham
Best answers
0
Country flag
You would probably have been better with a 2S Li-po.. Especially if the loco is likely to be left in the hands of a small person? :think:
 

Rich Skuse

Registered
10 Dec 2017
97
104
36
Bristol
Best answers
0
Country flag
You would probably have been better with a 2S Li-po.. Especially if the loco is likely to be left in the hands of a small person? :think:

It won't be, trust me. :D Plus I believe with some fiddling I can set the end stops of the throttle with the transmitter, but I'm sure I won't need to.
 

Rich Skuse

Registered
10 Dec 2017
97
104
36
Bristol
Best answers
0
Country flag
Little update, engineer has been prepped and given his training on the loco..IMG_2460.JPG

Cabin is painted and installed, note the isolator switch.
IMG_2461.JPG
 

Rich Skuse

Registered
10 Dec 2017
97
104
36
Bristol
Best answers
0
Country flag
Crikey, another update. Handy when you work at your computer desk one supposes. Reunited the loco body with the chassis and fitted the lamps up. SHLR apparently quite lax when it comes to locomotive lighting, allowing the freight department to operate a loco which shows white both ends :giggle:IMG_2462.JPGIMG_2463.JPGIMG_2464.JPGIMG_2465.JPGIMG_2466.JPGIMG_2467.JPG

Need to do the handrails (some quite specific detail required on those to make them look tidier when fitted, and a bit more weathering around certain areas on the loco is required. And the roof and buffers.
 

Rich Skuse

Registered
10 Dec 2017
97
104
36
Bristol
Best answers
0
Country flag
You would probably have been better with a 2S Li-po.. Especially if the loco is likely to be left in the hands of a small person? :think:

In a second response to this, I've now set the end stops of the throttle at 20% and that gives a good top speed running light engine, will see if it needs fettling further but it isn't a big deal. Can drop them even lower should I need to let little fingers operate which is a good safeguard. Bonus to this as well rather than using lower voltage batteries is that it gives a much better control over that speed range, whereas before the gimbal was 100% position for 100% motor speed, it's 100% position for 20%, much more feel for the input. I'm sure that may or may not make sense :D

Anyway, as far as I am happy with, it's finished. For now. We have all been there i'm sure. Note I have added basic vacuum brake pipework, I will retrofit that to the steam engine when that comes back into the 'workshop' and I will fit up the passenger/delicate (Gin tanker!) with the provisions too. I will need to build a Playmobil brake van for the open wagon rake though. Could be interesting.

DSC_0328.JPGDSC_0335.JPGDSC_0337.JPG
 
  • Like
Reactions: 1 users

PhilP

G Scale, 7/8th's, Electronics
5 Jun 2013
33,566
3,521
Nottingham
Best answers
0
Country flag
Really looks 'purposeful' (is that a word?) :)

Did you fabricate your brake-pipes, or buy them in?