Gauge Three 3 Rolling Stock and initial stumbling.

dunnyrail

DOGS, Garden Railways, Steam Trains, Jive Dancing,
Staff member
GSC Moderator
25 Oct 2009
26,160
4,986
75
St.Neots Cambridgeshire UK
Best answers
0
Country flag
I have been faffing around with Gauge 3 for a little while now in lockdown. My Steam Tram is a little stalled as is all of my work as I go through a ”cant be bothered“ phase but this will pass.


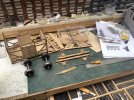
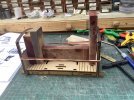
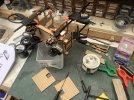
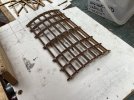
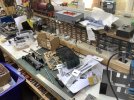
So on the bench are 2 wagons, one to be built up (under way) and a Bachmann Coal Wagon to convert. Both have their problems that will get resolved somehow. The kit is one of three obtained from 16mills, he does of course 16mm kits but also Gauge 1 and a small variety in Gauge 3. Lazer cut from MdF and very nice they are too. Tac has recently posted a build of a Brake Van in NG. Also on the bench of bags with Cambrian bits, especially rivets for the Steam Tram.
A90BF854-F175-42A4-90E7-5D5B23E8E165.jpeg8B29BE6F-87ED-4487-BB58-5F9ADE7883B3.jpeg
My current issue with the Bachmann is how to revise the axle guards for Gauge 3, I suspect cut them off and remount them a bit further out so that Gauge 3 wheelsets will fit between them, buffers also need to move out some but as they are removable that will be easy, I think the height should be ok. Both will have 1 set of wheels compensated, this adds further issues of work but it will be resolved. I sorted it in 00 and 0 so this size should be no problem except that of making the floppy bits so that they do not stick out(visible) too much.

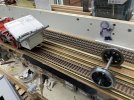
I have modified my workbench test track to have a Gauge 3 line.
2BC5C245-60F4-43DE-A4E8-1FD95E2F9F22.jpeg
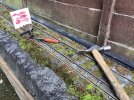
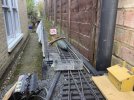
In the meantime yesterday I laid 6 yards of dual gauge track using my existing Peco Code 250 and just pinning the 63.5mm BtoB additional rail at the correct place on existing sleepers. A real pway mans nightmare as the trains would likely not stay upright but completely acceptable as a test track for the G3 stuff once built. Note that the track is only pinned in place every 6th sleeper, we will not be running my friends Gauge 3 Live Steam 9f on this short length of line!
DF8F50B2-28EE-478B-A09C-D0BA9963E3CA.jpeg
633E15CC-EE1E-4C0C-AE18-32CA6374E32D.jpeg
So that is where I am, dangerous water and I have been in this deep water before when I agonised about the current line being Gauge 3 when I moved back in 2012. But my wishes are not for the Garden just perhaps a very small light railway, perhaps the loft will be used and the G45 line up there in thro’s of construction will become moribund even before it is completed track wise. The ides of March are nearly upon us and anything is possible.
 

musket the dog

Registered
31 Oct 2009
787
143
Leicester
nlrr.webs.com
Best answers
0
Looking good so far JonD, making the thought at having a go at a little G64 petrol simplex all the more tempting :eek:. I remember that back in the day Mel converted a number of Bachmann Thomas wagons for his gauge 3 line. There's a write up of how he did it below, but unfortunately the pictures have been lost to time.

WGLR G64 Wagon Conversion
 

dunnyrail

DOGS, Garden Railways, Steam Trains, Jive Dancing,
Staff member
GSC Moderator
25 Oct 2009
26,160
4,986
75
St.Neots Cambridgeshire UK
Best answers
0
Country flag
Looking good so far JonD, making the thought at having a go at a little G64 petrol simplex all the more tempting :eek:. I remember that back in the day Mel converted a number of Bachmann Thomas wagons for his gauge 3 line. There's a write up of how he did it below, but unfortunately the pictures have been lost to time.

WGLR G64 Wagon Conversion
Thanks for that link, did remember Mel’s article but search never found it! That is why I have made my thread titles “Gauge Three 3” so that I can find them again! Search does not work on 3 letters/chr, a bit of a pain.

What his notes have told me is that the original wheels on the Bachmann Open are held in place with inside bearings. Hells teeth I thought that I had put all the junk taken off inside the open kept in place with the coal load, screws are there but those bearings..... drat lost for the moment. They would have been the ideal solution for 3 point bearing compensation on just one end. I cannot believe that I did not think of that when I pulled it apart. Also his thread started in 2011, just before I moved to the nits and could have changed to G3 in the new house quite easily. Glendale would have been my option to move on all my LGB G stuff except for that which would have worked with Gauge 3. Oh well never mind, to be honest I was impatient to have a new line running and a start in Gauge 3 would have slowed that up considerably.
 

dunnyrail

DOGS, Garden Railways, Steam Trains, Jive Dancing,
Staff member
GSC Moderator
25 Oct 2009
26,160
4,986
75
St.Neots Cambridgeshire UK
Best answers
0
Country flag
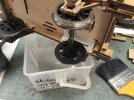
After some lack of direction I have got back to the Cattle Wagon, or more importantly sorting out 3 point suspension. What the means is that 1 axle is able to flop up and down on a central pivot. For tye 16mills Wagons this means some work and adaption. I found some Axle Guard suspension sets from Slaters in one of my parts draws. These were from many moons ad bought for Locomotive use. However the plastic that the bearings would slide in was too tight so O doubt they would ever have worked as expected. However the bearings were another mater. So today I started brass bashing, wagon bearing cutting and soldering.

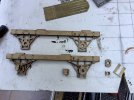
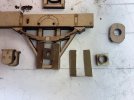
First thing to do was to create some bearing runners and remove the permanent bearing hole to enable them to fit. Note one each end which as you look at the together flat is one each end. On the top one you can see my pencil mark to make sure that I cut out the correct runner on the other side. The cutting out was simplicity and I used the same piecing saw blade that I used to cut out the brass u shaped bearing runner. Sundry parts can be seen below also showing the overlays to give bearing and axle box detail. The ling bit of brass with the round end has been marked up for the other 2 wagons that will get this treatment. Plan a
he
ad.
7389A3B9-7869-402C-9C29-A54358FE1DB6.jpeg
Here is a close up of the Slaters Brass bearing in my cut out U runner.
C8944565-95A3-4074-A226-F0FC331C766D.jpeg
Having done that the next issue was to ensure that the bearing did not turn thus miving the detailed Axle Box ends out of place. Some thin copper wire soldered both sides resolved that.
72CB42C4-2E3A-4DAD-8C9F-A35C0AE2FD4F.jpeg
Finally shown in place with the bottom bent over to give more area for glue when finaly putbin place, I have drilled the bottom with a couple of small hones so will also drill into the mdf and use some pins to give a firmer joint.
0C2D0BC1-848F-48DB-AECB-1F0F4A70E1ED.jpeg
 

Rhinochugger

Retired Oik
27 Oct 2009
36,706
4,240
North West Norfolk
Best answers
0
Country flag
Rockin' and rollin' :nod: :nod:
 

dunnyrail

DOGS, Garden Railways, Steam Trains, Jive Dancing,
Staff member
GSC Moderator
25 Oct 2009
26,160
4,986
75
St.Neots Cambridgeshire UK
Best answers
0
Country flag
Some more work on the chassis over the last few days.
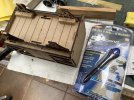
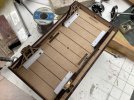
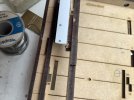
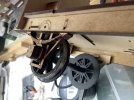
Having put the mobile bearings in place and needing them to be stable the top pieces were super glued to the ebarings so that they would not revolve. However I was unhappy with the amount of possible strength in the so resorted to some additional strengthening along the top as seen (just) in the first pic. I tried the UV light glue in the second picture and was astonished to find it works, I had always been skeptical but well I was happy to be proven wrong.

I wanted to have the side-frames removable so that if any issues occured with the wheels I could get them out. This means screwing them in place. Initial thoughts were a piece of rocket stick inside but could not be the full length as there needs to be space for the brake V and blocks. So a plan was hartches to have one for each w iron. Below you can see the pieces in situe with the holes for the long very thin screws to hold in place. Ooops flip, blow and lots of other family type cursing. Wheels catch them!
3DA2A706-C9AF-4A7C-84B9-5EE45C6480B0.jpeg082B766B-E5A7-469E-96BF-9A37E0E43FF6.jpeg
So a revised plan was cunningly thought out to use plastic L angle. I needed a couple of tries with the screw holes so that I could insert them with the wheels in place, more thought less drilling? Again some of the UV glue was used to hold the L to the bearing backs.
CD79C120-B9E0-4503-A71C-D0AE2C9D563C.jpeg0483203B-74F0-4083-90C4-7CFF50C5FCD1.jpeg
 

dunnyrail

DOGS, Garden Railways, Steam Trains, Jive Dancing,
Staff member
GSC Moderator
25 Oct 2009
26,160
4,986
75
St.Neots Cambridgeshire UK
Best answers
0
Country flag
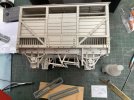
Over the last few days the van has had the roof completed and the last bits of wood detail added. Just the brake Handle and cross wire to add oh plus buffers and couplings once painting of the body is completed. These items are pre painted and ready to add.

Reading up on the prototype they were unpainted which will be an interesting colour to match with MDF. The reason for not being painted is that in them days most paint was lead based and they did not want the cows to be licking lead paint which they would as apparently it is somewhat sweet in taste. I know this as it was an occasional unknown death cause of infant babies in the day.

But first it has had to have a coat of MDF sealer, not found the recommended (by 16mills one MDF Rustins) in BnQ last Wednesday so got a Zinsser Primer Sealer Spray instead. One coat of this went on nice and thin not hiding any detail so before I went further I decided to put Cambrian Rivets and Bolt heads in place. Using the same method as mentioned in my Y6 build.
Below you can see a start has been made, all the bolt heads are in place and a fair few rivets. I just hope I have enough rivets for all 3 items of stock that I have 16mills kits of.
30A95421-FB8E-4A23-8004-8CC80440C842.jpeg
Next job will be an all over undercoat of Halfords matt (EDIT Gray )Red Primer. This will be followed by hand splashing the metal work black and then an attempt to replicate the old wood. I am thinking of a light wash with a wood looking yellow followed by dry brushing light grey then a wash of white and dry brush of white to replicate Lime Staining.
 
Last edited:
  • Like
Reactions: 1 user

dunnyrail

DOGS, Garden Railways, Steam Trains, Jive Dancing,
Staff member
GSC Moderator
25 Oct 2009
26,160
4,986
75
St.Neots Cambridgeshire UK
Best answers
0
Country flag
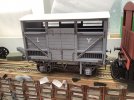
Not posted on here for a while but odds and ends have been going on. Of particular note is that it has now been painted in Gray, not Red Primer as originally intended. Post edited above to reflect this. The beast has had its full complement of Cambrian Rivets fitted with a few Bolt Heads in places where removable parts would be expected. Lettering has also been hand applied, quiet happy with the smaller stuff but the LY could have been better. Other side still to do so will try harder over there. I have gone over the Metal Work with a track gray colour but this has turned out glossy so will do Matt Black before weathering, liming and straw inside. I will use cut Sisal String as a straw representation. Buffers and Couplings have been fitted. I replaced the final coupling link with one of steel so that I can use a small rare earth magnet on a piece of wire for coupling and uncoupling.
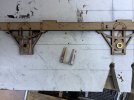
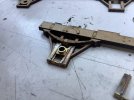
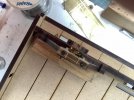
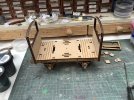
BAC60458-2E34-4FD1-AEC4-F0AD7879C662.jpegNext up for the wagon fleet is the Mid Wales Brake Van, this has been started and uses the same iteration of 3 point suspension as the Cattle Wagon has. The first picture shows how I used odd bits of wood and a lakey band to get the ends standing vertical. The next one shows the chassis with the full complement of wheels and axle guards, this time rather than using full L that almost got in the way of the wheels I have screwed things in place with much smaller cut of ally with a cut out for the wheels on the sprung set of wheels, the unsprung ones have a screw through the front of the chassis side frame through the axle guard assemply to a short piece of ally tapped for the 10ba screws. Whilst this may not be a battle ship connection, these wagons will not be in service on your standard gauge 3 line with a lumping great live steamer bashing them round at Mack 3.
39BDA69A-3FD8-440C-9ED5-4FA1DE8D4F8C.jpeg
4739A1E1-D69D-4C42-B63C-9687F6D929D3.jpegA9858B8F-6EEC-4BD6-BE9D-DC9647C37259.jpeg
The small hole where the screw goes in will be covered by a Plate, possibly a representation of a builders one to hide the hole each side.

Below you can see the beast with buffers fitted, dumb ones in this wagon. My Grandad used to tell horror stories about these things, but they were still in service on sundry Industrial Lines till quite late in the day and likely Light Railways till they ceased to be.
B7489789-C750-4B24-BBFC-59F1C14D5DE9.jpeg
Here I am a little further on with the body work being clamped in place while the glue dries.
302EC331-CBFE-4F23-A99F-A93BD59FA0AF.jpeg
And here you can see the result of not following instructions, the roof profile is bowed upwards some from the centre. Instructions say do middle lengthways rib then work out. I started at 1 side and worked across. So to resolve this foul up I have cut a bit of the waste where top curves were fretted out, used this as a centre reference. Drilled No74 and gently pinned this in centre the the same at the 4 outsides before a gentle spray with water and glued with thinned down PVA. Irritatingly I got this right on the Cattle Truck so in my haste created the foul up. I intend for the roof to be removable hence the sort out, if the roof was to be glued in place that would have not been an issue.
2585D798-F66B-4768-B2B6-BEDE6055C3CC.jpeg